Course Catalog#
Welcome to the EON-XR Course catalog guide. Here you will find 3 simple ways to create Xperiences!
How to access Course Catalog:#
First, you must log in to https://core.eon-xr.com/:
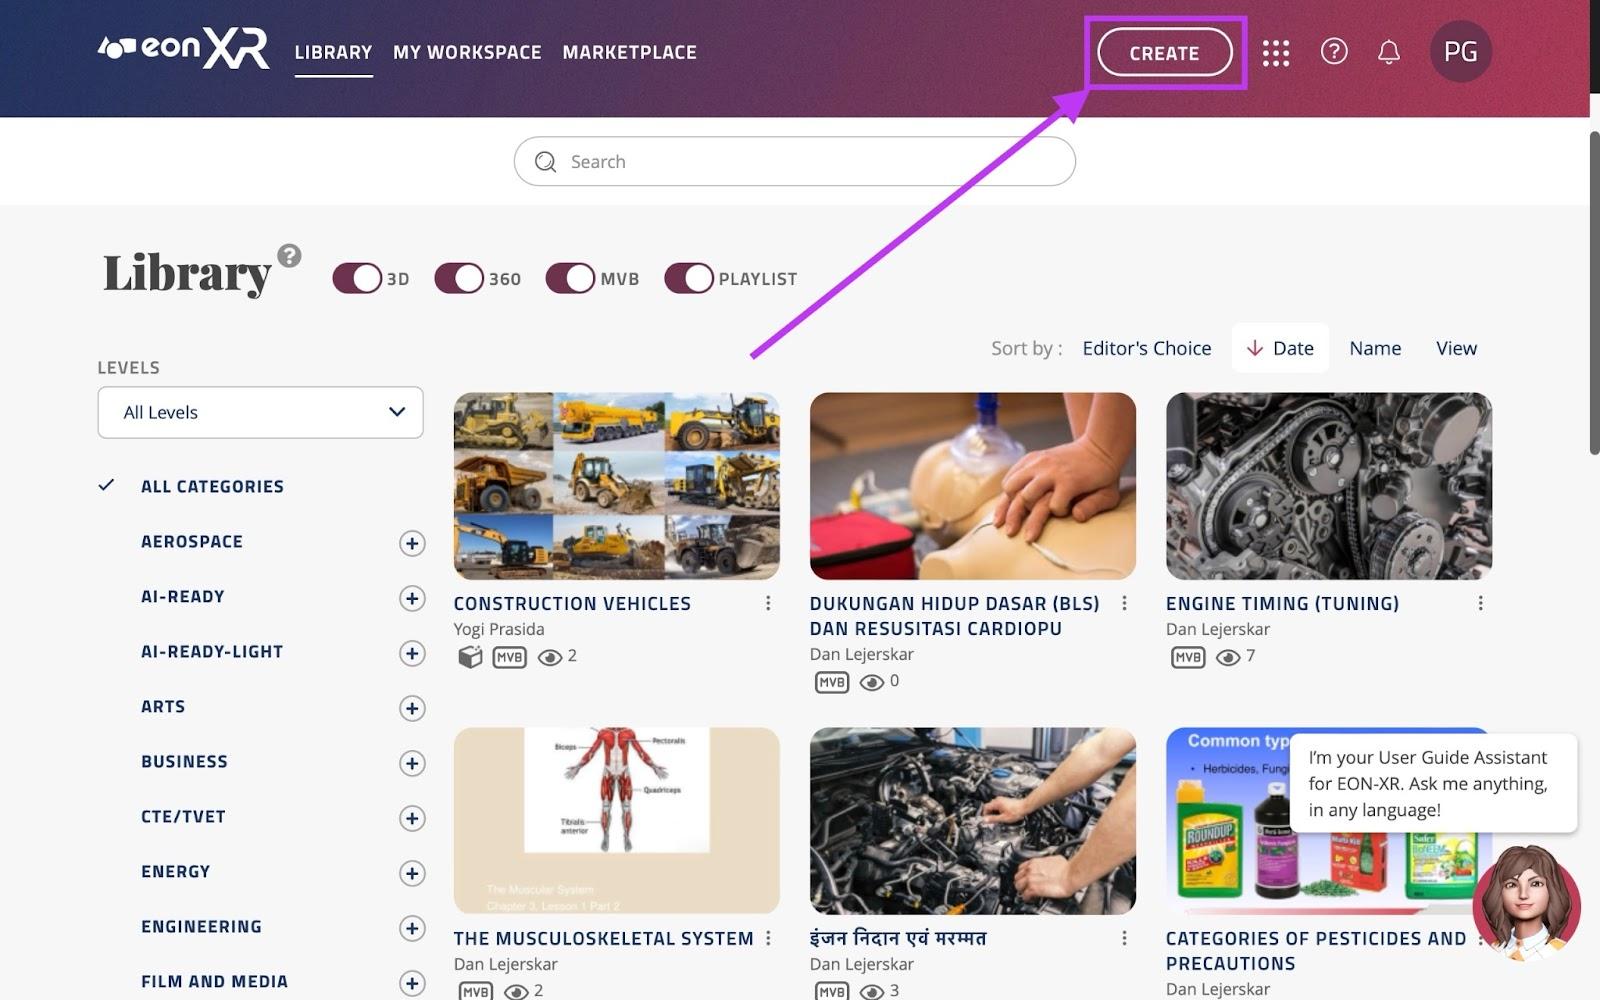
Once logged in, click the “CREATE” button near the top right of the screen.
This will take you to the following screen, click the middle option; Course Catalog:
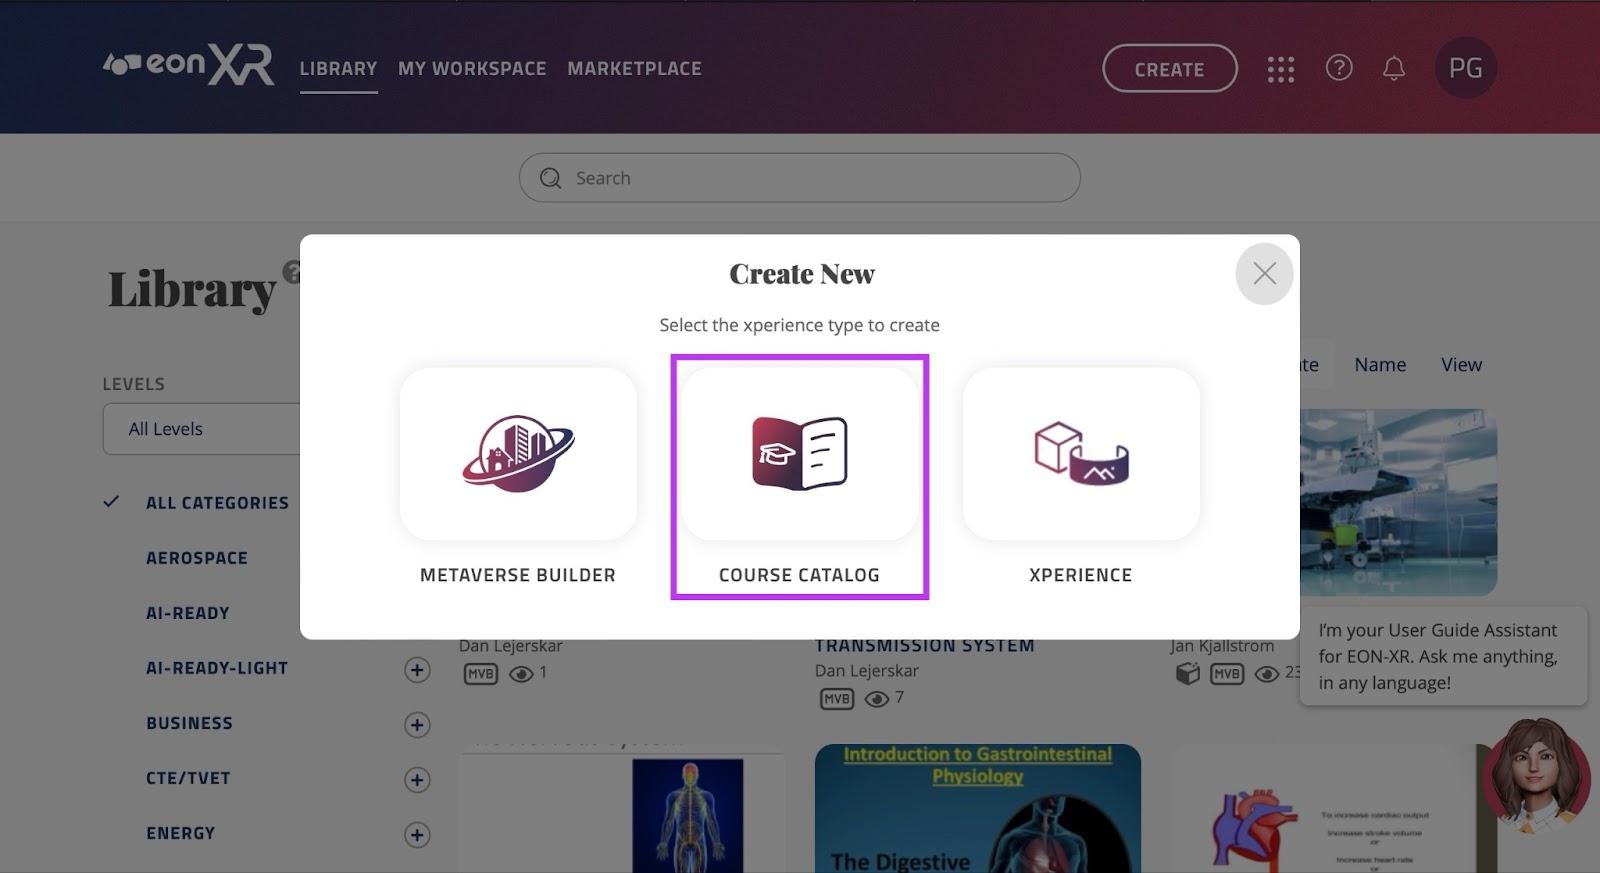
In this page, you will be able to see the three ways of creating Xperiences:
Single Express: Enter text or upload an image to create an Xperience.
Multiple: Upload a file to generate multiple Xperiences at once.
Guided: Chat with the AI assistant for personalized Xperiences.
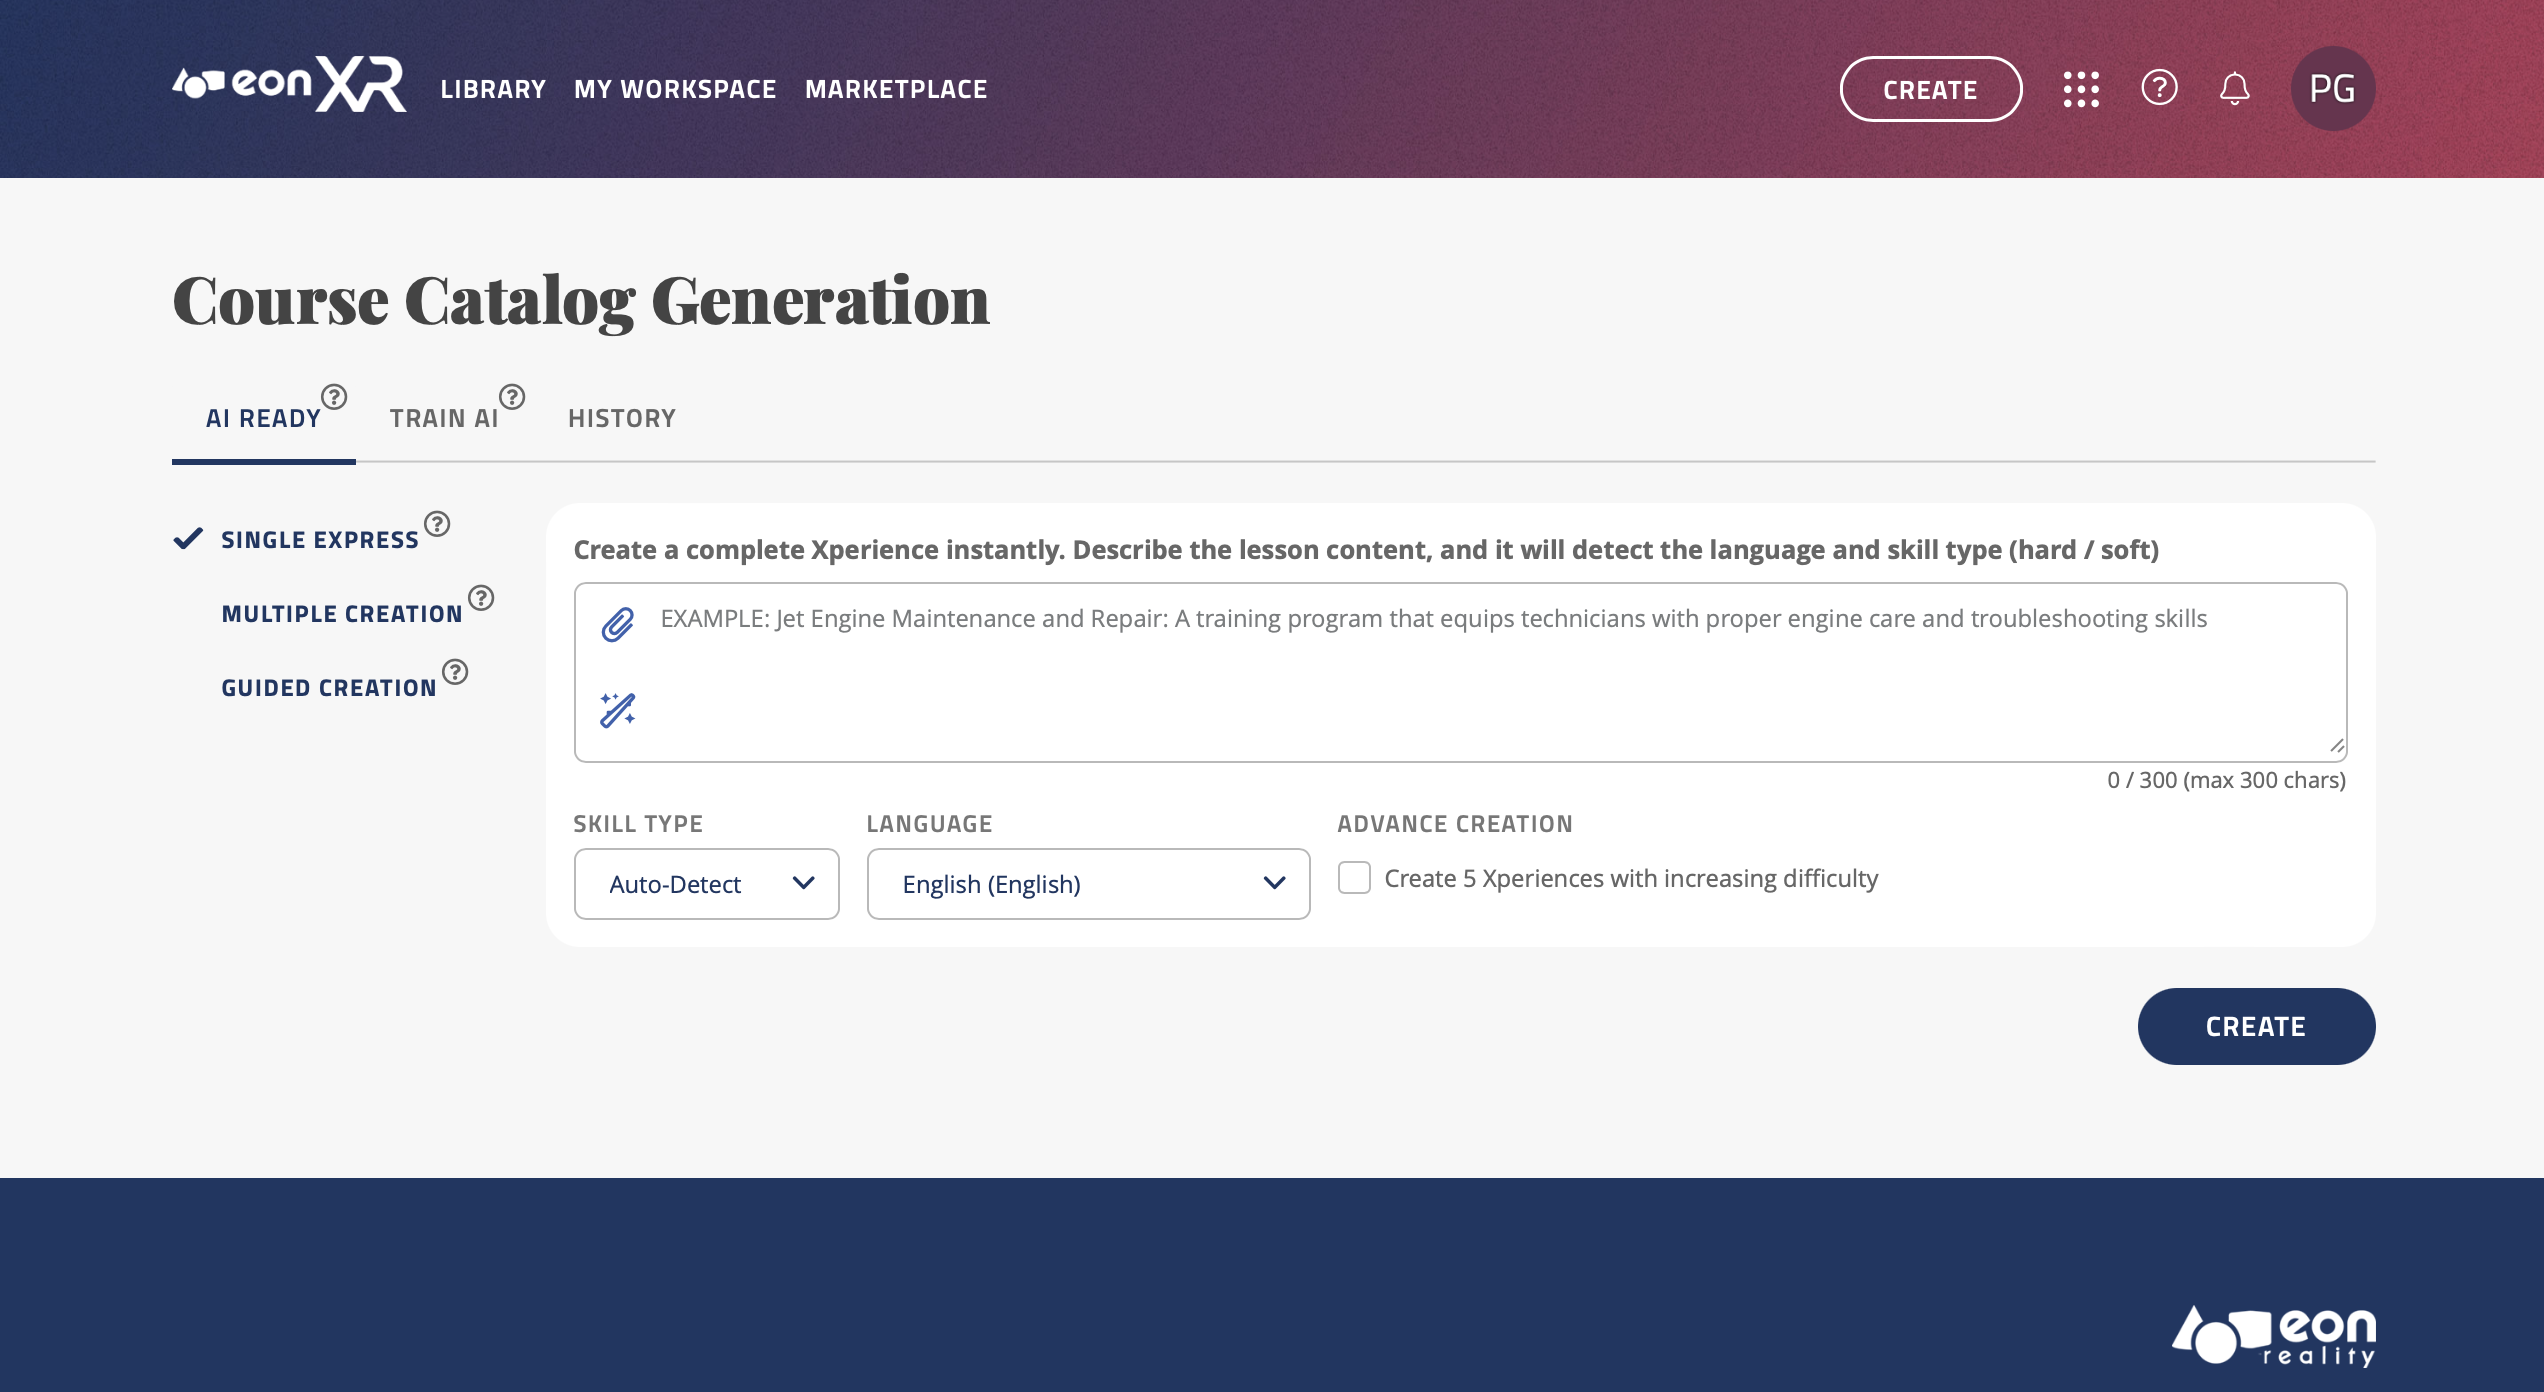
Single Express#
With this feature, you are able to learn anything you’d like through XR, simply by typing it in or uploading an image!
Make sure there is a tick next to the “Single Express” text on the left side of the screen.
There are two ways to generate an XR lesson using single express, the first way is Text-to-XR:
TEXT-TO-XR:
You can type anything you would like to learn, and EON-XR will automatically generate an Xperience based on your prompt in any language (300 Character Maximum).
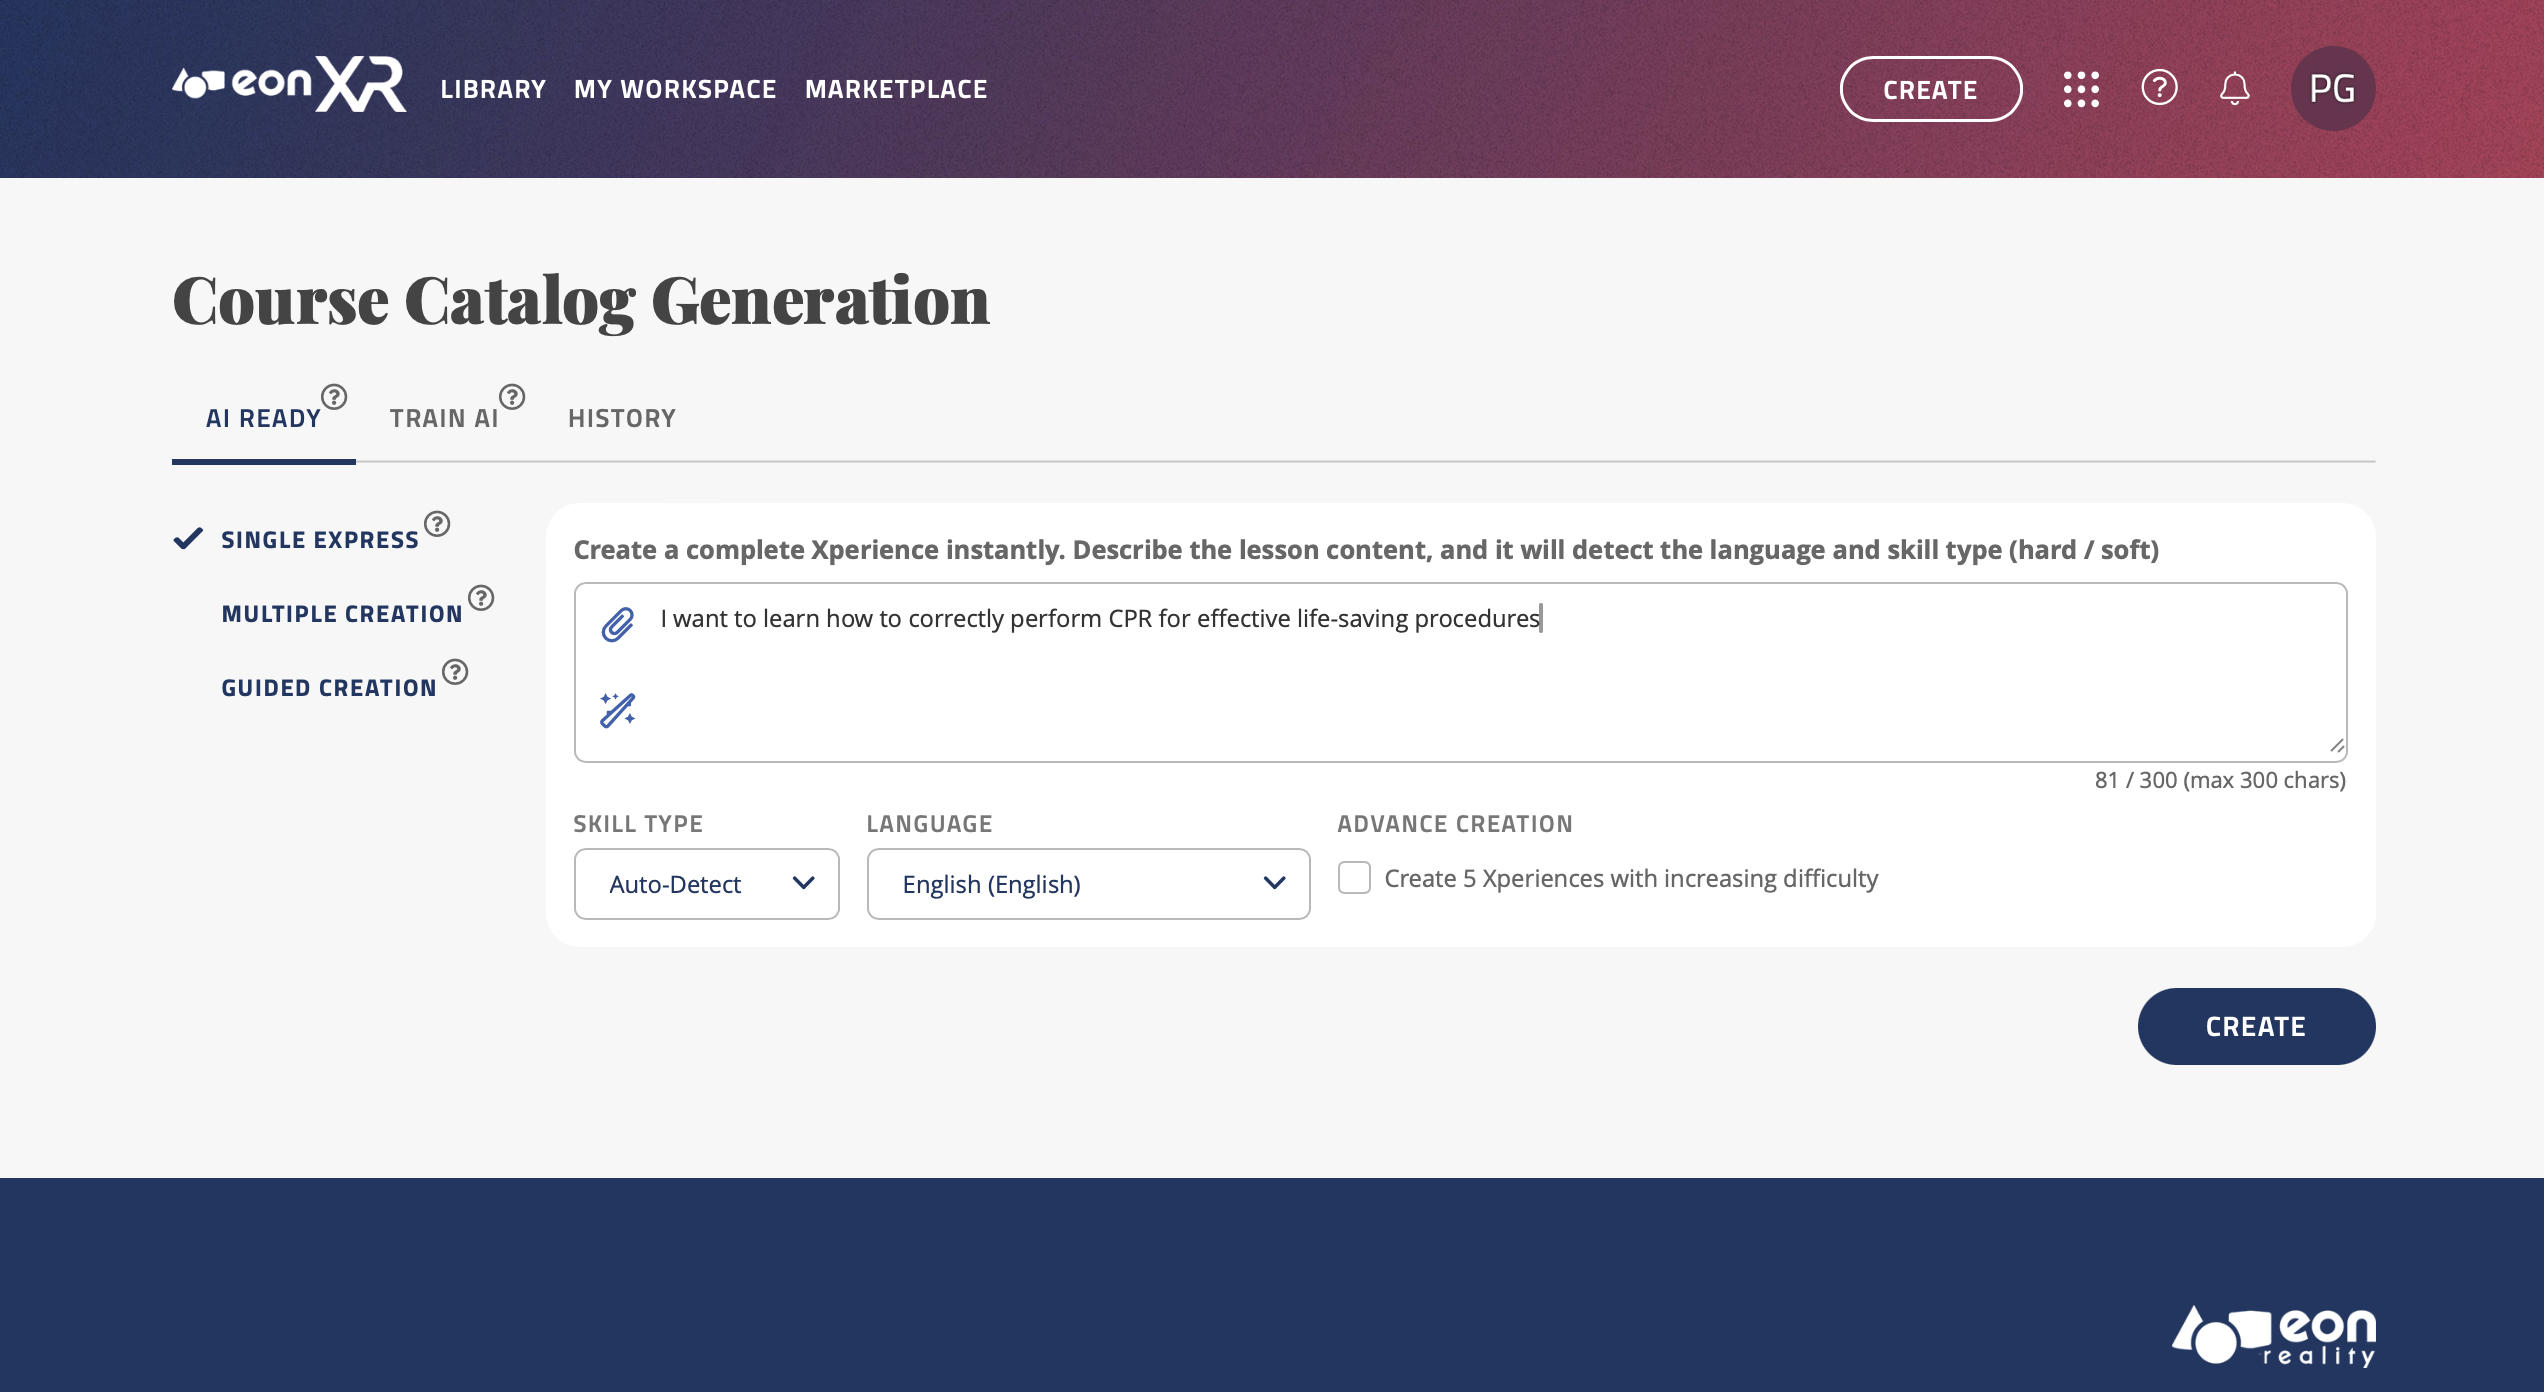
The example used is “I want to learn how to correctly perform CPR for effective life-saving procedures”:
You could type anything you would like to learn here, here are some examples:
“I want to learn basic car maintenance and repair, such as changing tires, checking fluids, and troubleshooting common issues.”
“I’m intrigued by home gardening. I want to learn how to grow my own fruits and vegetables, ideal conditions, materials needed etc.”
“I want to understand stock market trends and patterns with examples.”
“I’m fascinated by astronomy. I want to learn about different celestial bodies, their features, and how to observe them.”
“I want to learn about ocean ecosystems, marine species, and conservation efforts in marine biology.”
“I want to learn about mindfulness meditation techniques for stress relief and mental well-being.”
Be creative!
You can now choose the Skill type (Hard Skills or Soft Skills) by opening the dropdown menu under “SKILL TYPE”. If you choose to leave it as “Auto-Detect”, the software will decide based on the context of the prompt.
You can also change the language of the Xperience that will be created, there are over 20 languages supported, simply click the dropdown menu and select the new language, and your prompt will be translated and the lesson will be generated in the selected language.
You can also check the “Create 5 Xperiences with advanced difficulty” box to enable Advance Creation. This will generate 5 Xperiences in the topic, from beginner to expert level.
Once you are satisfied with the prompt you have written, you may press the “CREATE” button to begin loading the lesson:
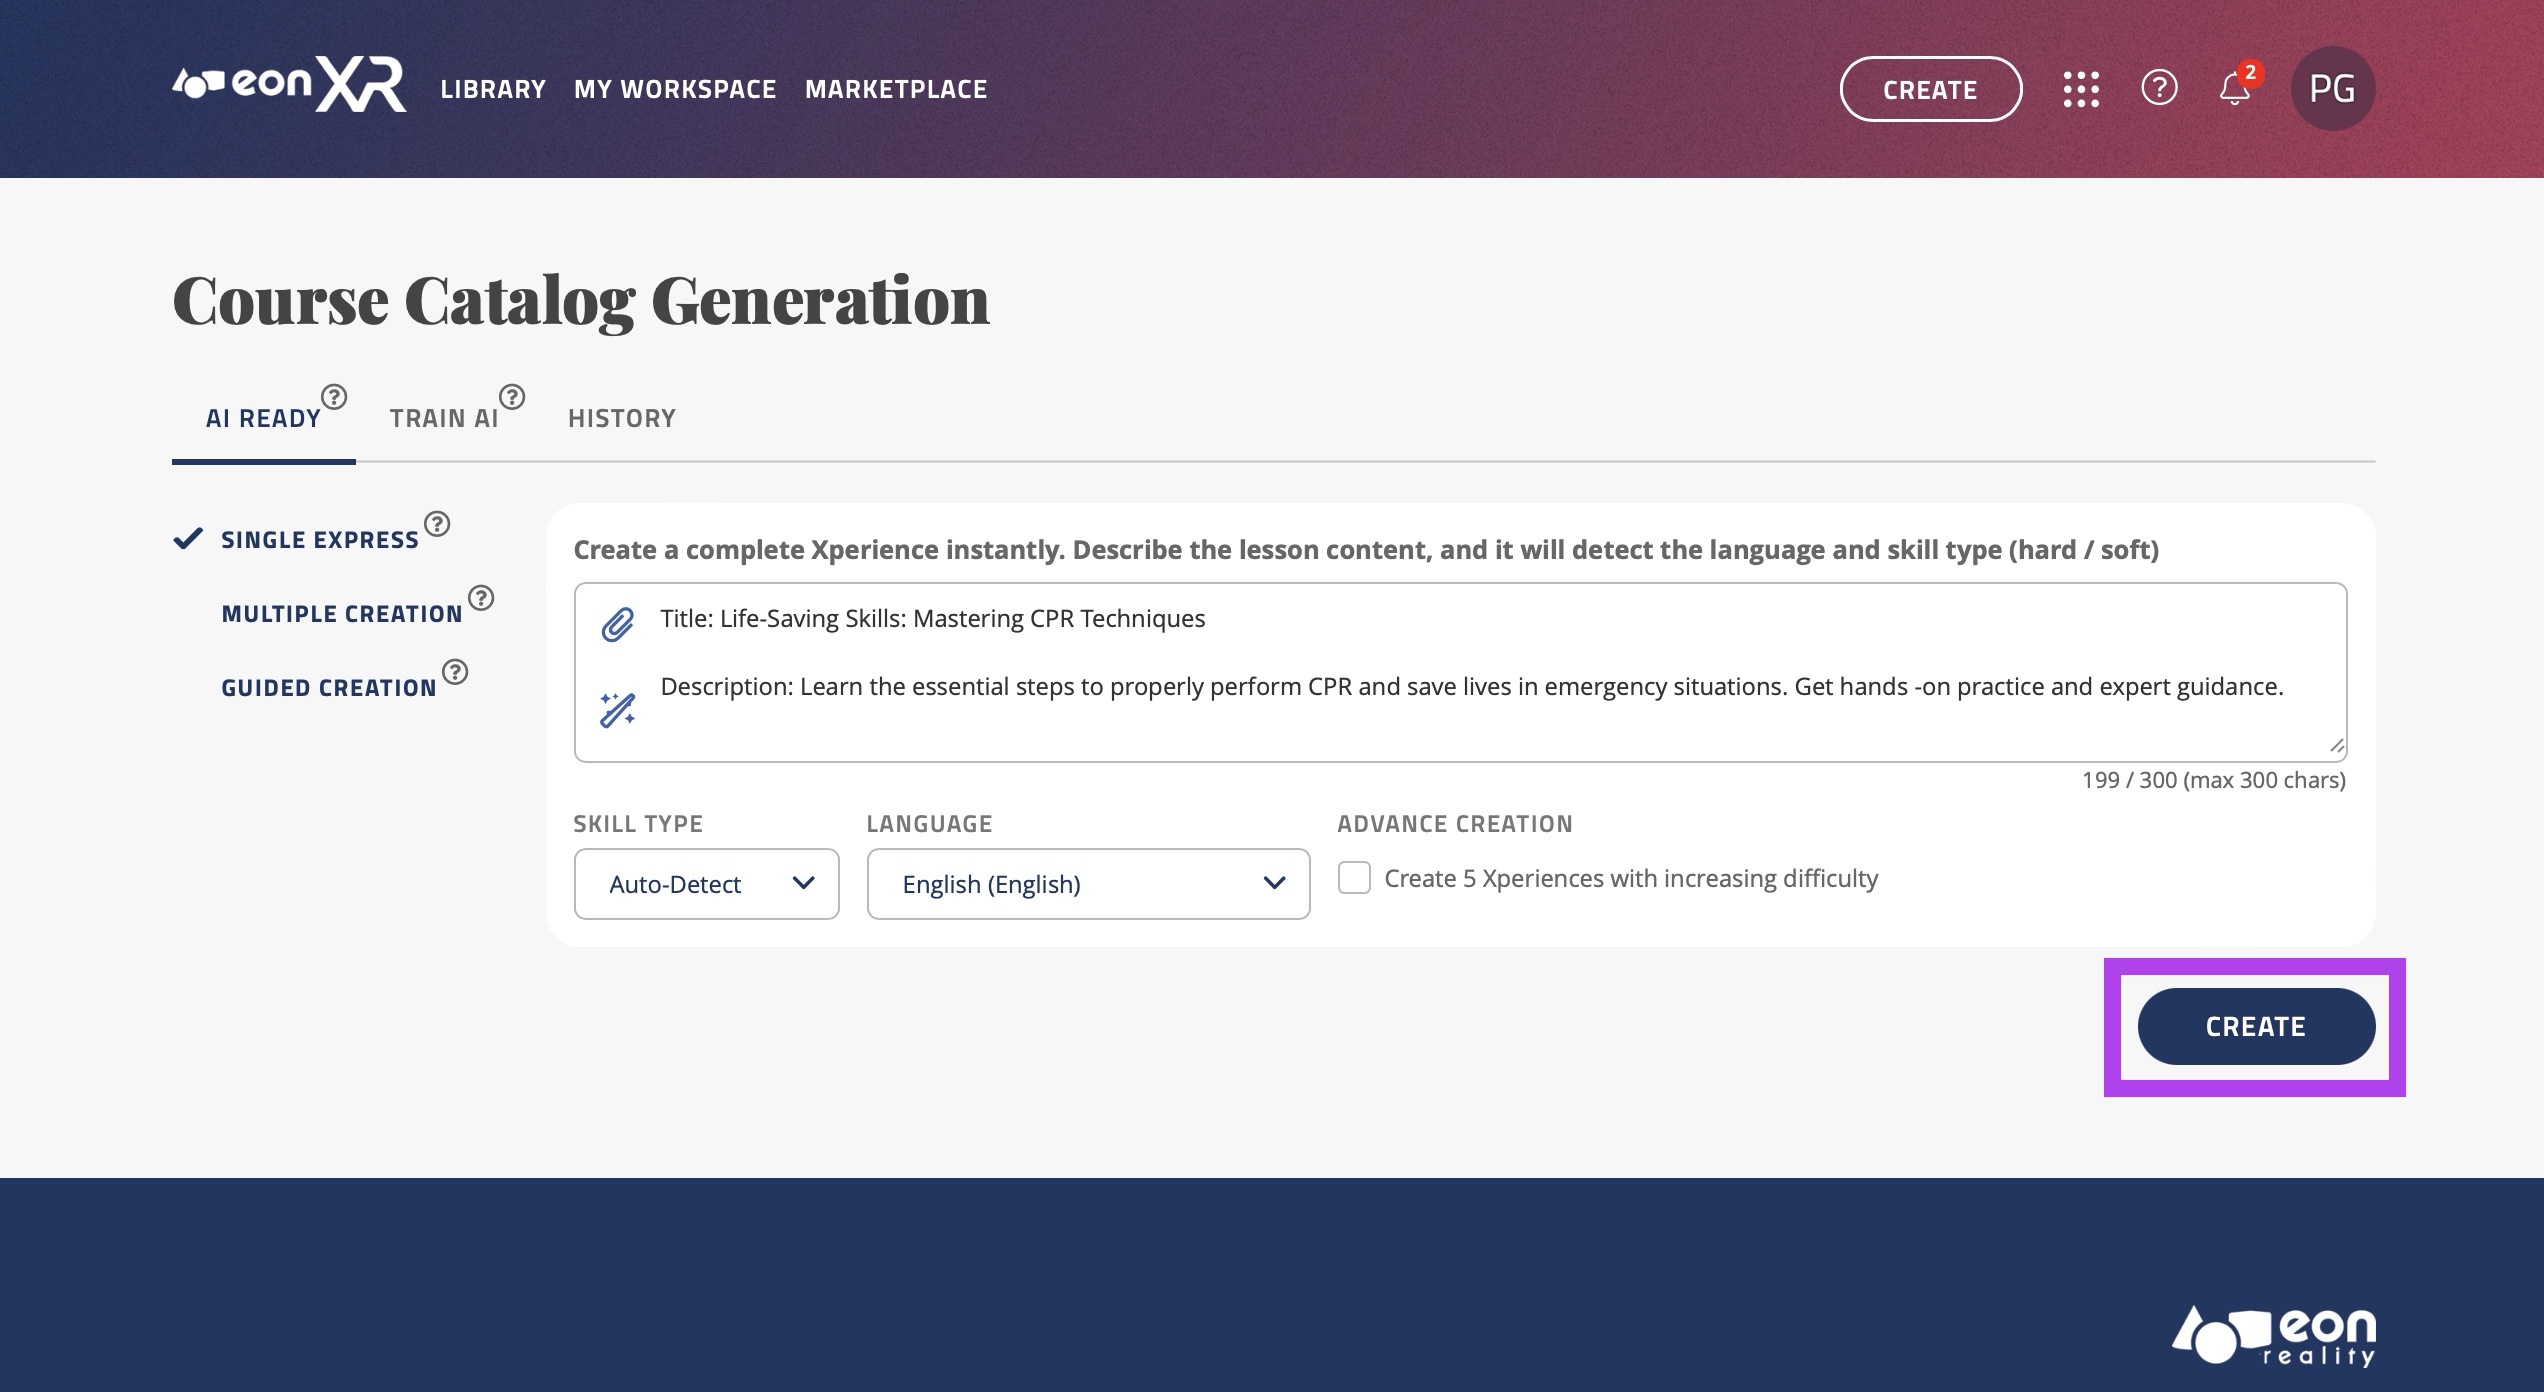
IMAGE-TO-XR:
The alternative method of generating an express creation lesson is through an image input. Click the small paperclip icon
 in the text box to open your computer files and be able to attach any image.
For this example, an image of the Eiffel Tower construction will be used:

The software will then generate a prompt based on that image, and that image will be the hero image in the Xperience.
“Stages of Eiffel Tower Construction: A historical sequence showing the Eiffel Tower’s construction, from its base framework to near completion, capturing the iconic structure’s rapid rise against the Paris skyline.”
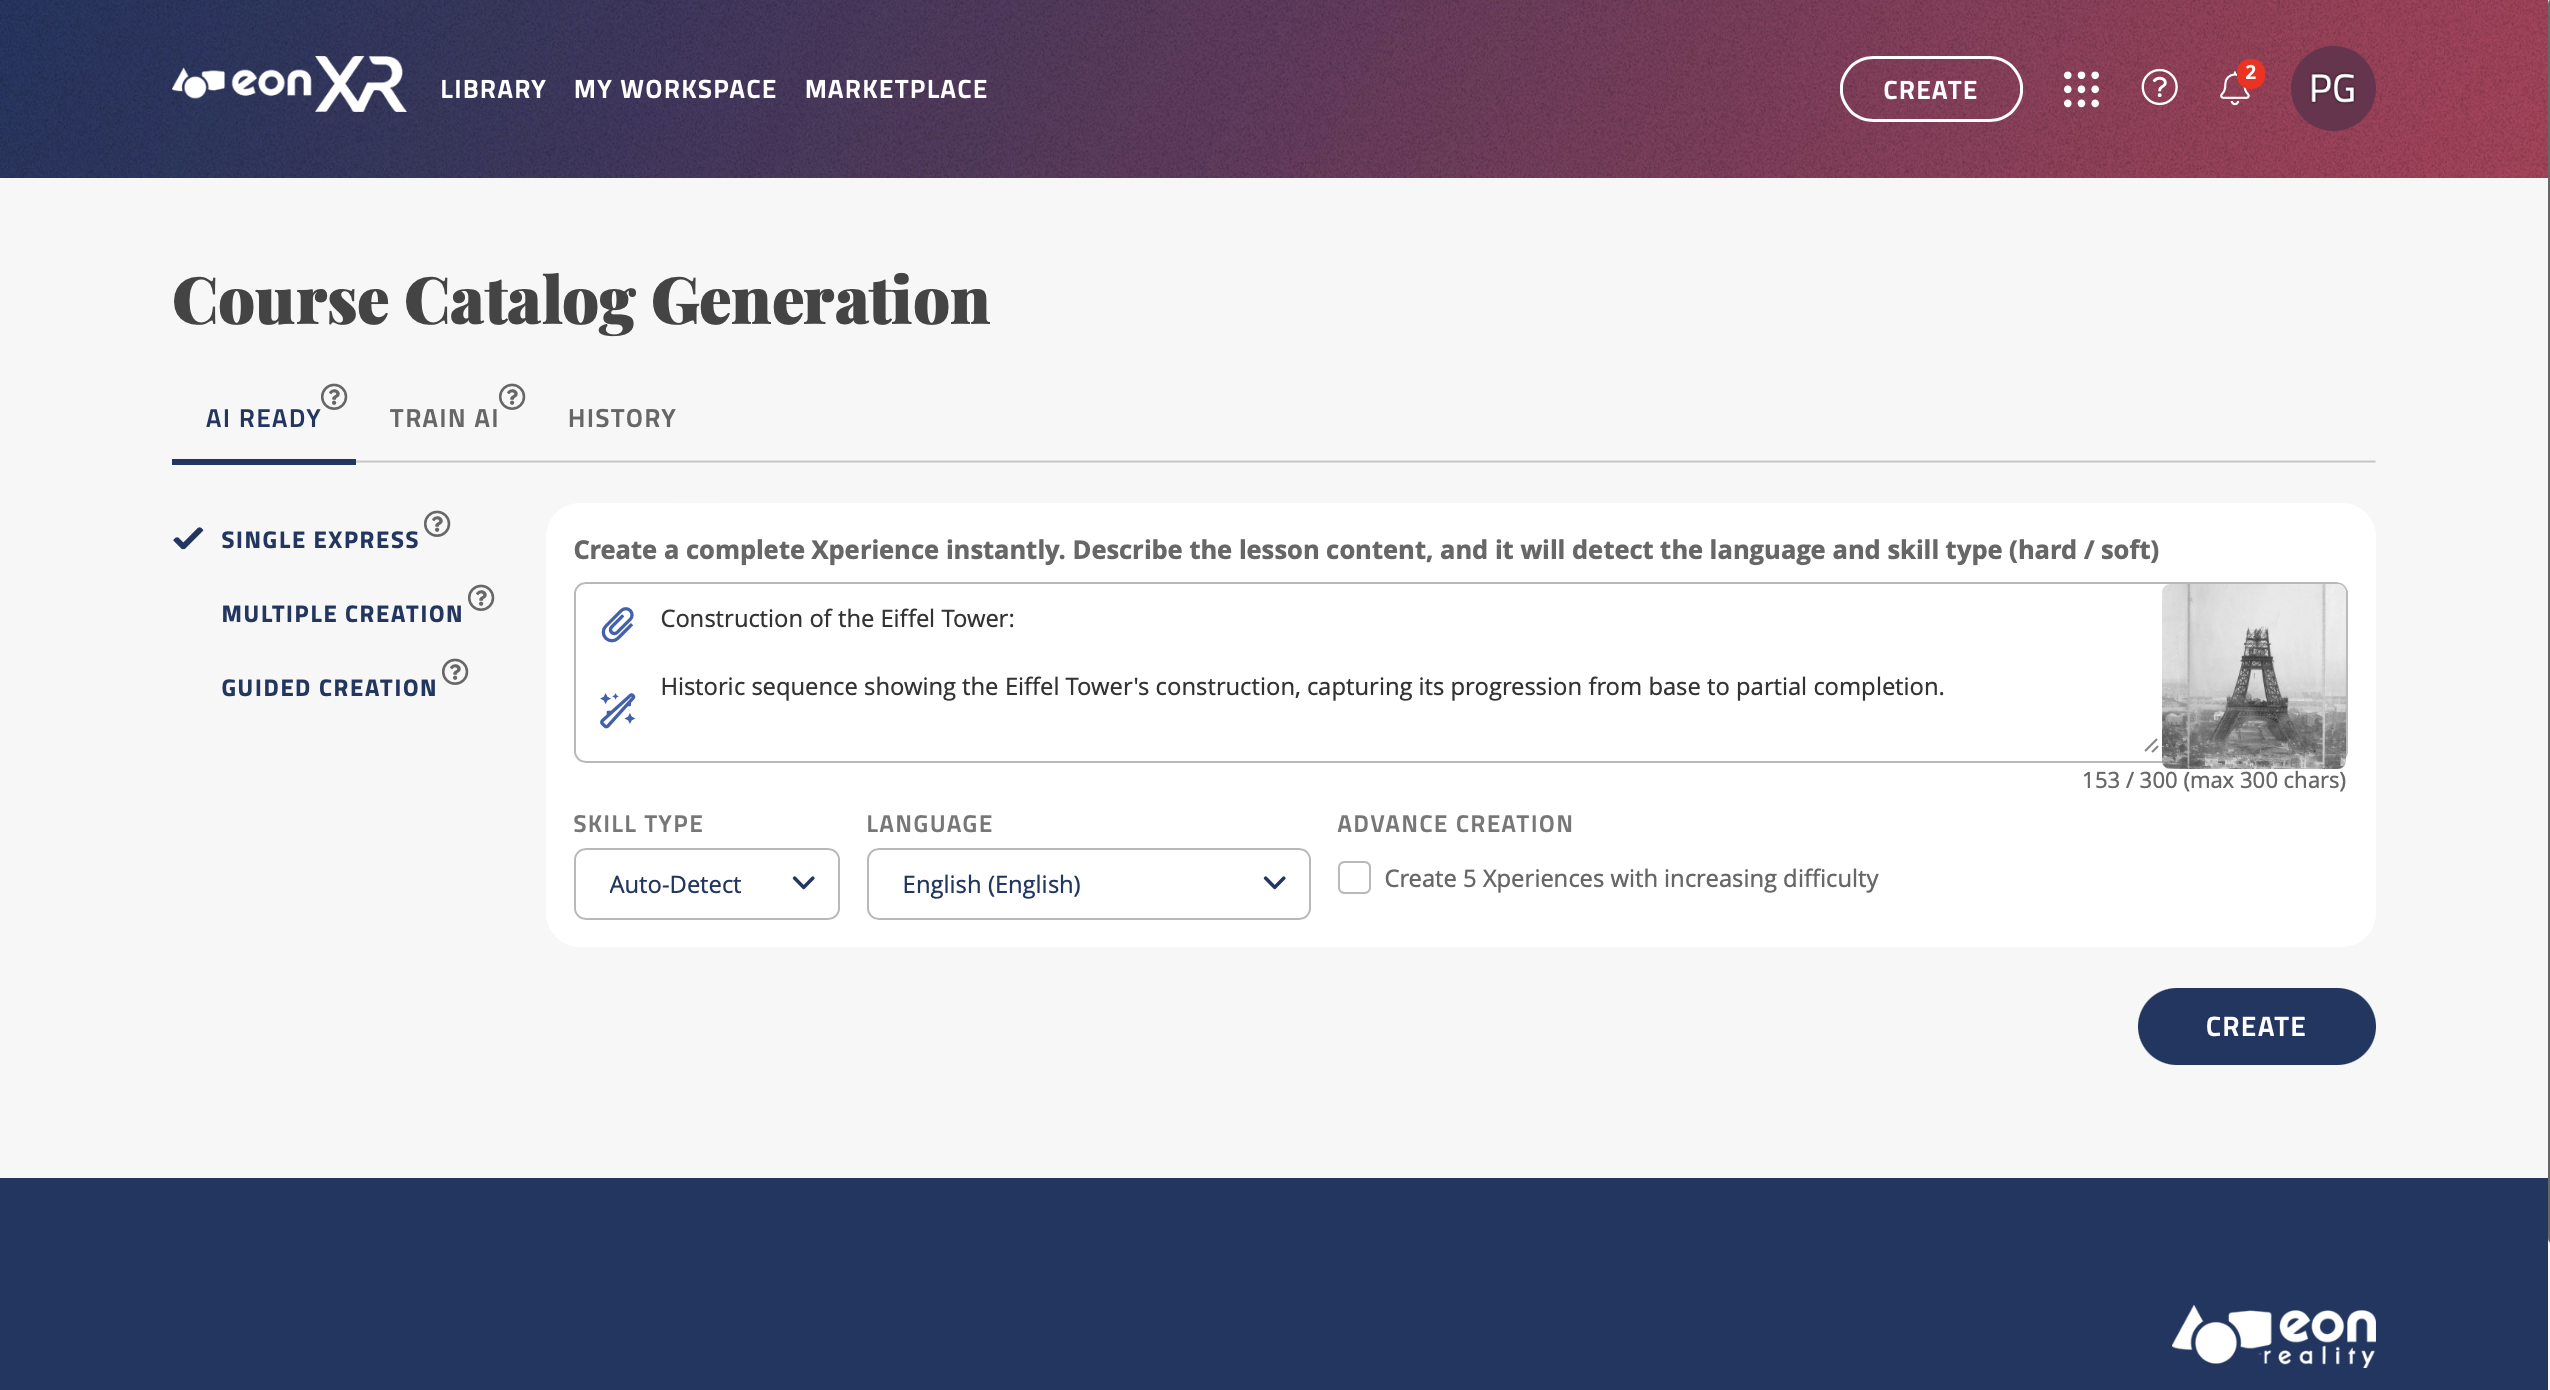
As mentioned, you can now choose the Skill type (Hard Skills or Soft Skills) by opening the dropdown menu under “SKILL TYPE”. If you choose to leave it as “Auto-Detect”, the software will decide based on the context of the prompt.
You can also change the language of the Xperience that will be created, there are over 20 languages supported, simply click the dropdown menu and select the new language, and the prompt will be translated and the lesson will be generated in the selected language.
You can also check the “Create 5 Xperiences with advanced difficulty” box to enable Advance Creation. This will generate 5 Xperiences in the topic, from beginner to expert level.
Once you are satisfied with the prompt you have written, you may press the “CREATE” button to begin loading the lesson:
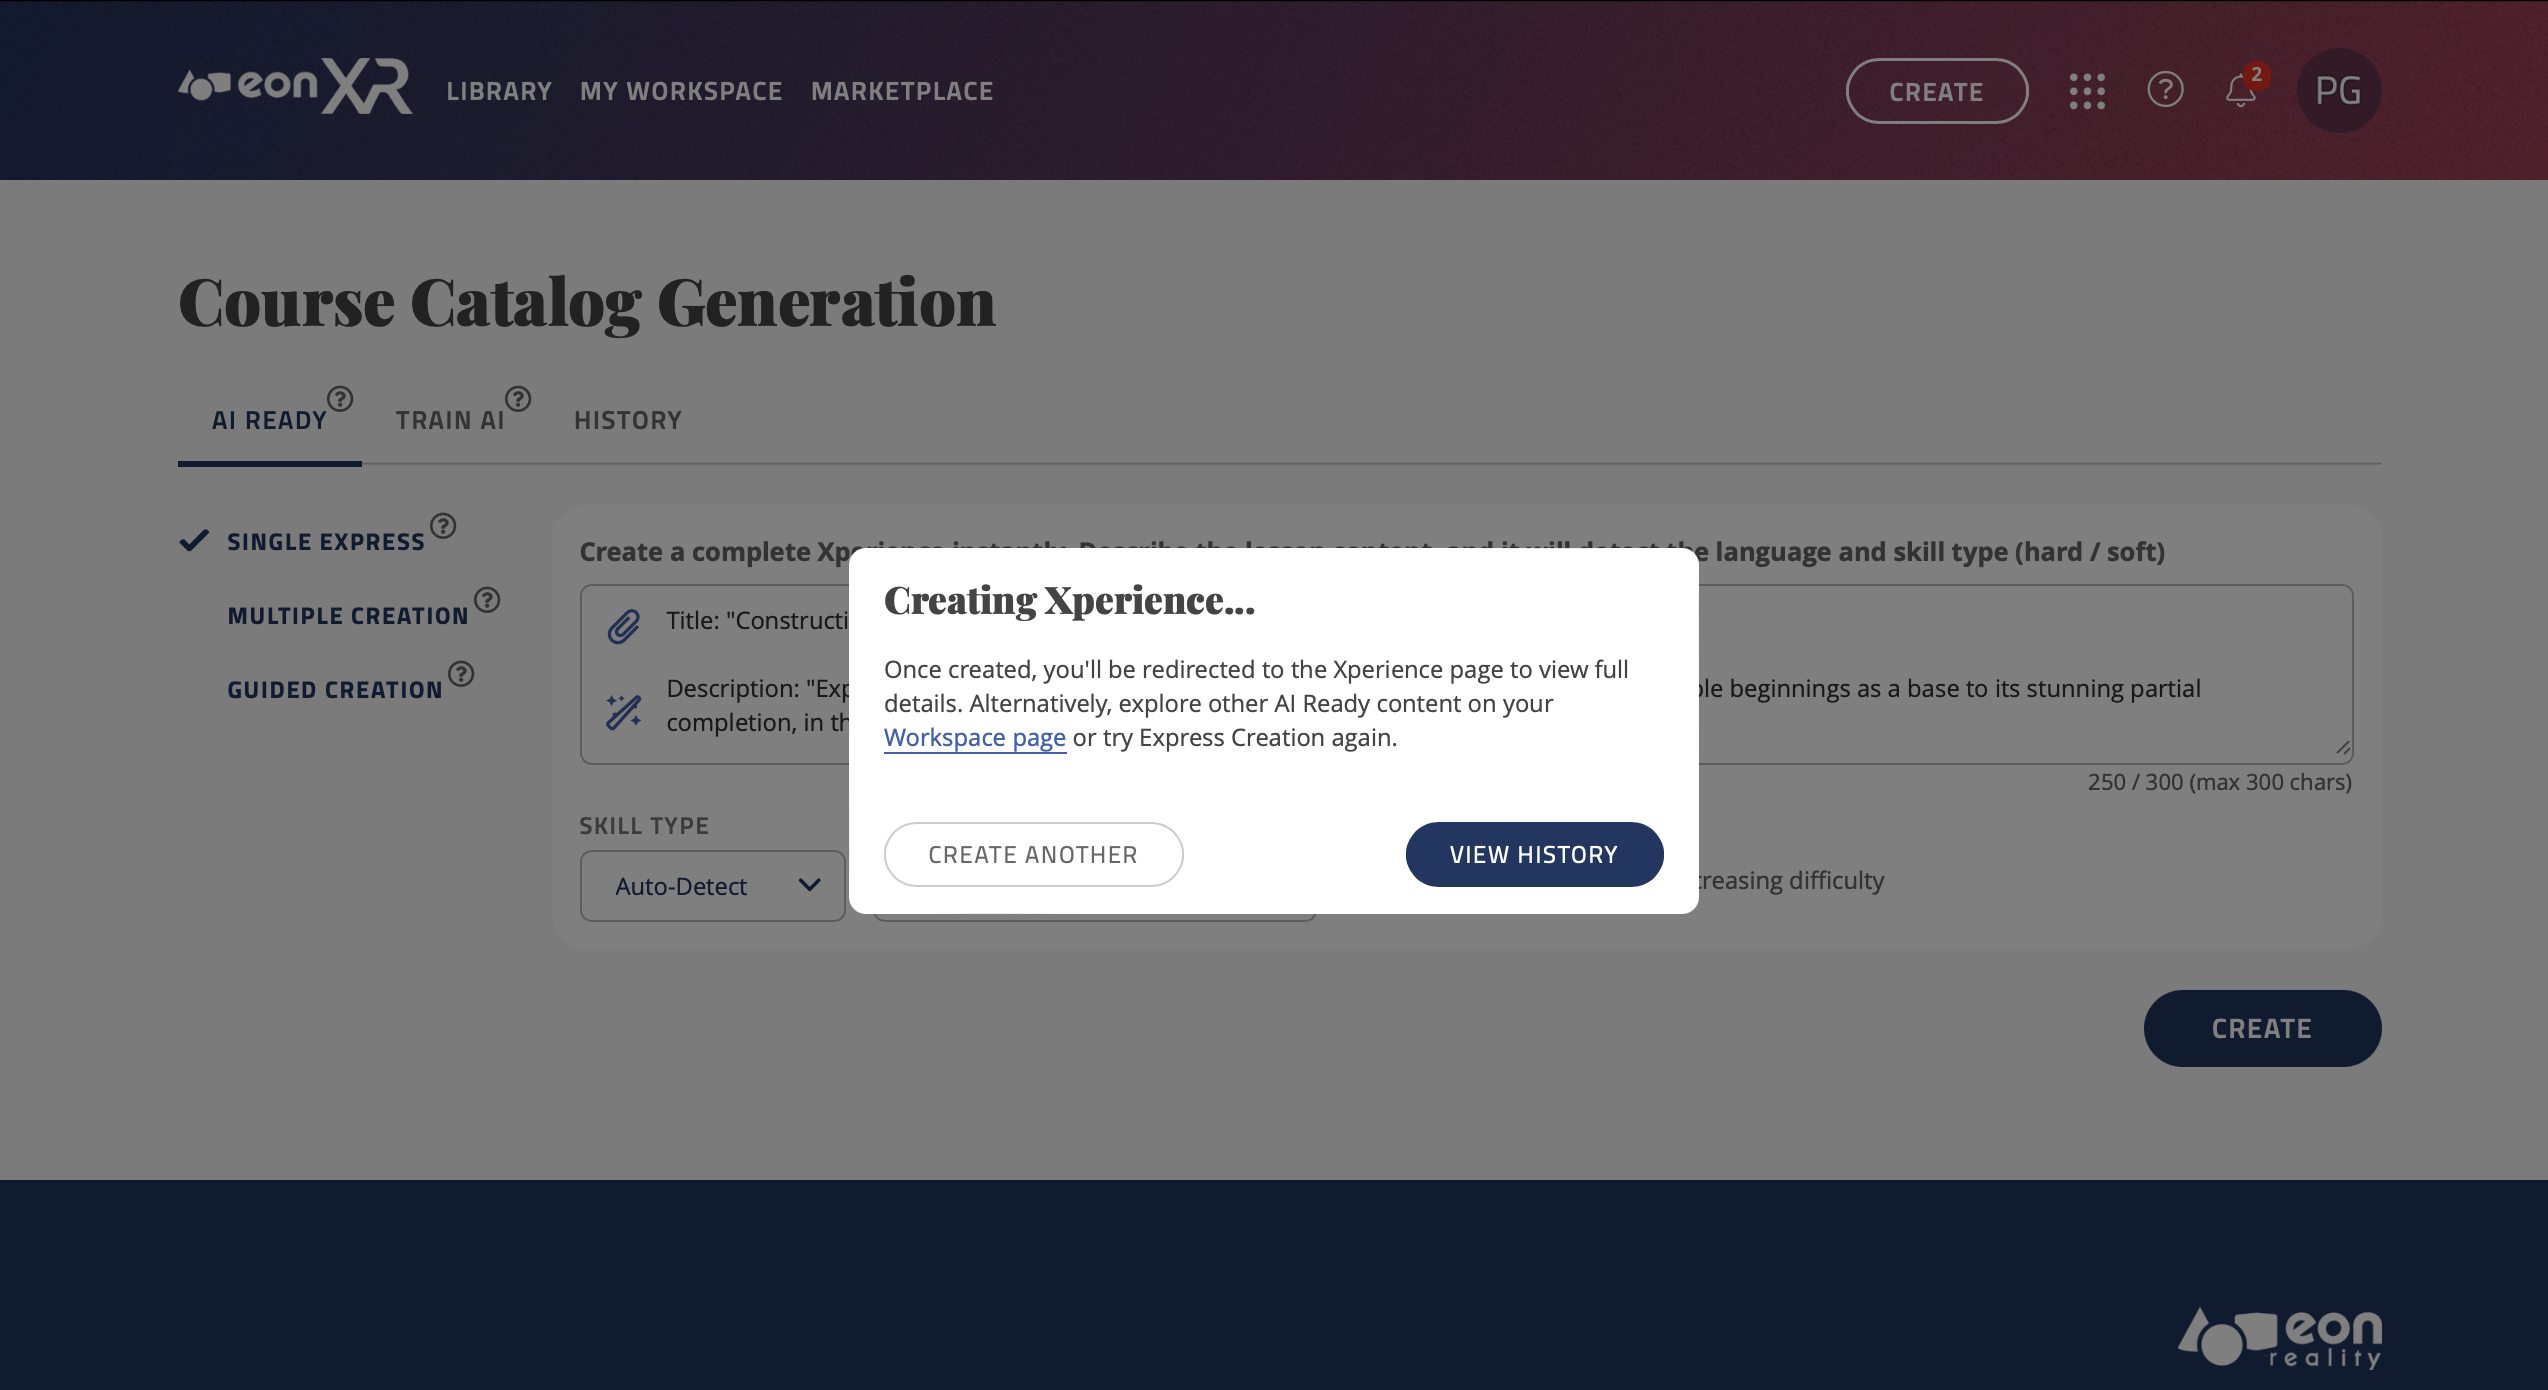
LESSON GENERATED
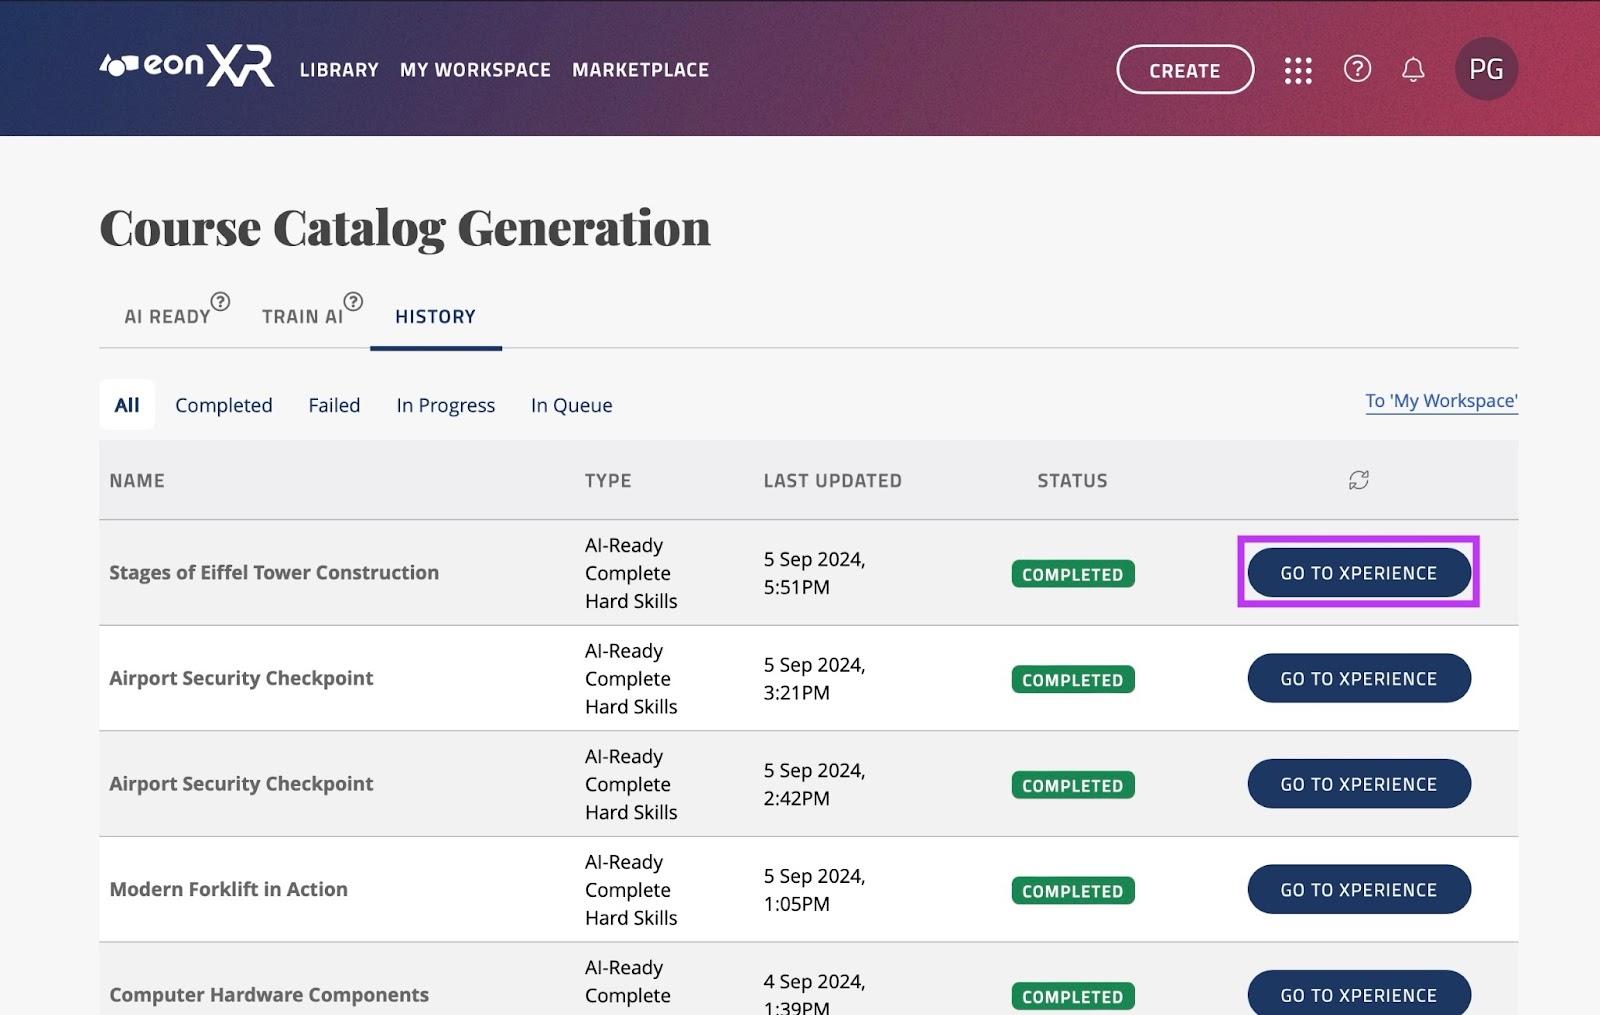
Regardless of the method of generating the lesson (text or image), you will then be taken to the following screen, showing that your lesson has begun creating. Press on “VIEW HISTORY” to keep track of all your creations:
As you can see below, the lesson you have just created shows at the top, with its name, type, date/time created and the status. You may press the small refresh button to the right of the status (
 ) to check if the lesson has been completed and is ready to view:
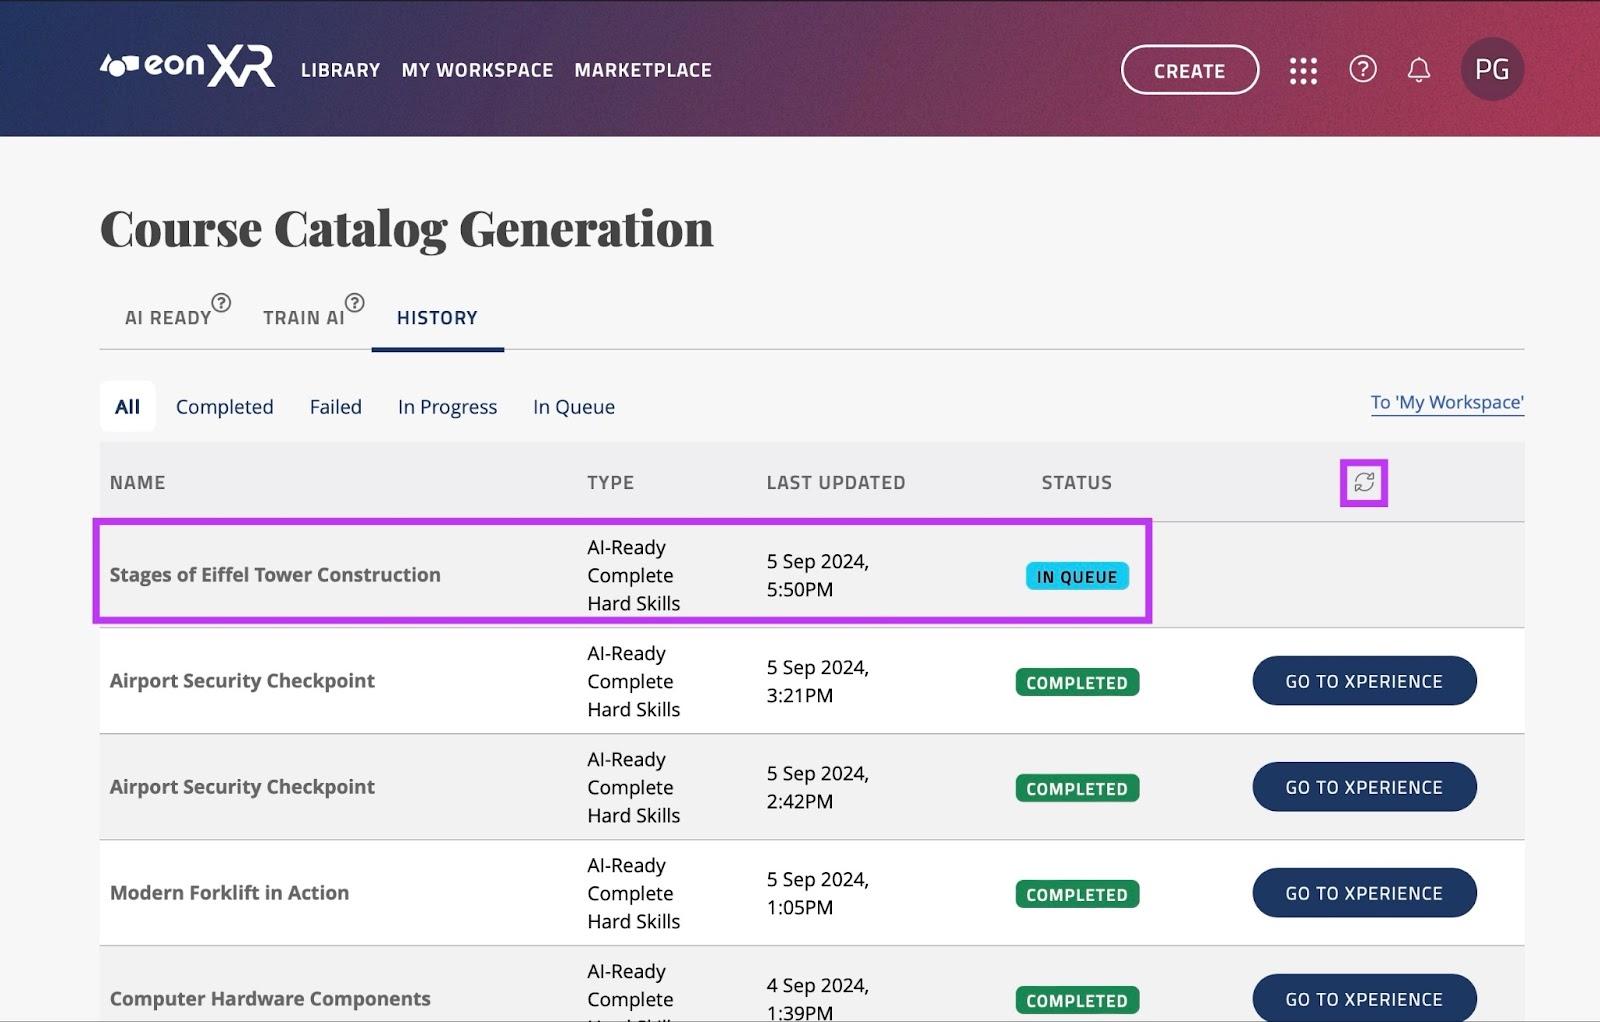
Once the status changes from “IN PROGRESS” to “COMPLETED”, you may press the “GO TO XPERIENCE” button to view it:
As can be seen below, the lesson has now been created from the prompt introduced:
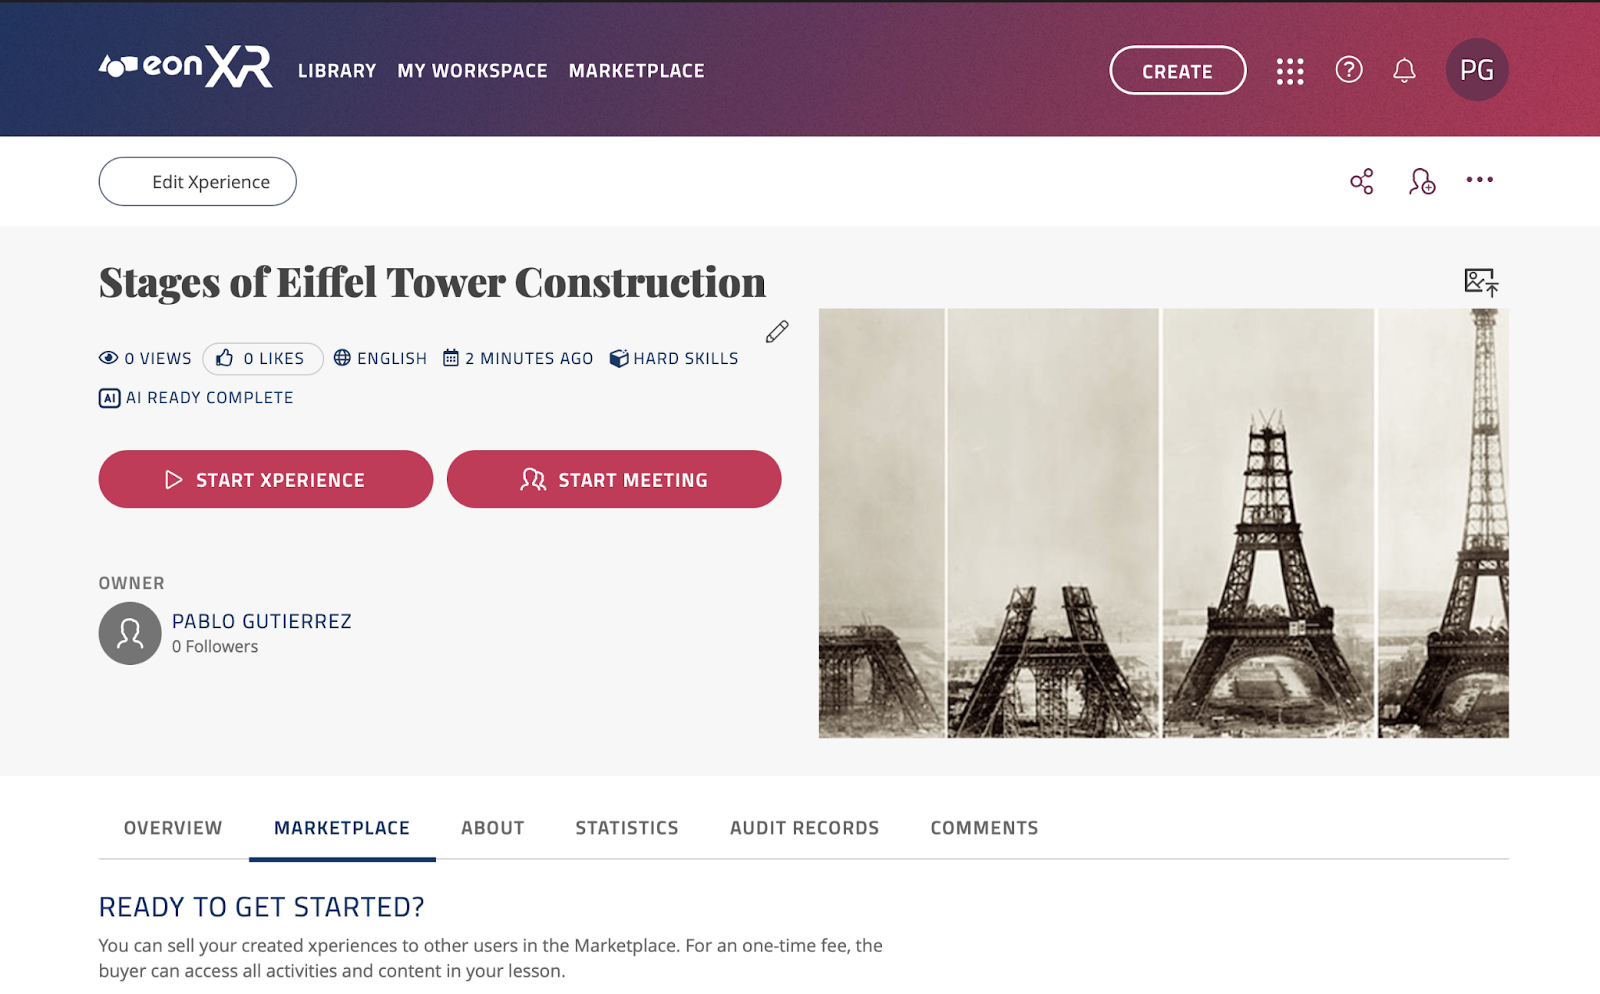
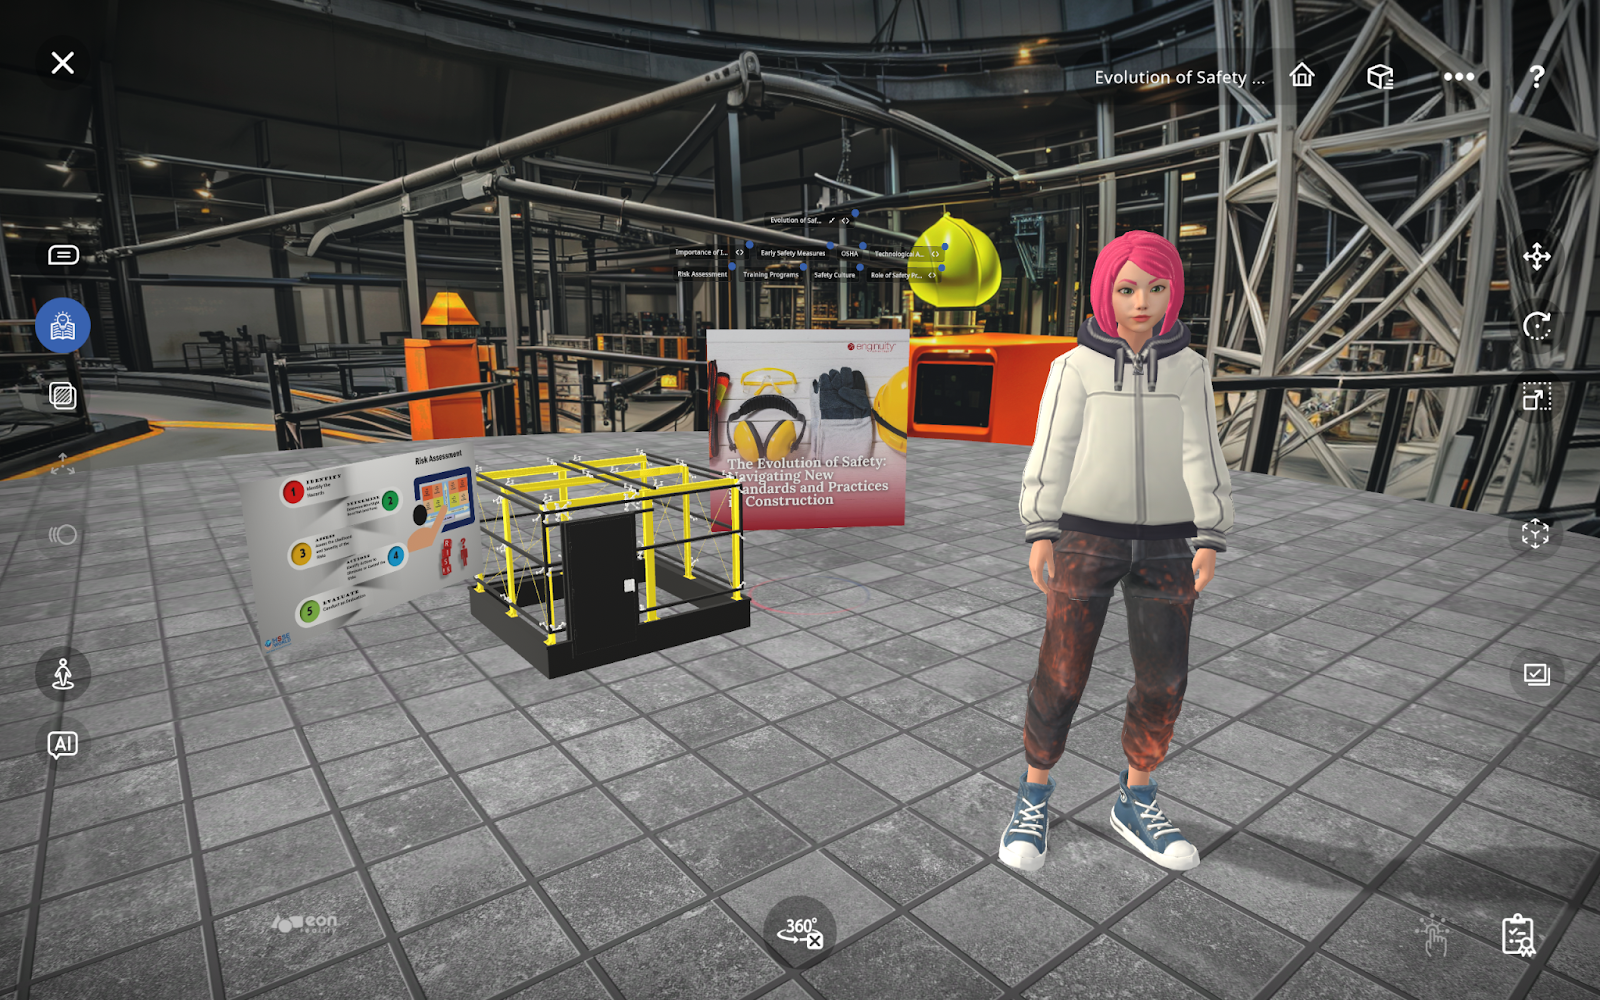
From here you can press “START XPERIENCE” to learn about the desired topic. You will be directed to the EON-XR app. As mentioned, if you generated a lesson through an image, that image will be the hero image in the Xperience:

You are also able to access this Xperience from your mobile device if you are logged in with the same account.
Multiple Creation#
The next way to create Xperiences is through the “Multiple” feature. With this feature, you will be able to upload a file (PDF, TXT, CSV, DOCX) with a list of topics you would like to create Xperiences on, and the EON-XR software will create these for you.
HOW TO IMPORT FILES:
Log in to the EON-XR web portal for your institution (on desktop).
Click on “CREATE” near the top right of the screen to open the following menu.
From this menu, select the middle option labeled “Course Catalog” This action will prompt you to select a syllabus file to import.
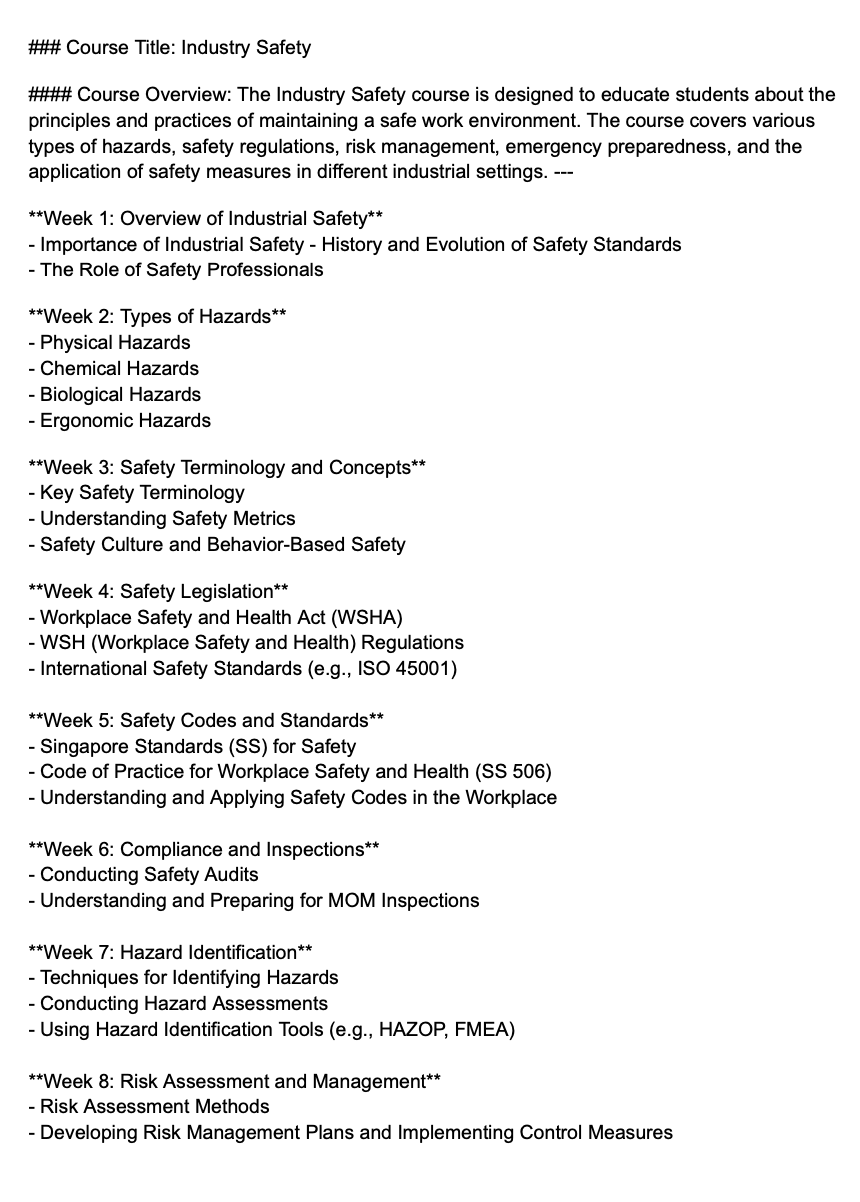
The file uploaded should contain a list of courses / topics you are interested in converting into Xperiences, the file could look something like this:
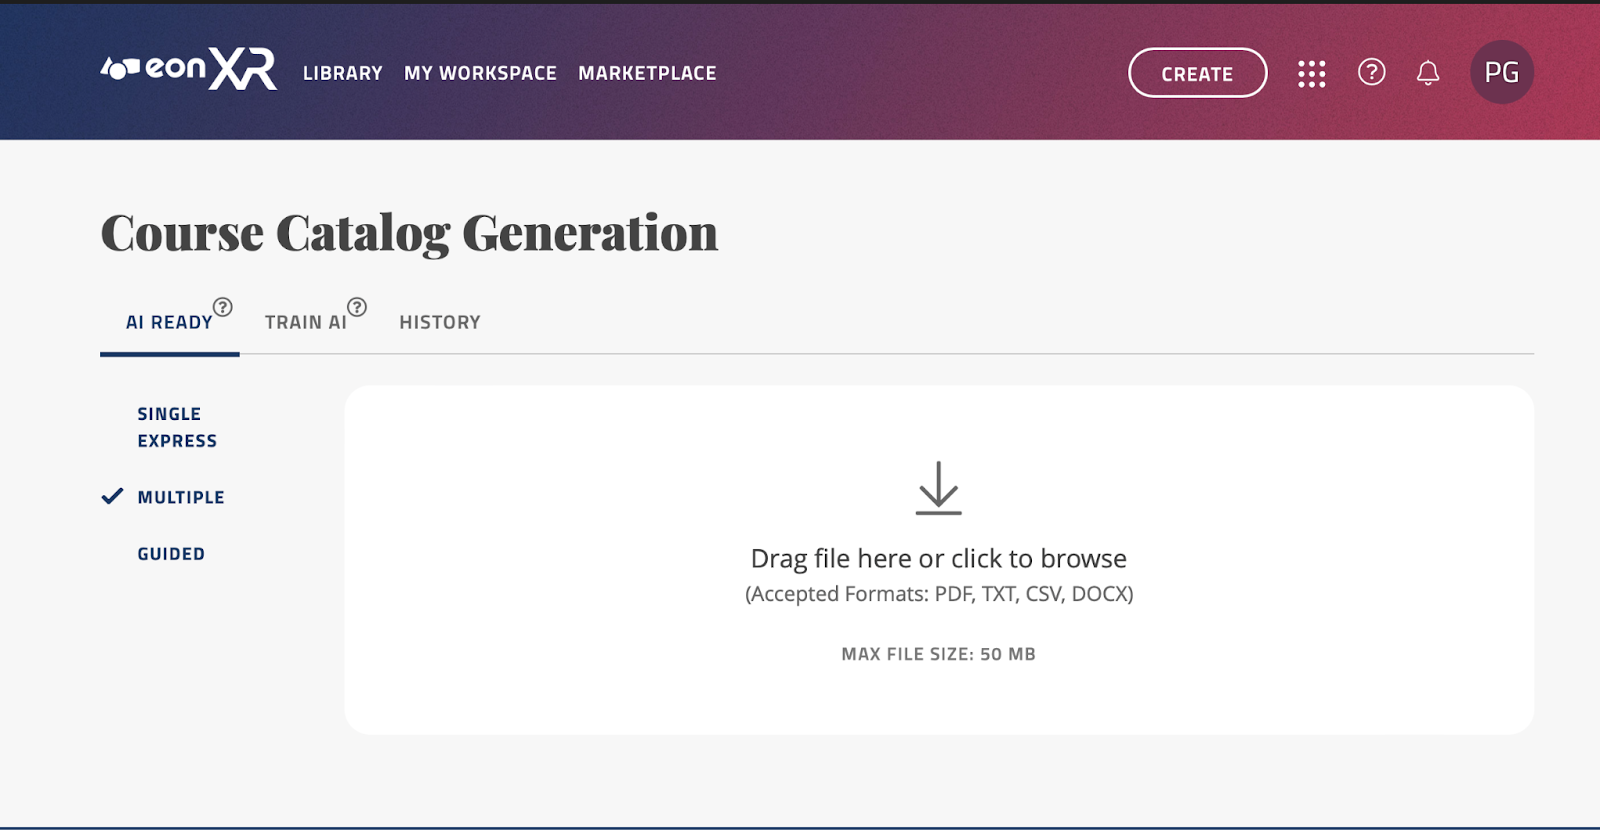
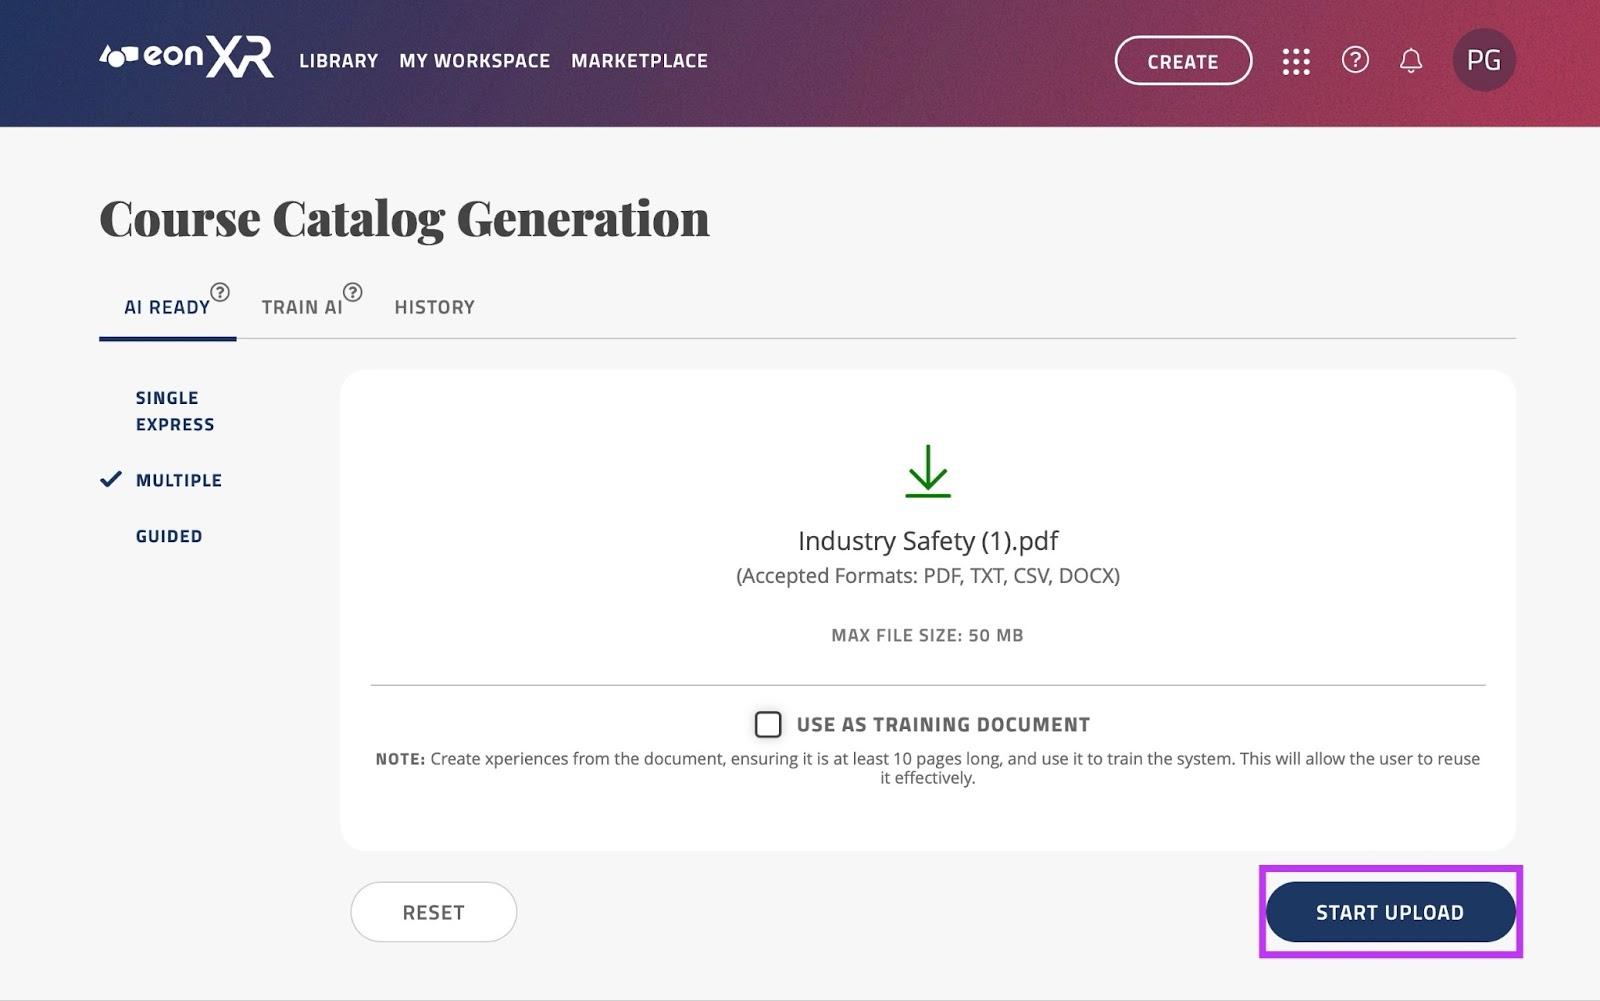
With your file ready, drag it in or click anywhere in the white rectangle labeled “Drag file here or click to browse” to select the course catalog file you would like to import.
Once it has loaded in, you have the option to “Use as training document”. If your document includes very detailed information of a certain topic, it will train the AI specifically on the information found in your document.
Once ready, click the “Start Upload” button:
The upload will begin to progress, and once finished you will be taken to the next screen
On this screen, you will see a list of the topics that have been extracted from the uploaded file. There is a limit of 50 topics to create Xperiences.
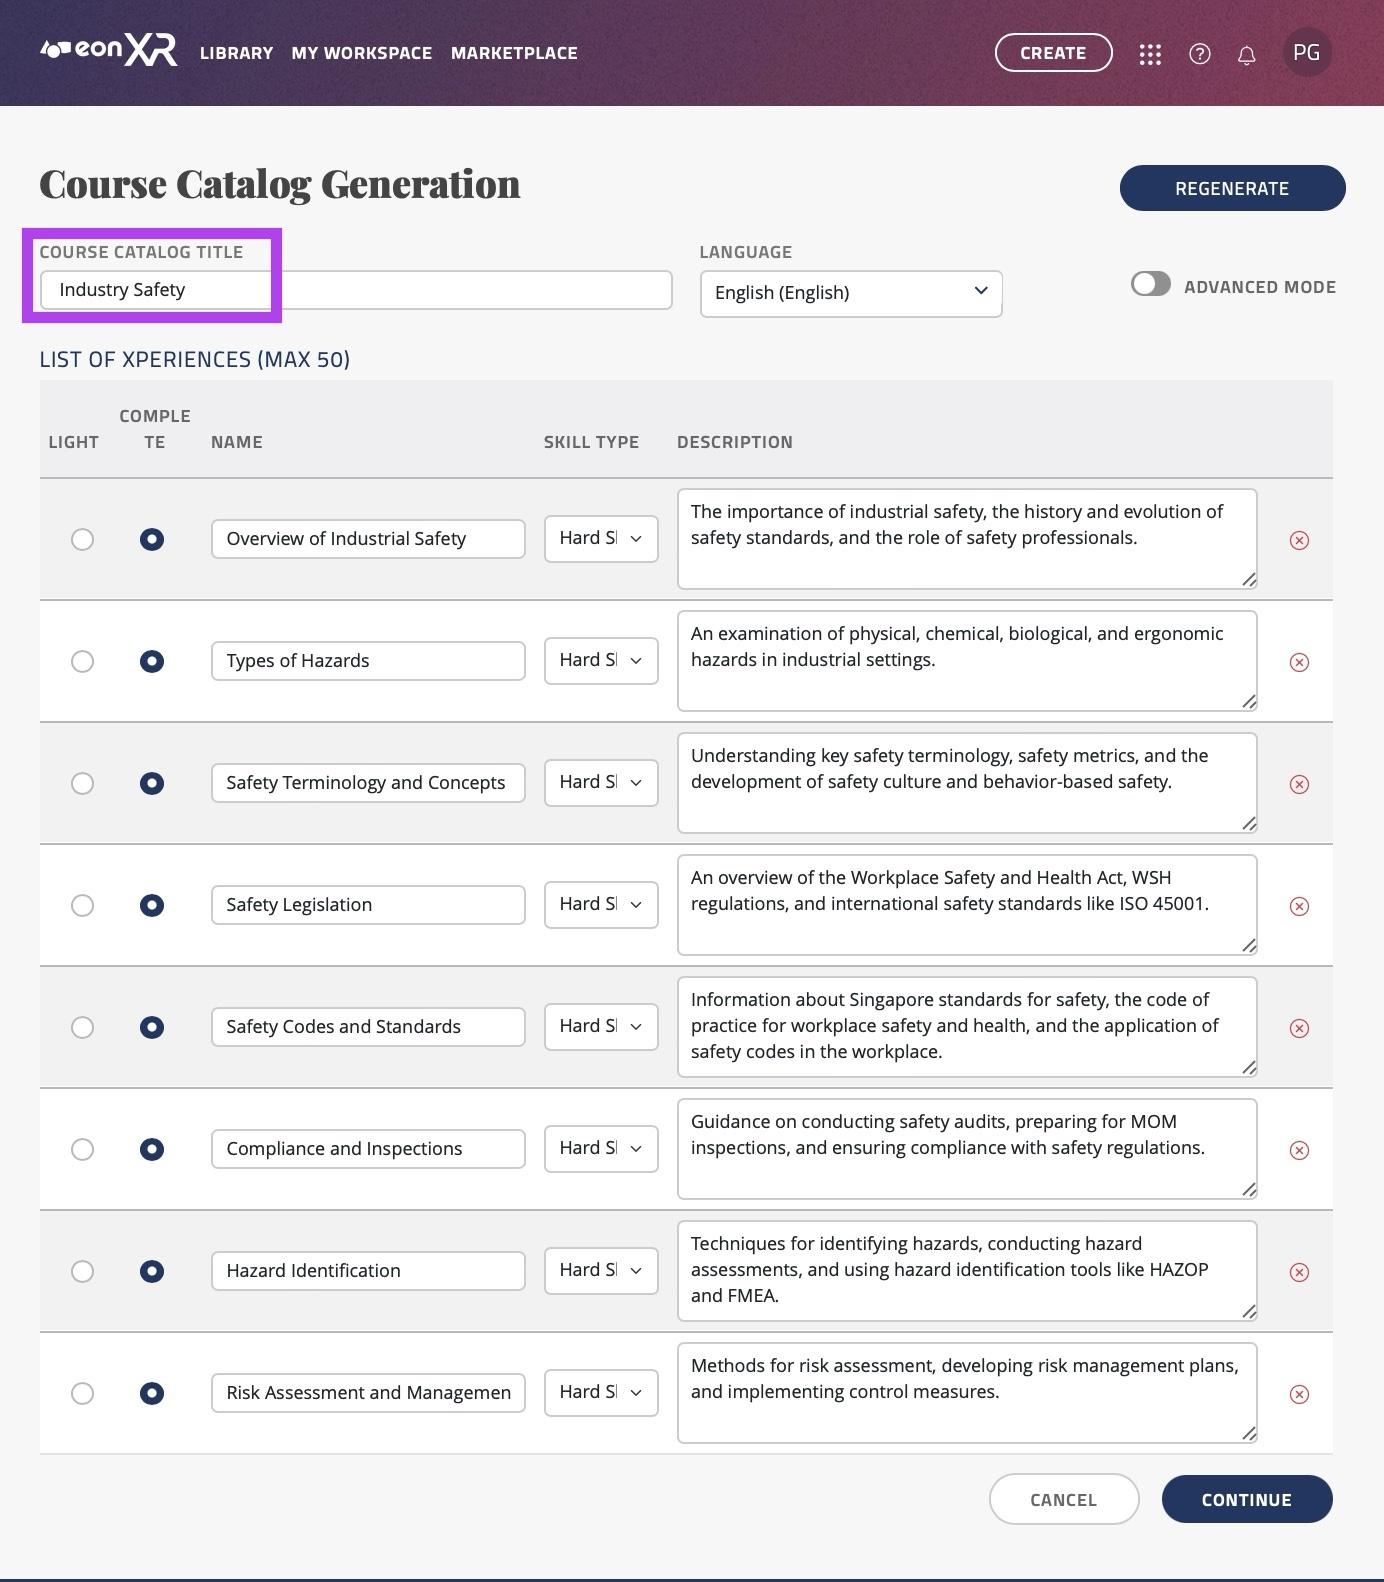
You may rename the syllabus title by editing the name in the text box labeled “COURSE CATALOG TITLE”.
You may also change the language by clicking the drop down menu labeled “LANGUAGE”, we currently support over 20 languages.
There are two options for the Xperiences you are able to create from these topics; AI READY LIGHT, or AI READY COMPLETE. Here is the difference:
AI READY LIGHT only creates the topic and thumbnail for you to manually edit and add things in the EON-XR app.
AI READY COMPLETE directly creates a full lesson. This includes the topic, thumbnail, images, annotations and quizzes. You can directly open the Xperience once it is automatically created.
If you would like EON-XR to create an Xperience for you, keep the “COMPLETE” box ticked next to the topic you wish to create the lesson for.
If you would only like to create the topic and thumbnail so you can manually edit the Xperience, tick the checkbox labeled “LIGHT” for the Xperience you’d like to manually edit.
You may rename the topics by editing the text input box under “NAME”.
You may change the “Skill type” by clicking on the dropdown menu under “SKILL TYPE”; you have 2 options for this:
Hard Skills: This option creates a hard skills Xperience where an avatar will guide the user through important aspects of the topic you have inputted, showing 3D models, videos and images to the user.
Soft Skills: This option creates a 1 on 1 role-play scenario, firstly teaching the important aspects related to the topic, then giving you the ability to discuss this topic with a trained avatar with its own personality and mood. Finally, you receive a score based on your performance depending on the scenario.
You may change the description by editing the text input box under “DESCRIPTION”.
If there are courses you do not wish to import into your institution, simply press the red
 cross. This ensures that only relevant courses are added to your library.
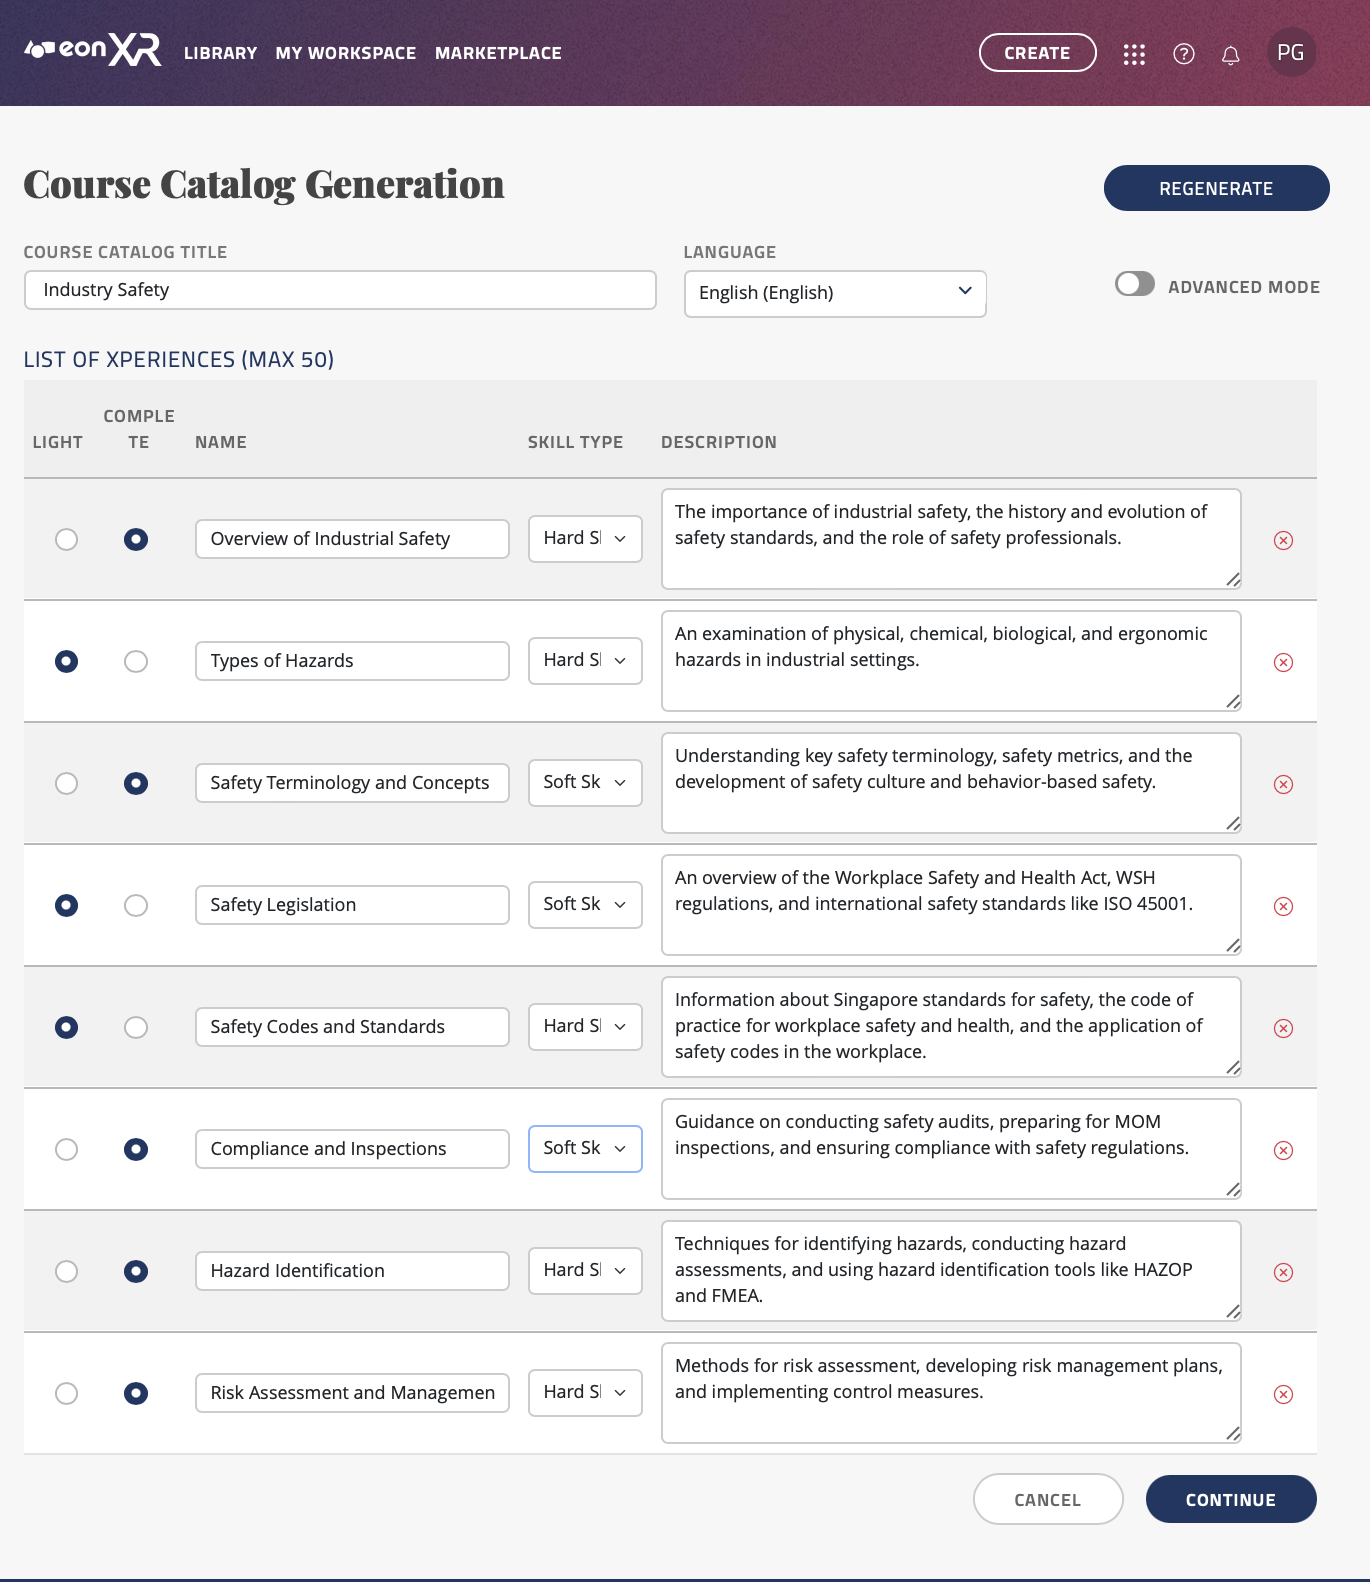
As shown above, the courses that are not relevant have been removed. LIGHT Xperiences will be generated for 4 topics, and COMPLETE Xperiences will be generated for the remaining 3. There is a mix of hard and soft skills that will be added.
Once you have reviewed and finalized the list of courses, click on the “CONTINUE” button to initiate the process of adding these courses to the library as AI Ready Lite Xperiences.
Depending on the number of courses and the size of the syllabus, this may take some time.
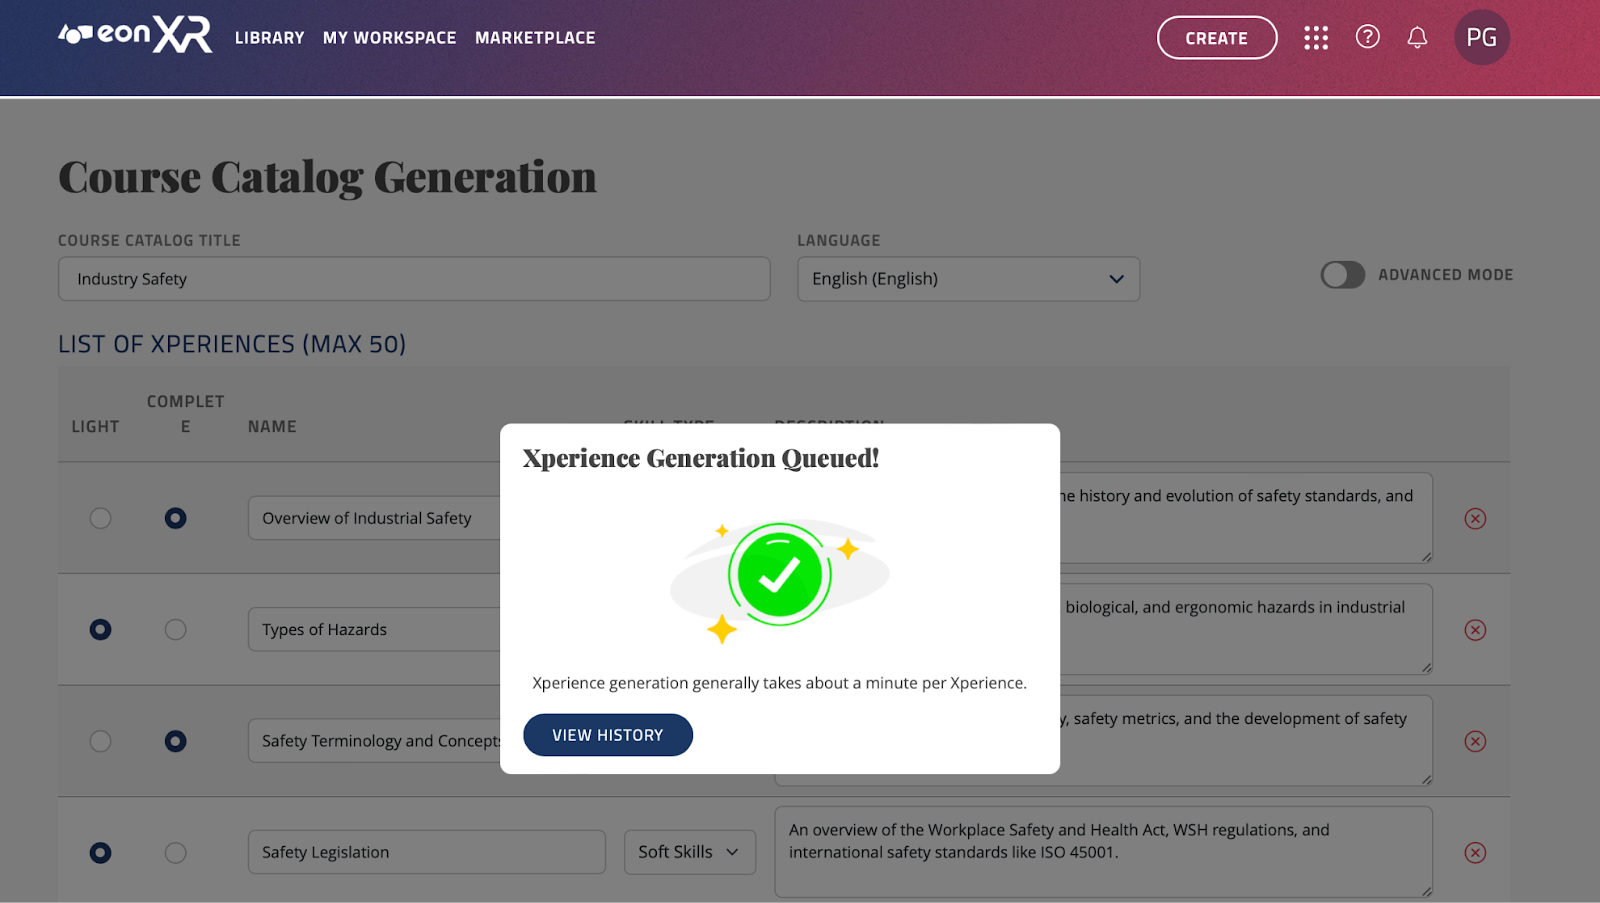
Once the import process is complete, you will be taken to this screen. If you press “View History” you will be taken to your Xperience creation history:

As can be seen, the Xperiences are now being created. While they are being created, the STATUS will be shown as “IN PROGRESS” in yellow, and once completed and ready, it will show “COMPLETED” in green, with the option to go to the Xperience created. Press the “GO TO XPERIENCE” button to view it:
You can now press any of these Xperiences; If you wish to finish creating a LIGHT lesson you can click the “edit Xperience” button to finish creating it:
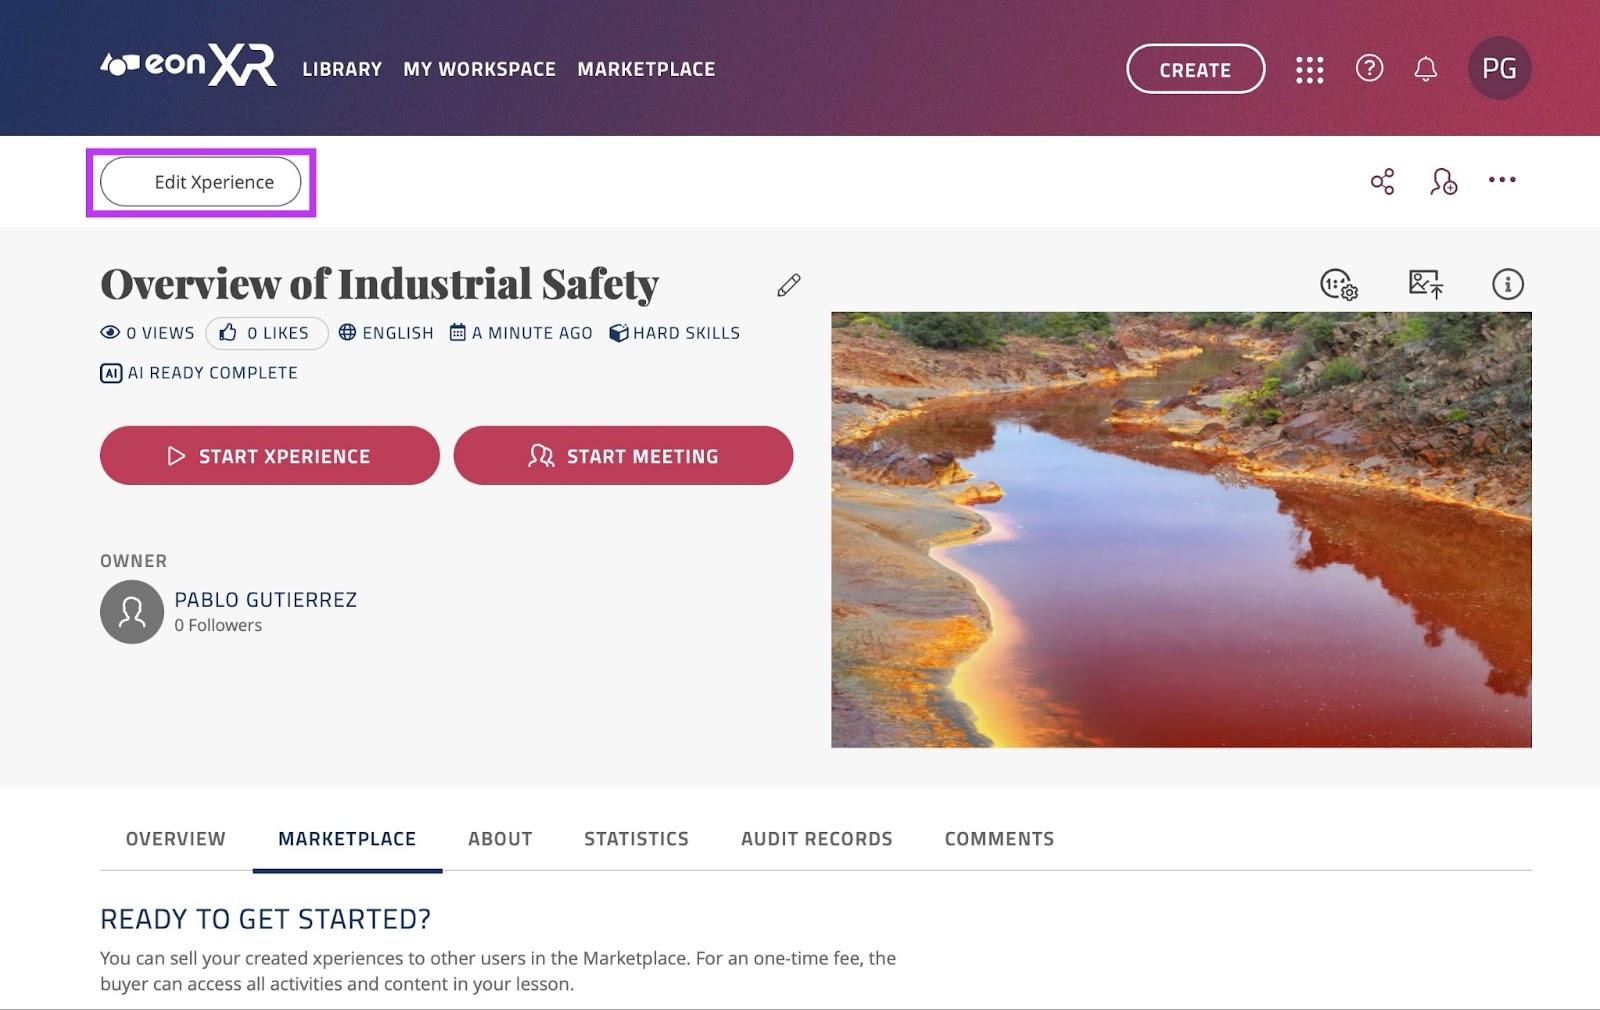
Once ready, you can click the “Start Xperience” button, which will prompt you to download/ open the app and start the Xperience.
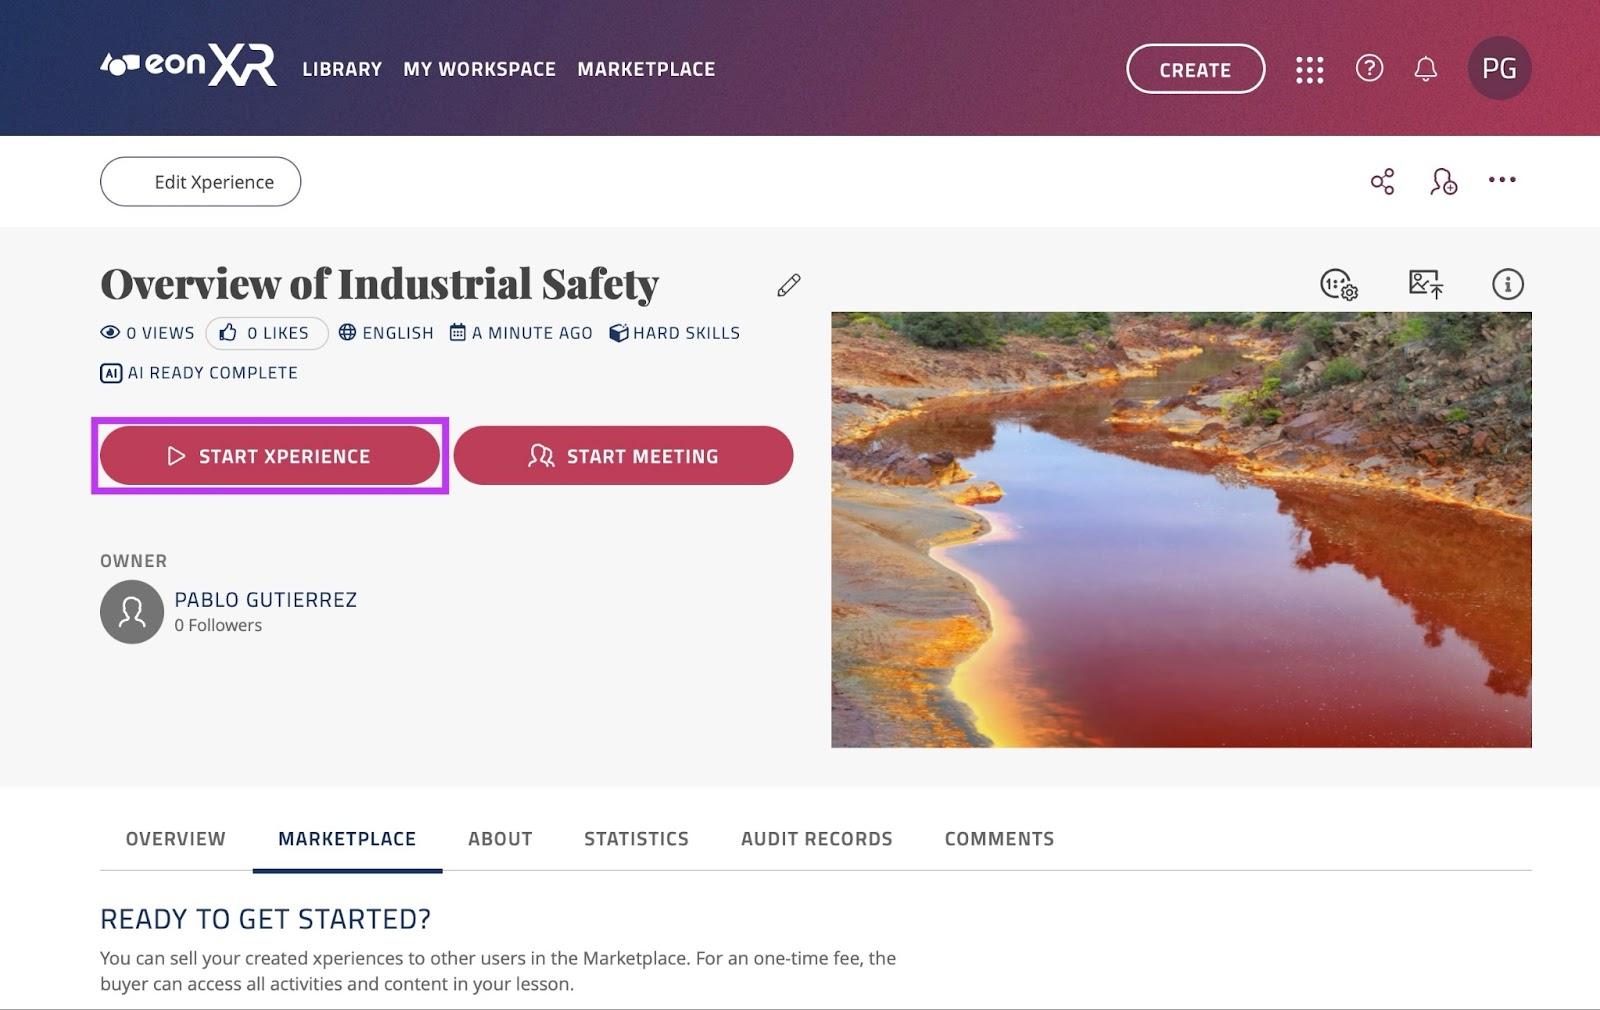
If it is a COMPLETE lesson, you will be able to click the “Start Xperience” button, which will prompt you to download/ open the app and start the Xperience:
Guided Creation#
The final way to create Xperiences through the Course Catalog is Guided creation. Chat with the EON assistant to create Xperiences based on your interests.
First, you must log in to https://core.eon-xr.com/:
Once logged in, click the “CREATE” button near the top right of the screen.
This will take you to the following screen, click the middle option; Course Catalog:
Once in Course Catalog, click the “Guided” text in the left side of the screen:
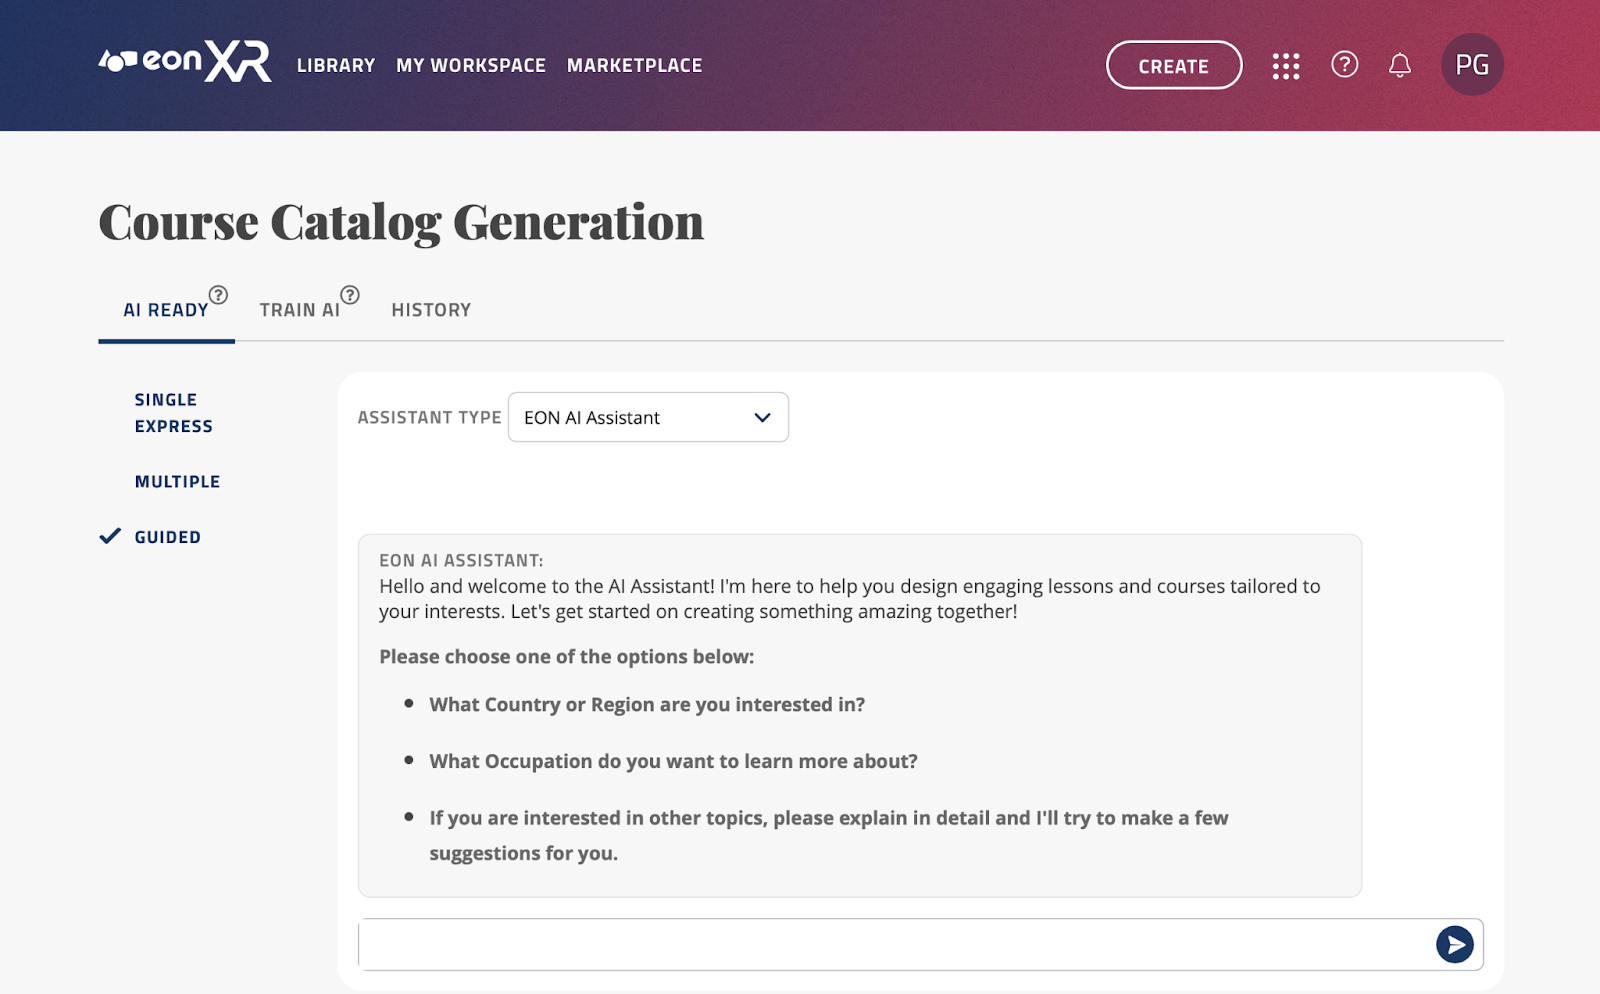
This will open the EON AI Assistant, you may begin the conversation by introducing a country/region, occupation, or topic you are interested in.

The assistant will give a list of regions where your topic is especially popular.
You can now choose which of these regions interest you most, and input the corresponding name/ number. For example, if the user is interested in Robotics Engineer in Tokyo Japan, the user can type “2” to explore this topic further:
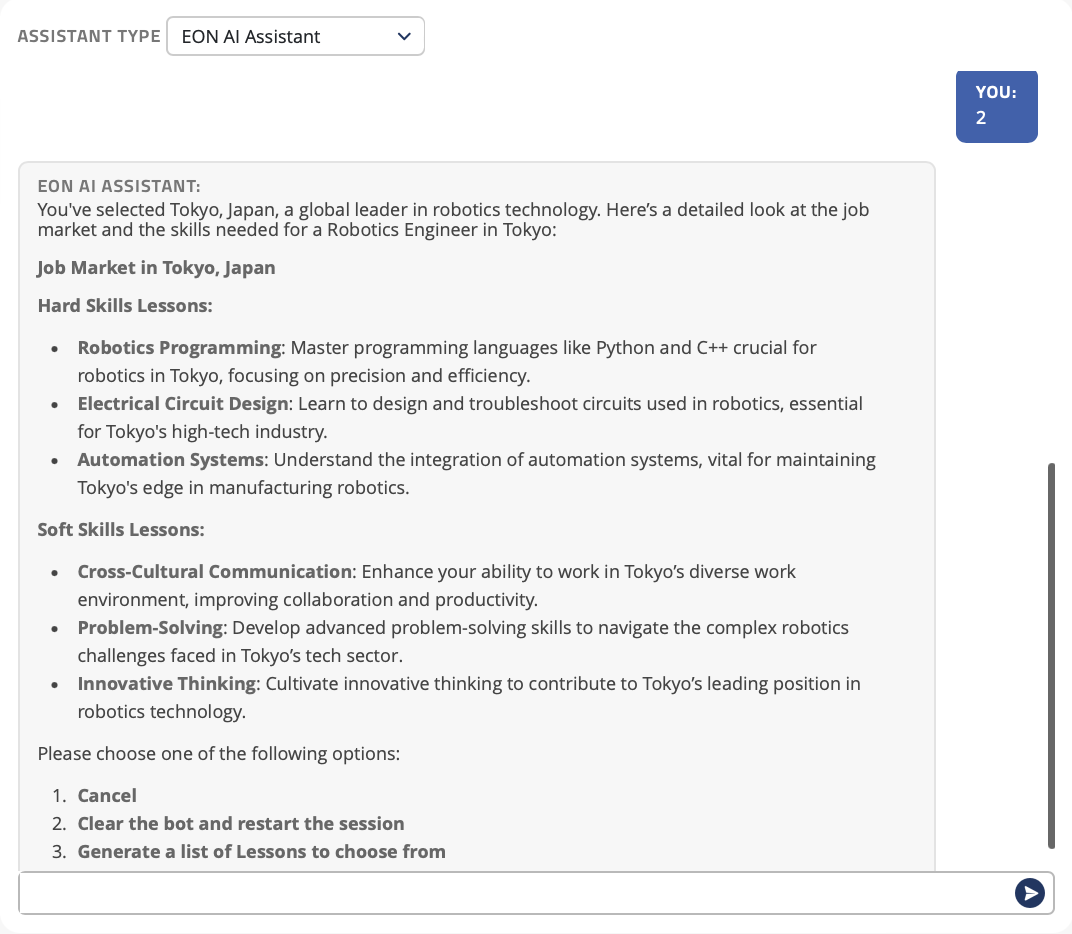
The EON AI Assistant will now create a list of 3 Hard skills and 3 Soft skills lessons.
If you wish to generate these, type 3
If you wish to clear the bot, to begin with a new topic/region, type 2
If you wish to cancel the generation of the lessons, type 1
If you choose to generate the lessons, you will be taken to the following screen:
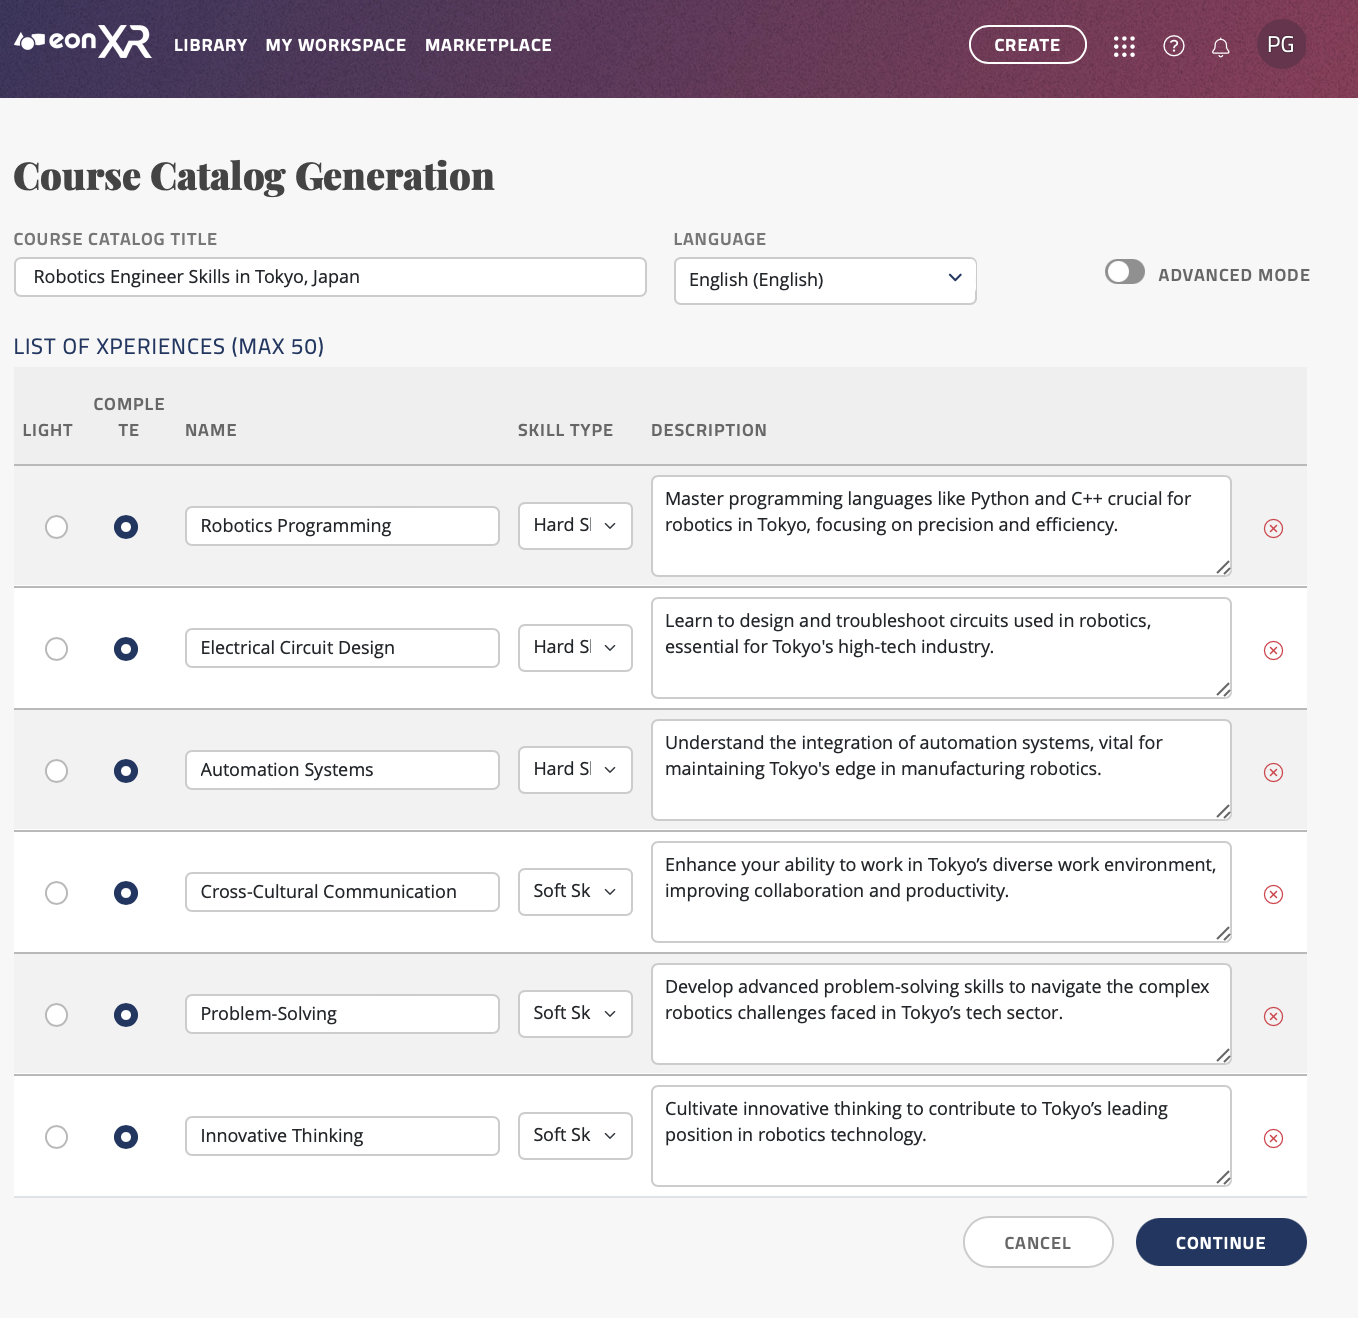
In this screen, you will see the topics that have been created by the EON AI Assistant
You may rename the syllabus title by editing the name in the text box labeled “COURSE CATALOG TITLE”.
You may also change the language by clicking the drop down menu labeled “LANGUAGE”, we currently support over 20 languages.
There are two options for the Xperiences you are able to create from these topics; AI READY LIGHT, or AI READY COMPLETE. Here is the difference:
AI READY LIGHT only creates the topic and thumbnail for you to manually edit and add things in the EON-XR app.
AI READY COMPLETE directly creates a full lesson. This includes the topic, thumbnail, images, annotations and quizzes. You can directly open the Xperience once it is automatically created.
If you would only like to create the topic and thumbnail so you can manually edit the Xperience, keep the checkbox ticked in the “AI READY LIGHT” column.
If you would like EON-XR to create an Xperience for you, tick the “AI READY COMPLETE” box next to the topic you wish to create the lesson for.
You may rename the topics by editing the text input box under “NAME”.
You may change the “Skill type” by clicking on the dropdown menu under “SKILL TYPE”; you have 2 options for this:
Hard Skills: This option creates a hard skills Xperience where an avatar will guide the user through important aspects of the topic you have inputted, showing 3D models, videos and images to the user.
Soft Skills: This option creates a 1 on 1 role-play scenario, firstly teaching the important aspects related to the topic, then giving you the ability to discuss this topic with a trained avatar with its own personality and mood. Finally, you receive a score based on your performance depending on the scenario.
You may change the description by editing the text input box under “DESCRIPTION”.
If there are courses you do not wish to import into your institution, simply press the red
cross. This ensures that only relevant courses are added to your library.