Setup
Access LTI Settings
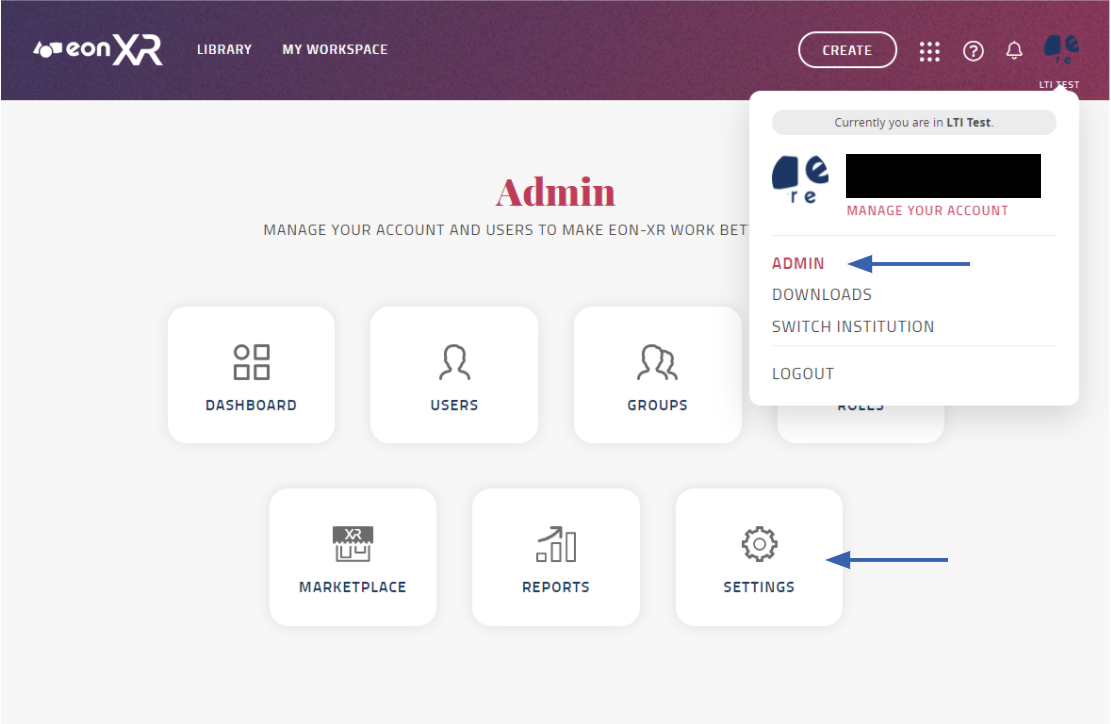
Login to EON-XR, select the account menu by clicking on your profile icon then navigate to the Admin section.
Your account will need a role that allows access to this section.
If you do not have access to Admin you will not see this option in the dropdown.
Select Settings, you will need a role that grants permission to Modify LTI
If you do not have this permission, you may be able to access Settings but be unable to access LTI Settings.
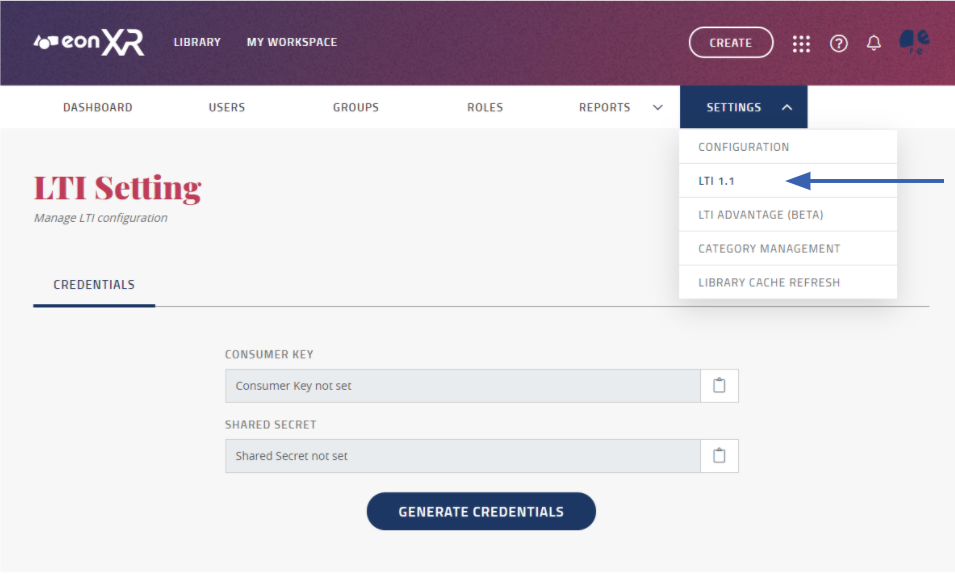
From the Settings landing page, select the Settings menu and if you have a role that can manage LTI, you will see an LTI 1.1 option in the dropdown.
Generate Credentials
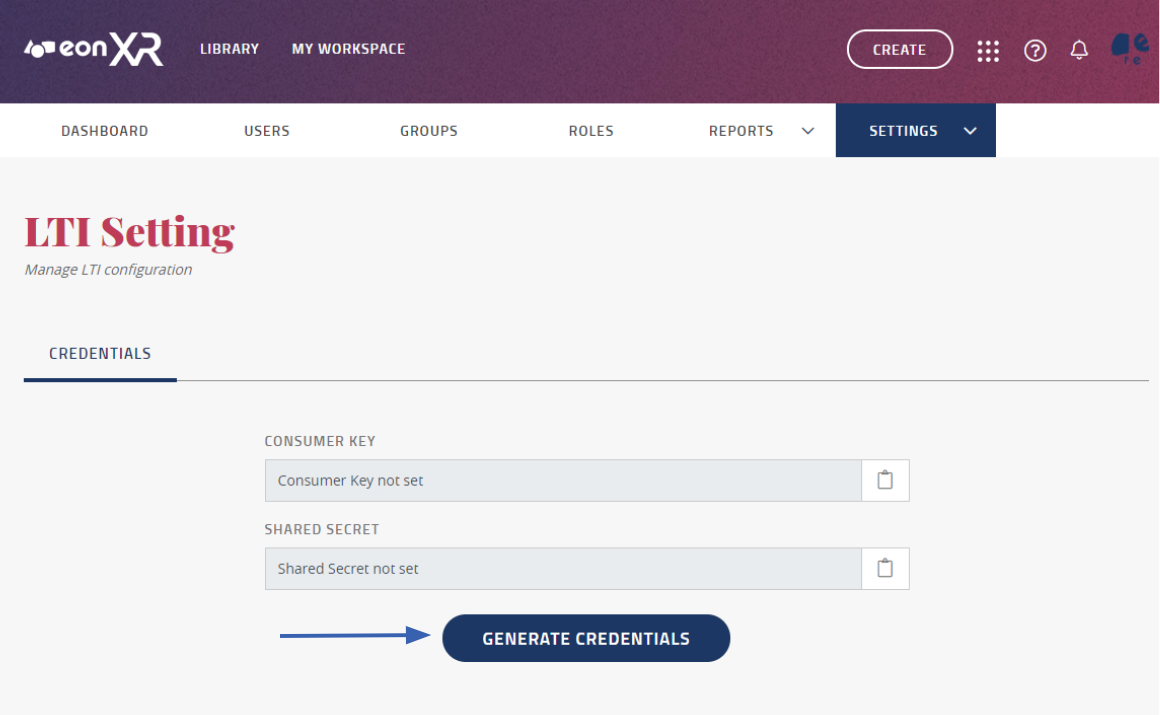
On the LTI Settings page, if credentials have not yet been generated, select the Generate Credentials button.
You will then be redirected to the Roles tab.
Map LMS Roles to EON-XR Roles
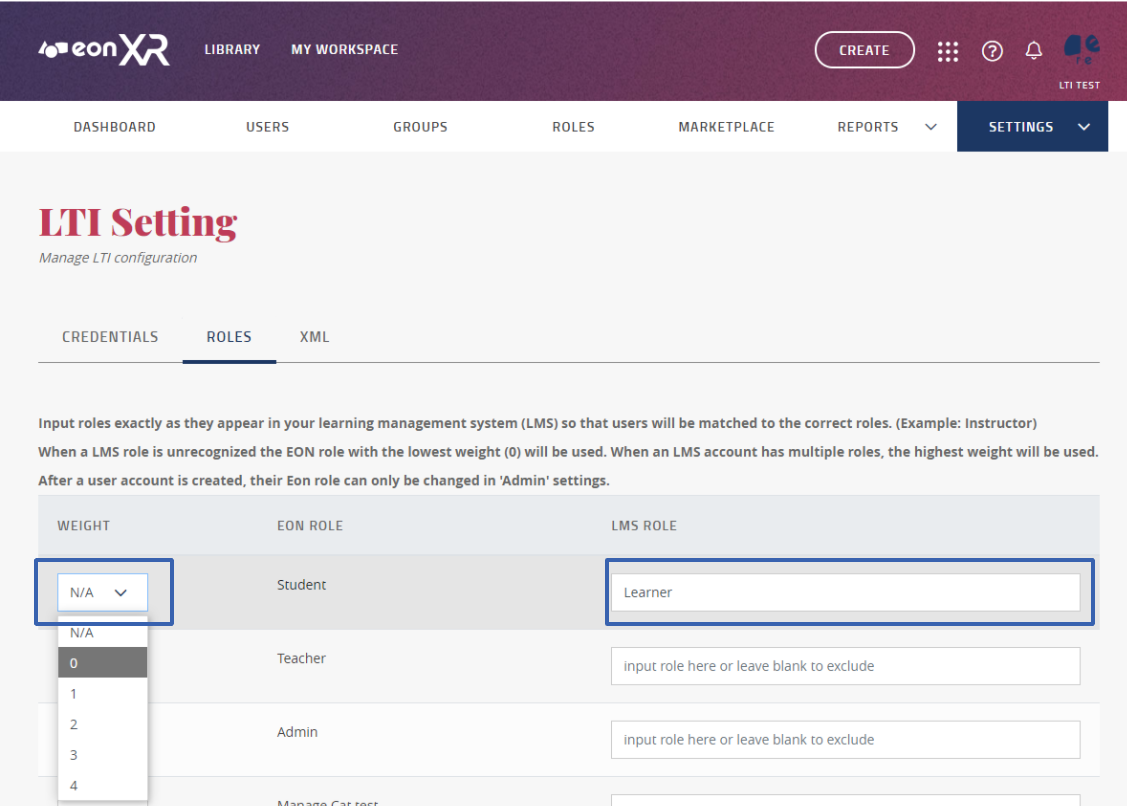
This page allows you to decide which lms role will be assigned to which EON-XR role. Input the lms role you want associated with the EON-XR role. EON-XR roles you do not wish to be assigned should be left blank and will not be assigned.
Choose the appropriate weight. If a user has more than one lms role, the highest weighted role will be assigned. If a users lms role was not mapped, the lowest weighted role will be assigned by default.
After a user account has been auto provisioned and assigned a role, changes to that account must be made in the User Management page, changing this setting will not affect existing accounts.
An actual role in your lms will look like this http://purl.imsglobal.org/vocab/lis/v2/institution/person#Instructor however, it is acceptable to enter a keyword such as Instructor instead, as long as the keyword matches exactly the characters within the role name and is unique to that role.
When finished, select the Update button.
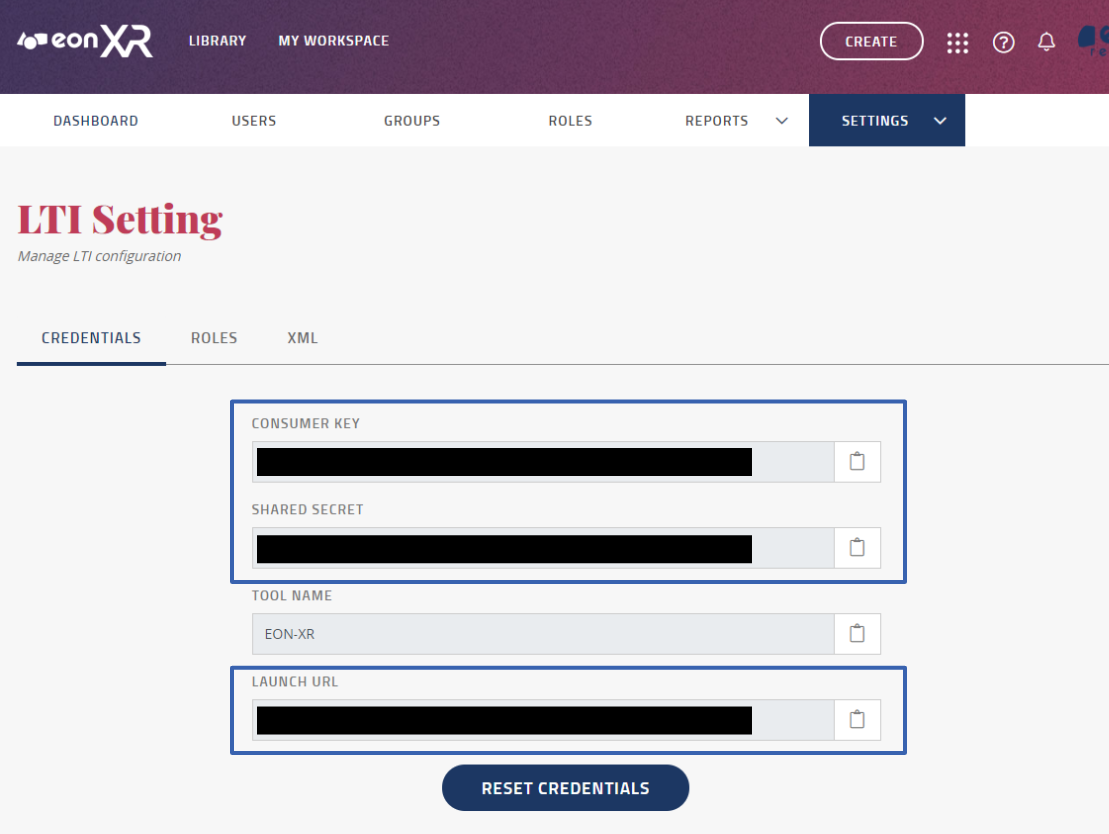
Then select the Credentials tab, your lms will need the information listed.
LTI 1.1 Tool Link
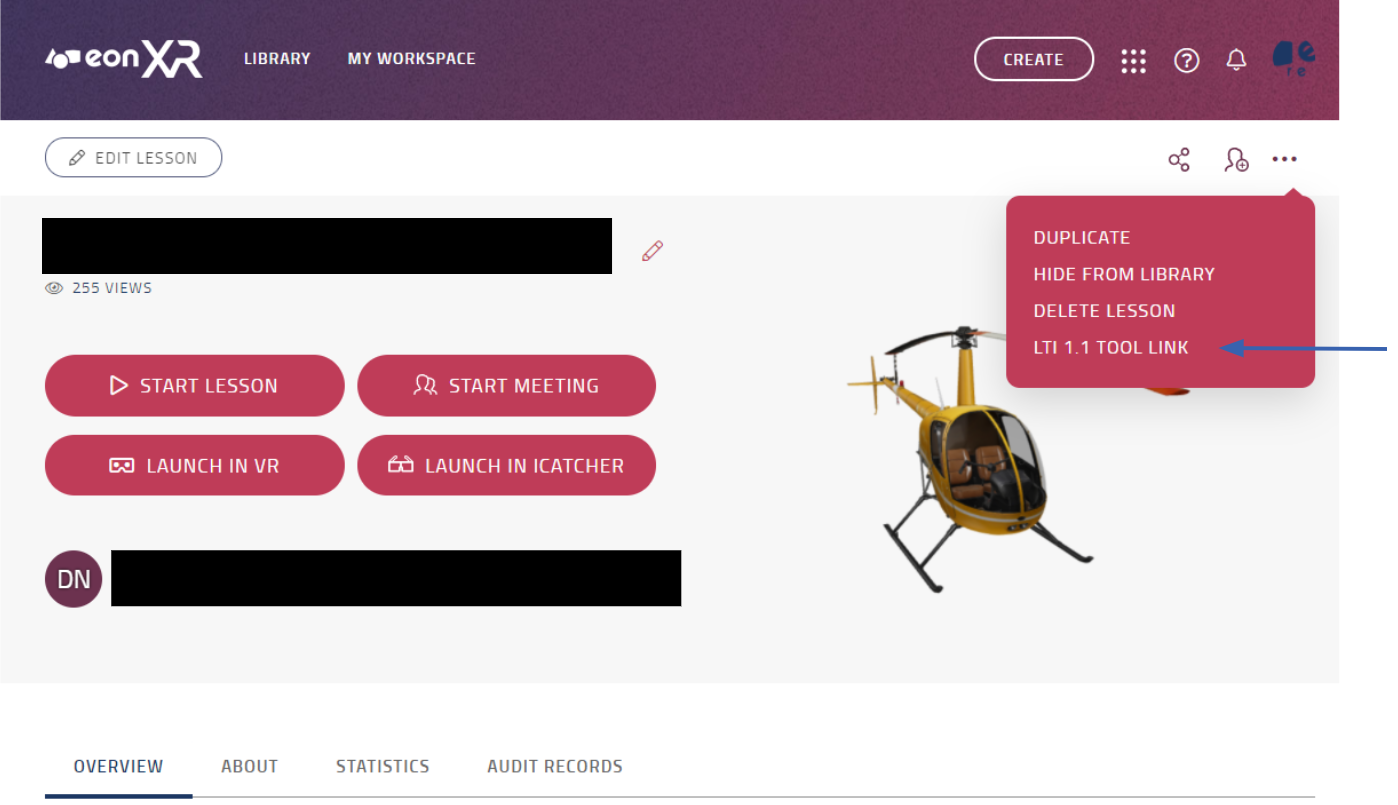
Navigate to the desired lesson on the EON-XR Platform and select LTI 1.1 Tool Link
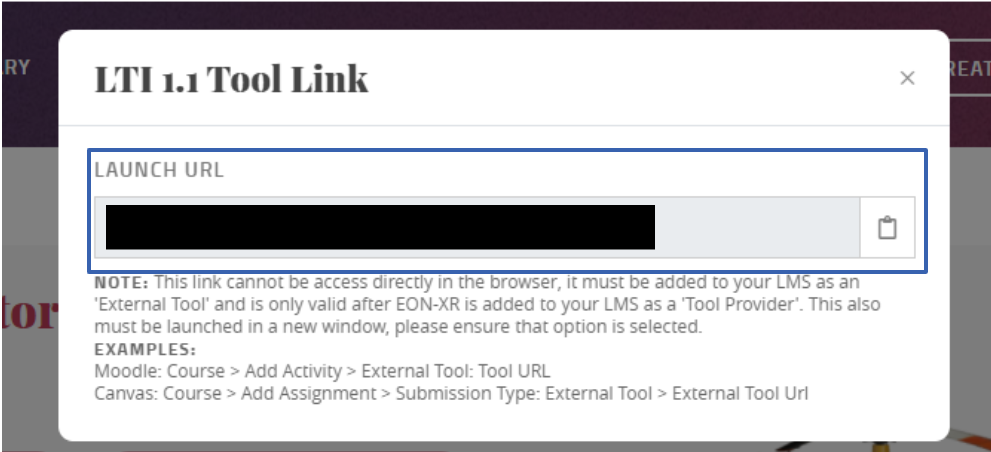
You will need this link to create a new assignment or activity linking to this lesson from your lms. Note that this link only works for LTI integrations, it cannot be used directly in the browser.