Setup
Access LTI Settings
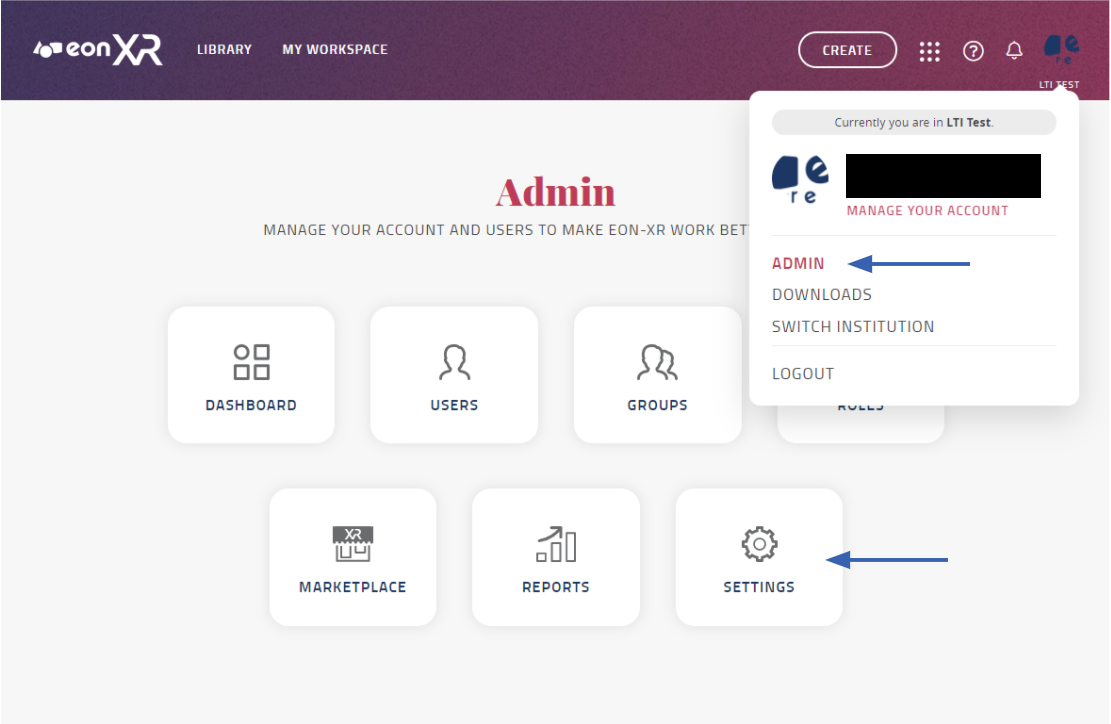
Login to EON-XR, select the account menu by clicking on your profile icon then navigate to the Admin section.
Your account will need a role that allows access to this section.
If you do not have access to Admin you will not see this option in the dropdown.
Select Settings, you will need a role that grants permission to Modify LTI
If you do not have this permission, you may be able to access Settings but be unable to access LTI Settings.
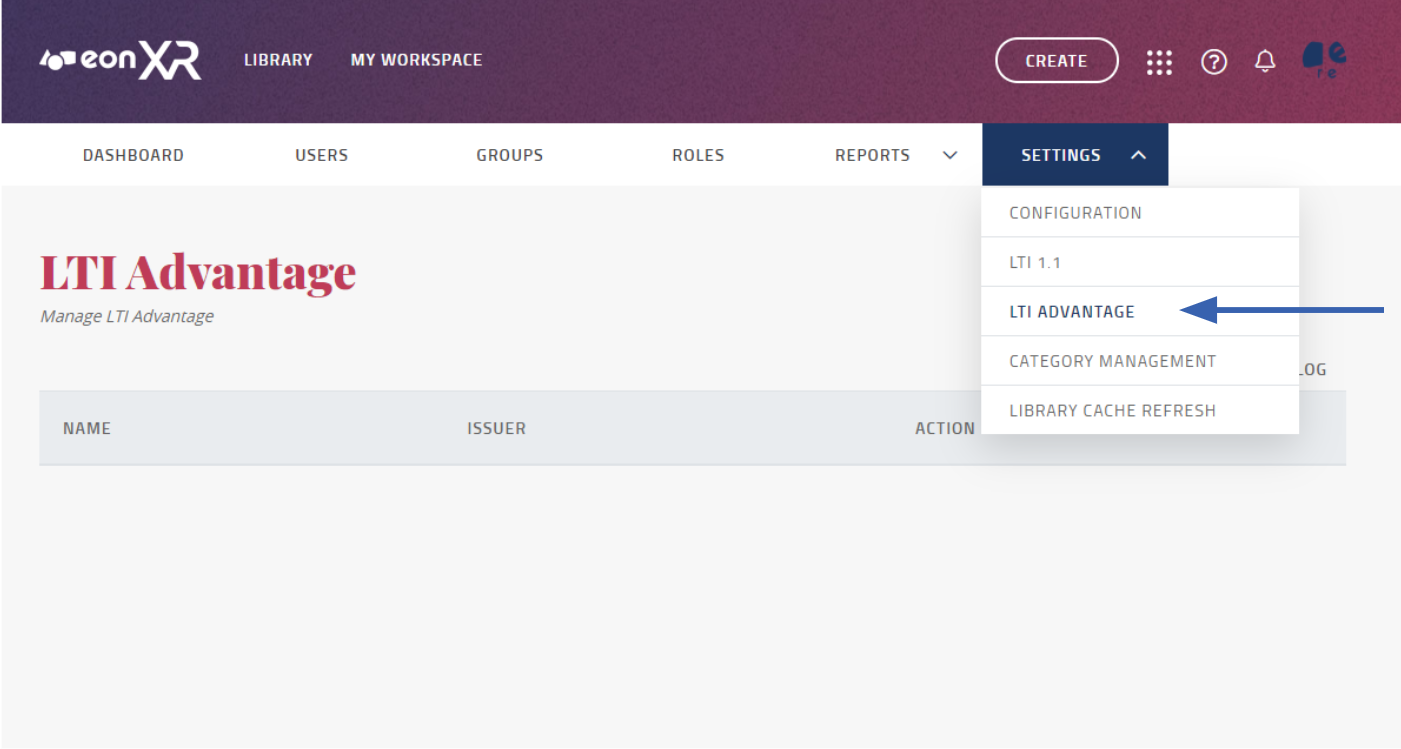
From the Settings landing page, select the Settings menu and if you have a role that can manage LTI, you will see an LTI Advantage option in the dropdown.
Add Platform
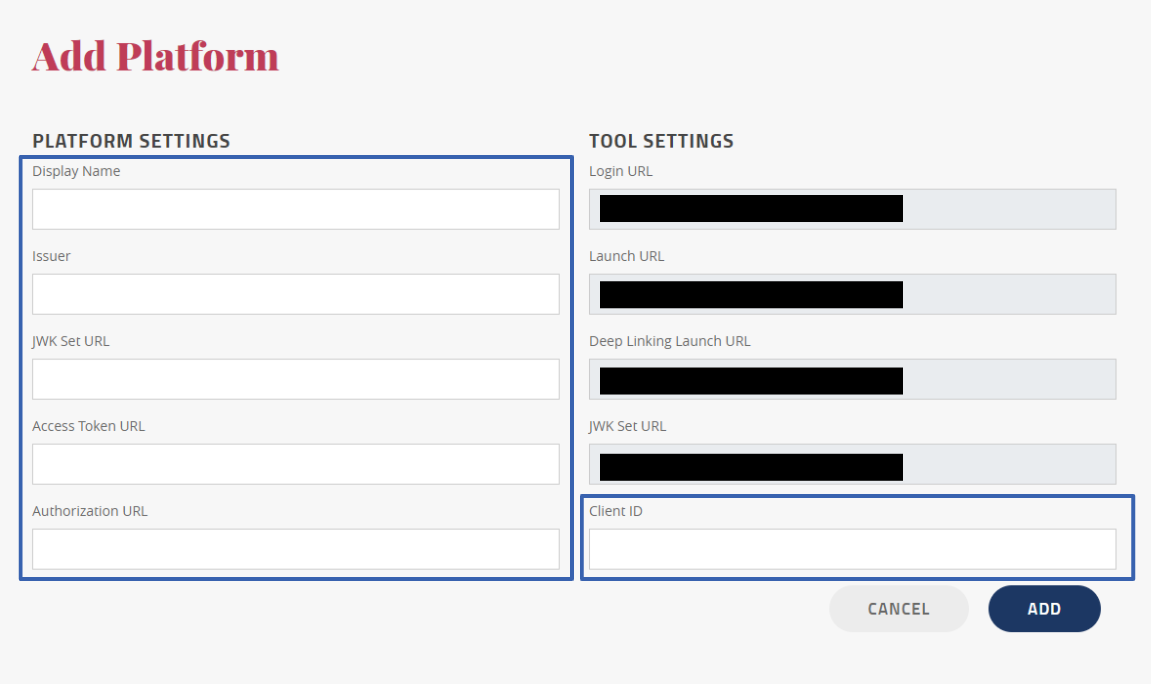
Select Add Platform and enter the required information provided by your lms.
Some information may not be generated by your LMS until the next step below.
Copy Information Into Your LMS
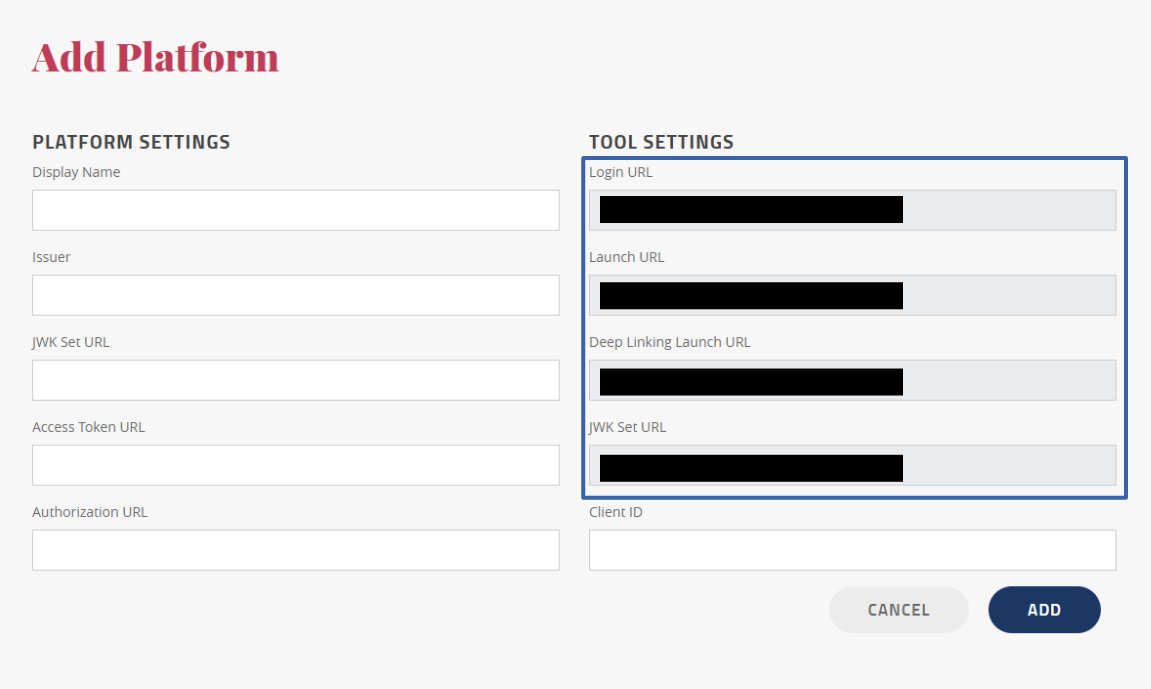
Copy the information into your lms and finish registering EON-XR as an external tool provider.
The lms will generate information such as the Client Id that is required to finish adding the platform.
Map LMS Roles to EON-XR Roles

Input the lms role you want associated with the EON-XR role.
An actual role in your lms will look like this http://purl.imsglobal.org/vocab/lis/v2/institution/person#Instructor however, it is acceptable to enter a keyword such as Instructor instead, as long as the keyword matches exactly the characters within the role name and is unique to that role.
Select the EON-XR role you want associated with the lms role in the dropdown and add the entry.
Add Deployments
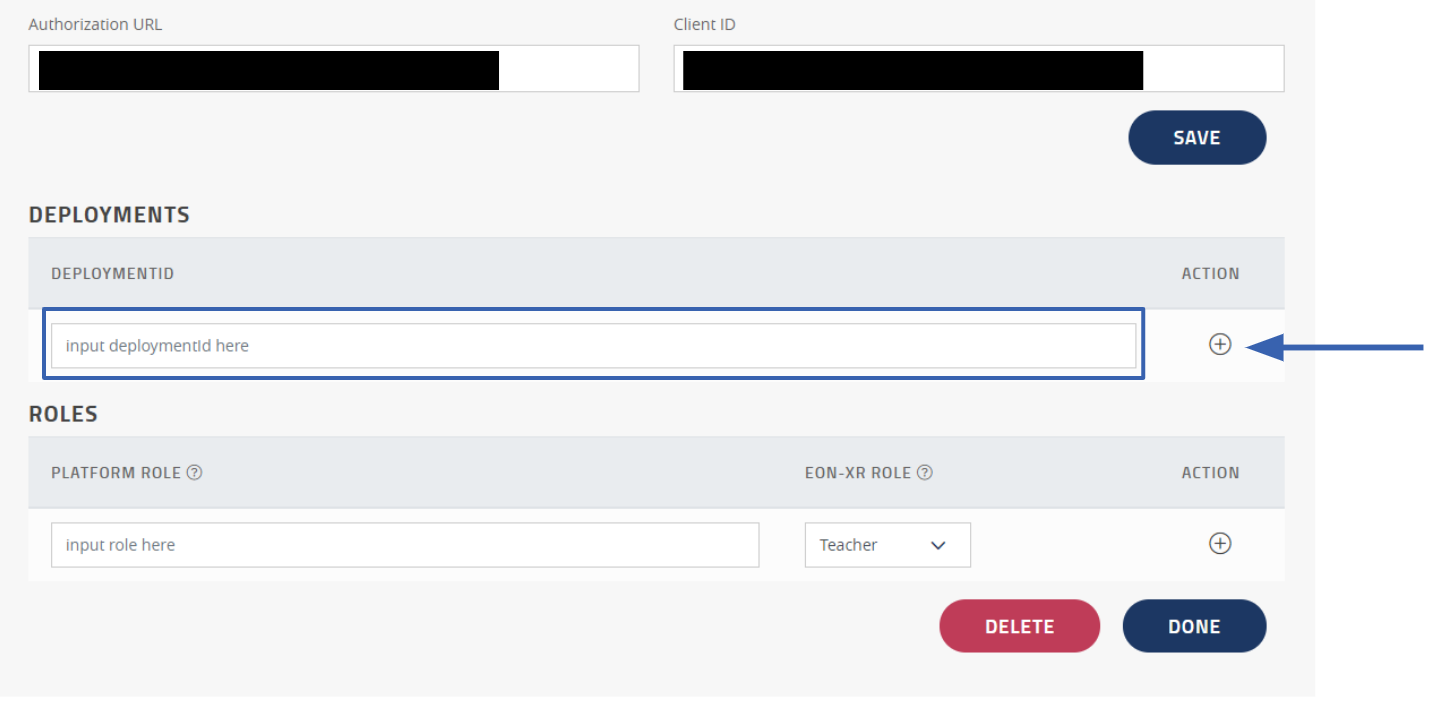
When adding the EON-XR tool to a course in your lms you will need to add the associated Deployment Id provided by your lms.
In most cases courses will share the same LTI 1.3 tool registration, but only courses with their associated Deployment Id added will be authorized to launch the tool.