Import 3D Asset
You can upload 3D assets either from the  create menu on mobile device or
  menu on desktop.
The 3D assets are used when creating lessons in EON-XR.
menu on desktop.
The 3D assets are used when creating lessons in EON-XR.
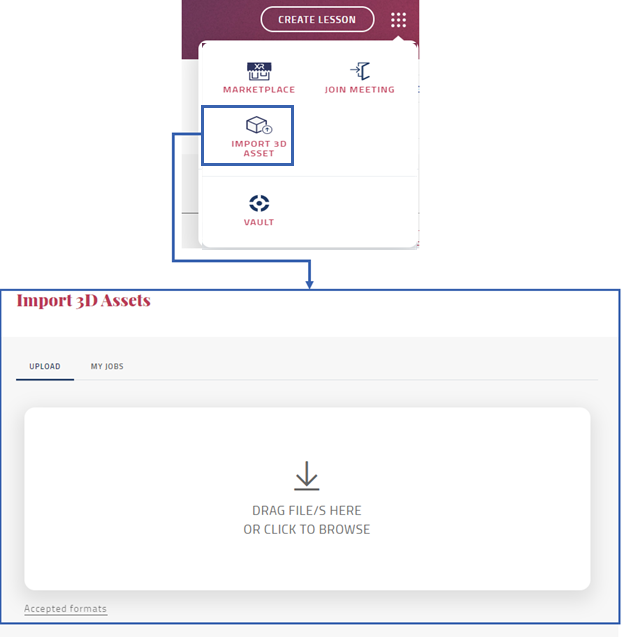
Select IMPORT 3D ASSET
Select asset(s) by dragging or browsing the file(s)
NOTE: Accepted formats displays a list of supported file formats

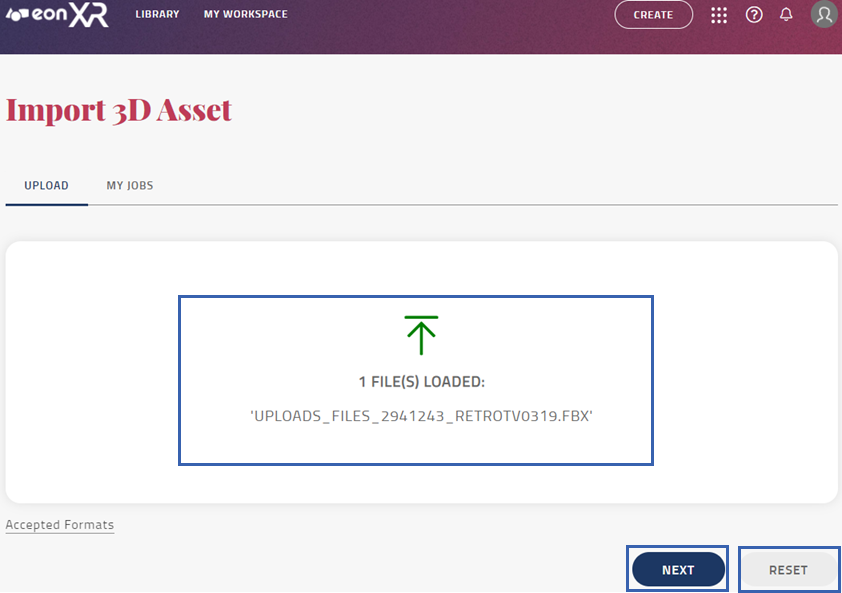
Select Next to proceed
NOTE: A warning message is displayed if files with unsupported file formats are uploaded.
Alternatively, Select Reset to remove the uploaded files
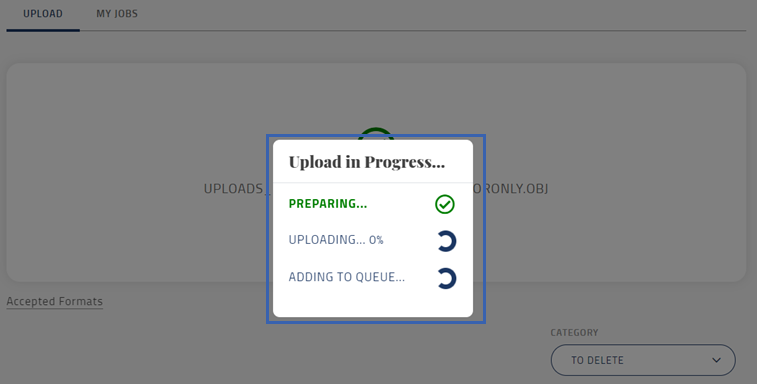
Select Set asset category to set the category for your asset
Select Start upload to start the upload
My jobs
In the My jobs dashboard you can view your imported 3D assets and check the asset details, such as ASSET NAME, DATE CREATED, STATUS, and PROGRESS. You can also search for specific assets using the search bar.
Available statuses:
All
Success
Failed
In Progress
In Queue
Cancelled
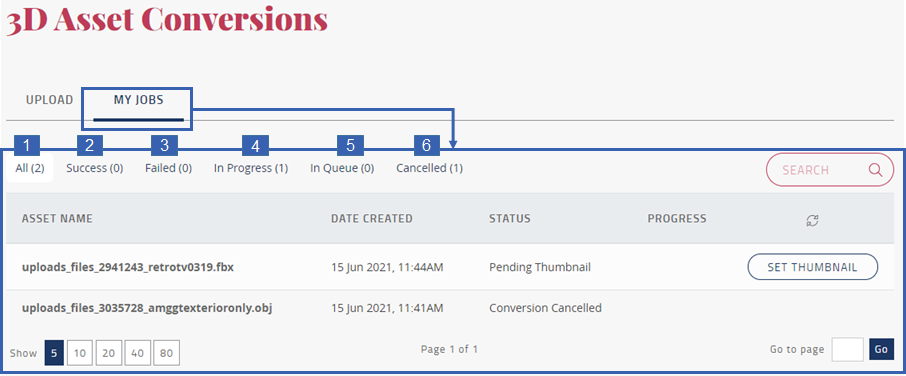
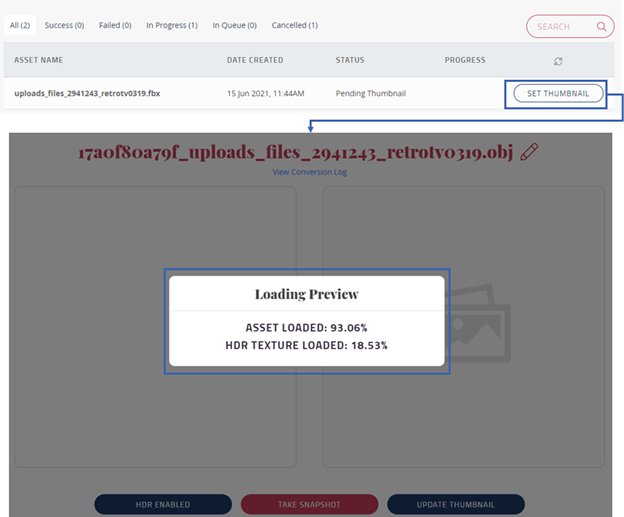
Select Set thumbnail to create a thumbnail for the asset. A pop-up window with Loading Preview appears on the screen which loads the asset to create a thumbnail.
Select edit icon
 to edit the name of the asset.
Select
 to save the lesson name, or select
  to undo changes
Select Enable dynamic lightning to improve the image quality and apply lighting on the object
Select Disable dynamic lightning to decrease the image quality and disable applied lightning
Select Take snapshot to take snapshot of the asset
Select Update thumbnail to set the thumbnail for the asset
NOTE: You will be redirected to the MY JOBS page after successfully updating the thumbnail
Once asset is uploaded, select View asset to display the Asset overview
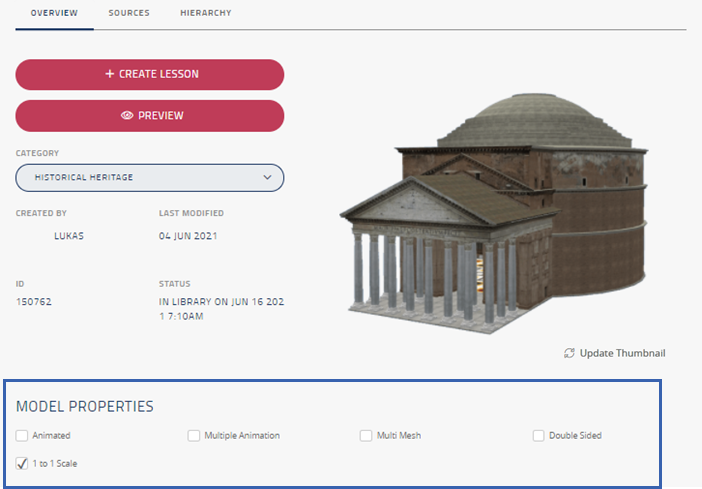
Asset overview
The Asset overview includes options to create lesson using the asset, preview asset and displays information about the asset.
Select Create lesson to create a new lesson
Select Preview to view the asset
Select Category to set the category from a drop-down list
Select Asset information to display asset details, such as CREATED BY, LAST MODIFIED, ID, and STATUS
Select Update thumbnail to change the asset thumbnail
Select Model properties provides additional settings for the 3D object:
Animated: Use if the asset contains at least one animation
Multiple animation: Use if the asset contains more than one animation
Multi Mesh: Use if the asset has multi mesh in it
Double-sided: Use if the asset penetrates the inner detailing of the model
1:1 Scale: Use if 1:1 scale is enabled for the object in AR mode
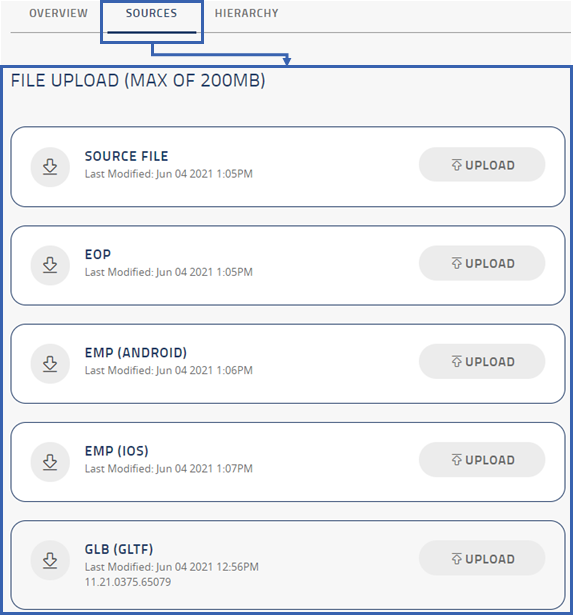
Sources
Sources include options to download the asset file(s), or upload new asset file(s). If you upload new file(s), the current asset file(s) are replaced.
Select Download or Upload for the different file formats: 3DS MAX file / EOP / EMP (Android / IOS) / GLB (GLTF).
NOTE: The maximum file size for uploads is 200 MB
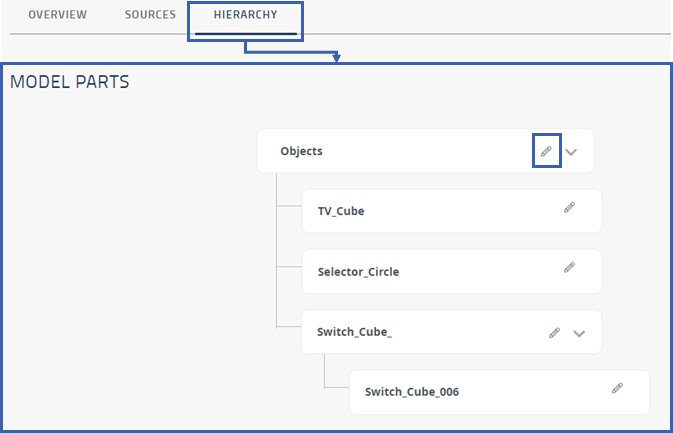
Hierarchy
Hierarchy includes all the model parts of the 3D asset.
Select to edit the model parts name.
NOTE: Maximum of 30 characters can be added to the model part names.