Metaverse Builder#
EON Metaverse Builder (MVB) is a tool used to compose multiple 3D objects together in AR mode, when creating a 3D Xperience. Some functionality in the MVB authoring tool is the same as described in the Create 3D Xperience article.
You can add learning material and media content for each object in the MVB using:
Assessment portal to create assessment activities, such as Quiz, Locate, and Identify
Knowledge portals with different media content, such as Video, Image, PDF, and memo
Memo in Knowledge portals, used to play text elements with a synthesized voice of your choice
You can also use add-on functionality to enhance learning experiences created with MVB:
Create an MVB experience#
You can use the Create  function to create an MVB experience.
After creating the Xperience, you can add details in the Xperience Page, such as description, additional learning materials, and assigned students.
The Create function directs you to select a model and build the experience using the MVB authoring tool.
Select Create
and Metaverse Builder to create an MVB experience

The MVB authoring tool launches in AR mode
Place your avatar, which guides you through creating your Xperience
If you are adding subsequent objects, select
 in the
  menu
menuDescribe what you want to create with your voice and then:
Select
 to search for objects, and then select
  to search
Optionally, select
 to say something else
Alternatively, select
 to type the search words using the keyboard

Select the object you want to use, and select Next to proceed
If the Auto-generate Knowledge portal checkbox is selected, Knowledge portal and activities in Assessment portal are automatically created for the object
Note
Activities are only auto-generated for existing annotations. The number of annotations affects which activities are created.
Hint
Assets are graded based on their complexity and how they perform in a 3D Xperience.

Select an anchor point on a surface location
The object is downloaded to the anchor point
Alternatively, select X in the progress bar to cancel the download
Repeat steps 5-8 for each object you want to add
Select X to SAVE & EXIT and go to the Xperience page
Optionally, edit the title of your MVB experience and update the Xperience thumbnail
Alternatively, select DISCARD to return to the Library without saving
Note
These exit options are only displayed the first time you exit a new MVB experience. On subsequent exits, your Xperience is saved automatically.

MVB authoring tool#
You can select and access different tools and menus to create an immersive Xperience:
Select exploration tools to interact with the object(s) and view annotations
Select the Move all icon to select objects
Select Object name to change object and part name in hierarchy view
Select
 to navigate to the start position of the current hierarchy
Select
 to access Xperience options in the experience menu
Select
 to show or hide tooltips
Select the AR tools to create persistent anchor or change object position
Select
to access Content menu

Use multitouch gestures to select, manipulate, and isolate different components of the object:

Select
 to preview your Xperience in play mode

Exploration tools#
The exploration tools include:
Annotations
 : view descriptions and activities attached to object parts
Knowledge portal
 : show or hide Knowledge portals
Explode
 : break apart the 3D object
X-Ray
 : view the inner details of the 3D object
Animation
 : view animation associated with the 3D object
Note
The animation option is only available for 3D objects with animation

Object select#
Selected objects are indicated by the multicolored circle surrounding the base of the 3D object.
Tap on the 3D object to select that specific object

Select all 3D objects with


You can manipulate selected object(s) as follows:
Re-anchor the objects as a group
Rotate all objects
Set the scale for all objects
AR tools#
You can select the AR tools to:
Adjust placement the 3D object(s) on a surface
Select and grab parts of the object(s)

Experience menu#
You can select options in the Experience menu to:
Option |
Remark |
|---|---|
Delete selected object |
|
Delete persistent anchor |
Delete created persistent anchor |
Set thumbnail |
Create a new thumbnail for the Xperience page |
Disable / Enable AI Assistant |
Either hide or show the AI Assistant avatar |
Save scale |
Save the current image scale as 1:1 real scale |
Digital twin: |
|
Start alignment |
Create a digital twin of the object, placed in relation to real-world objects. Annotations are linked with the digital twin |
Hide model |
Hide the 3D object from view |
Annotation options: |
|
Reverse annotations |
Reverse direction of annotation anchors |
Delete all annotations |
Delete all annotations you have created for the object |
Hide / Show buttons |
Either hide or show tools and menus |
Settings |
Open Settings menu to configure sound and lightning effects |

Settings#
Number |
Remark |
|---|---|
Background sound |
Upload an audio file to play in the background |
Shadows |
Enable the 3D objects to cast shadows |
HDR |
Enable high dynamic range reflection on the 3D object |
Enable segmentation of physical objects. Improves illusion that 3D objects exist in real-world |

AI Assistant#
The AI Assistant guides you to create new Xperiences, answers questions that you ask, and creates the auto-generated Knowledge portal and Assessment portal.
You can change the visual look and voice of your AI Assistant in the user profile menu.
Note
The AI Assistant is only available when creating Xperiences with EON Metaverse Builder.
Note
The information generated by the AI Assistant is saved in a AI Report, accessed in the Xperience Page.
Ask the AI Assistant questions after adding the first object to your Xperience:
Select
 to open the AI portal
Select
to ask the AI assistant your questions

Select
to receive a response from the AI Assistant
Optionally, select
Repeat this step to ask additional questions

The conversation history is displayed in the AI portal
Select
to delete questions and related answers

Hint
The AI Assistant can point out and highlight parts in the 3D object, if the answer and part name matches.
Hint
You can select Suggested questions to ask to receive suggestions from the AI Assistant.
Optionally, select
 or to hide the AI Assistant
Markup Guide#
Welcome to the Markup User Guide! Markups are 3D add-ons that you can add to the scene for better like icons or text like a sticky note around the model or the environment. The original idea is to bring each player’s markup data in a meeting so they can share extra ideas through the markups.
How to use the markup toolbox:#
Click the
 button

Click on the Markup Toolbox
 icon on the far left.

This is the Markup Toolbox where it holds Markups you want to use in the scene. To add more Markups to your Toolbox, click on the
 icon on the bottom right corner of the Markup Toolbox panel.

This is the Markup Toolbox Editor that acts like a catalog of Markups. Click on different tabs at the top to see different categories.


– Numbers (Left) and Icons (Right) categories –
Click on any of the icons on the left. To add to your Toolbox, click on the right arrow button in the middle.

When done adding, click Save to save your changes.
How to add markups:#
To put Markups in your scene, reopen your Markup Toolbox and click on any one of the icons available.

The Markup object will pop up and be attached to the model initially. Drag it around the scene to a desired highlighted model part and tap on screen to confirm.
If a Persistent Anchor is present, the Markup object will be allowed to be placed beyond the model, in the environment.

Once the Markup is set, the Markup should be attached to the associated model part and will continue to follow the part.


When you tap on the Markup object placed, it will select the Markup object and highlight the associated part. By selecting, a menu of buttons will appear around the Markup object.
You can press the  icon to delete Markup.
Tap anywhere outside of the highlighted area to deselect.

You can see the list of present Markups in the current scene in the List tab of Markup Toolbox.
You can also select Markup by tapping the Markup item in the list.
You can toggle visibility using the  icon.
icon.
You can also select Markup by tapping the Markup item in the list.
You can delete all Markups by pressing the Delete All button at the bottom.
In order to use Text Markup, tap on the
 icon in your Markup Toolbox.

Here, you can speak into the microphone of your device or press the
 icon to type in your desired text.

A Textbox will pop up with the desired text and you can place it on the model or the environment just like any other markups. Tap to confirm.

The Text Markup works just like any other Markup. It will attach to the selected model part during initial placement and will remain attached. It can also be selected for more options.


Welcome to markup!#

Soft Skills#
Welcome to the EON-XR Soft Skills Training feature, a virtual space designed to enhance your soft skills through immersive learning experiences. Follow this guide to navigate and create your own soft skills training scenarios.
Accessing Soft Skills Feature:#
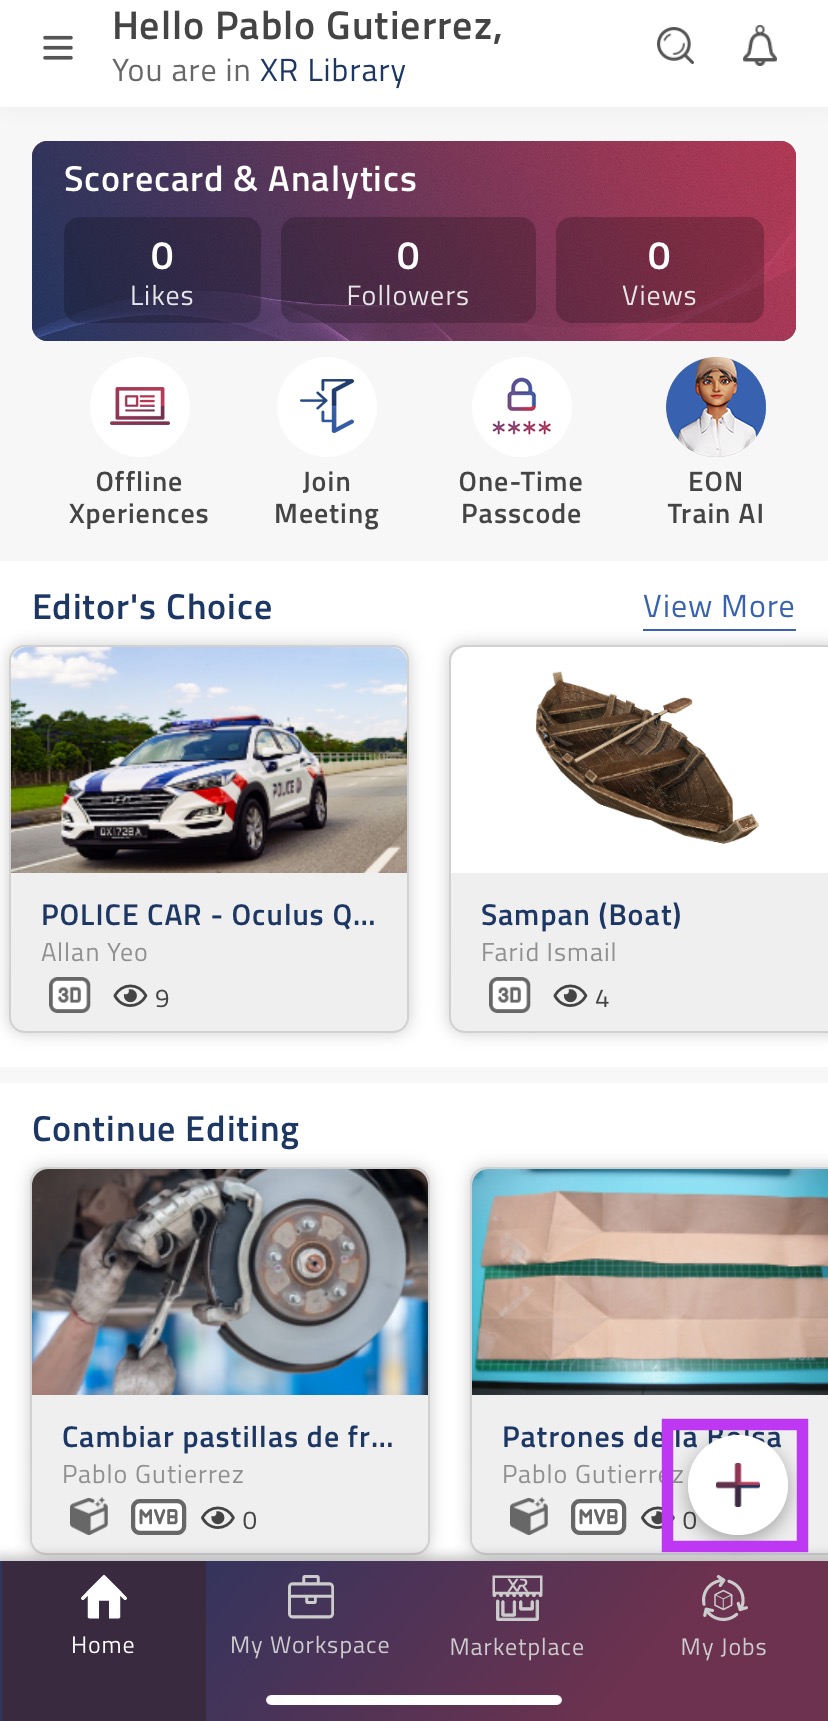
Open the EON-XR application and log in to your account.
From the home menu, press the
 button in the bottom right corner.
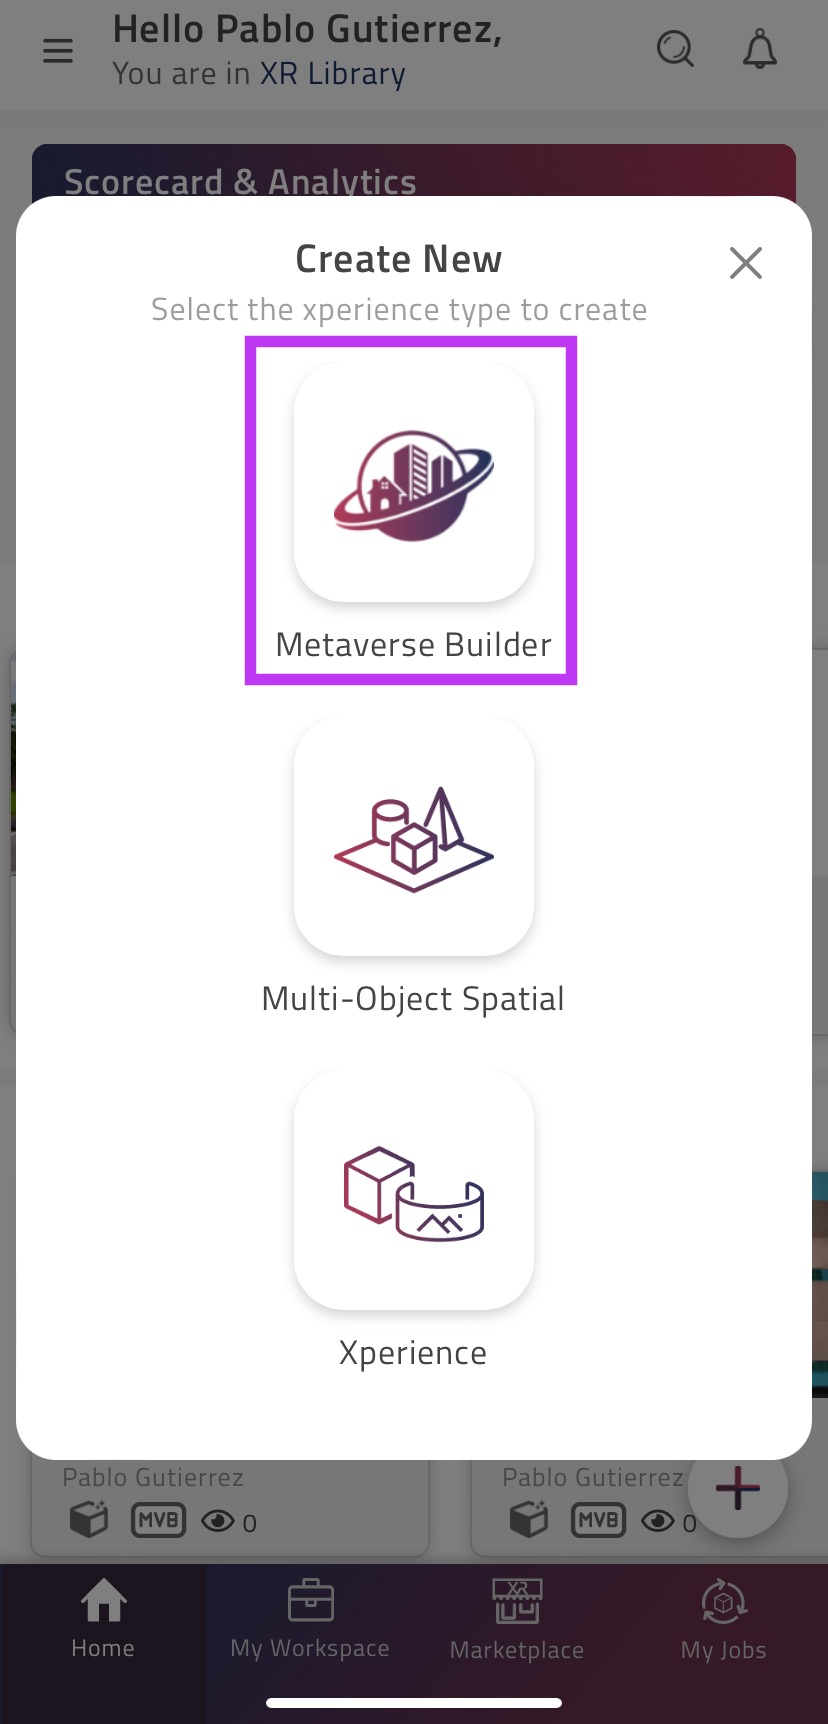
Select the “Metaverse Builder” Xperience type:
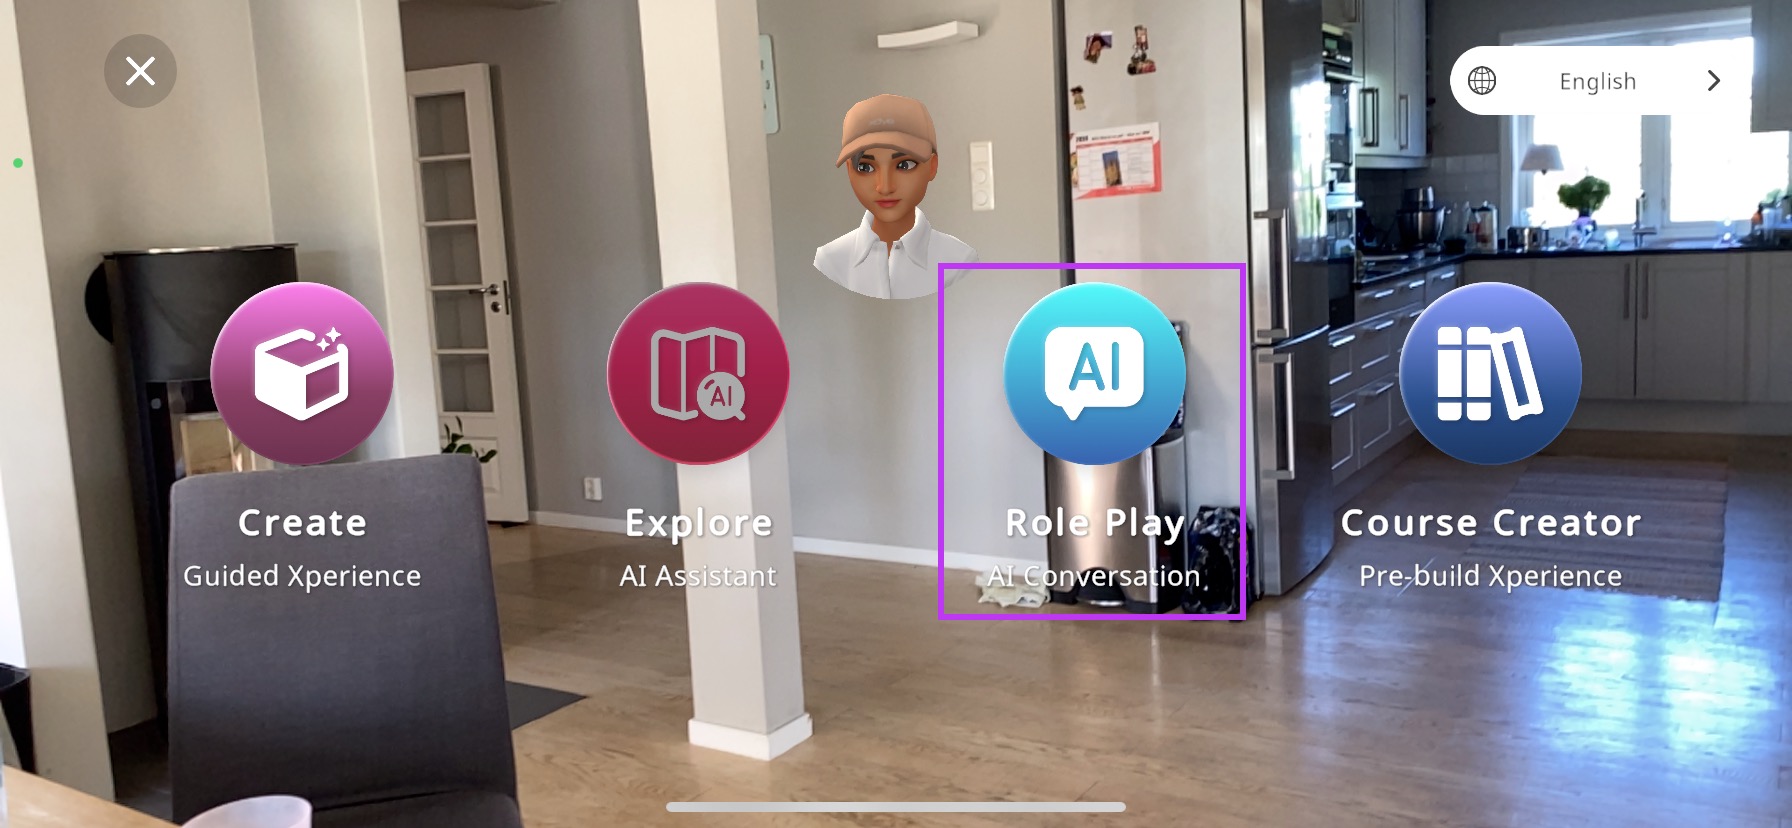
Rotate your device and select the “Role Play” option from the Metaverse Builder menu:
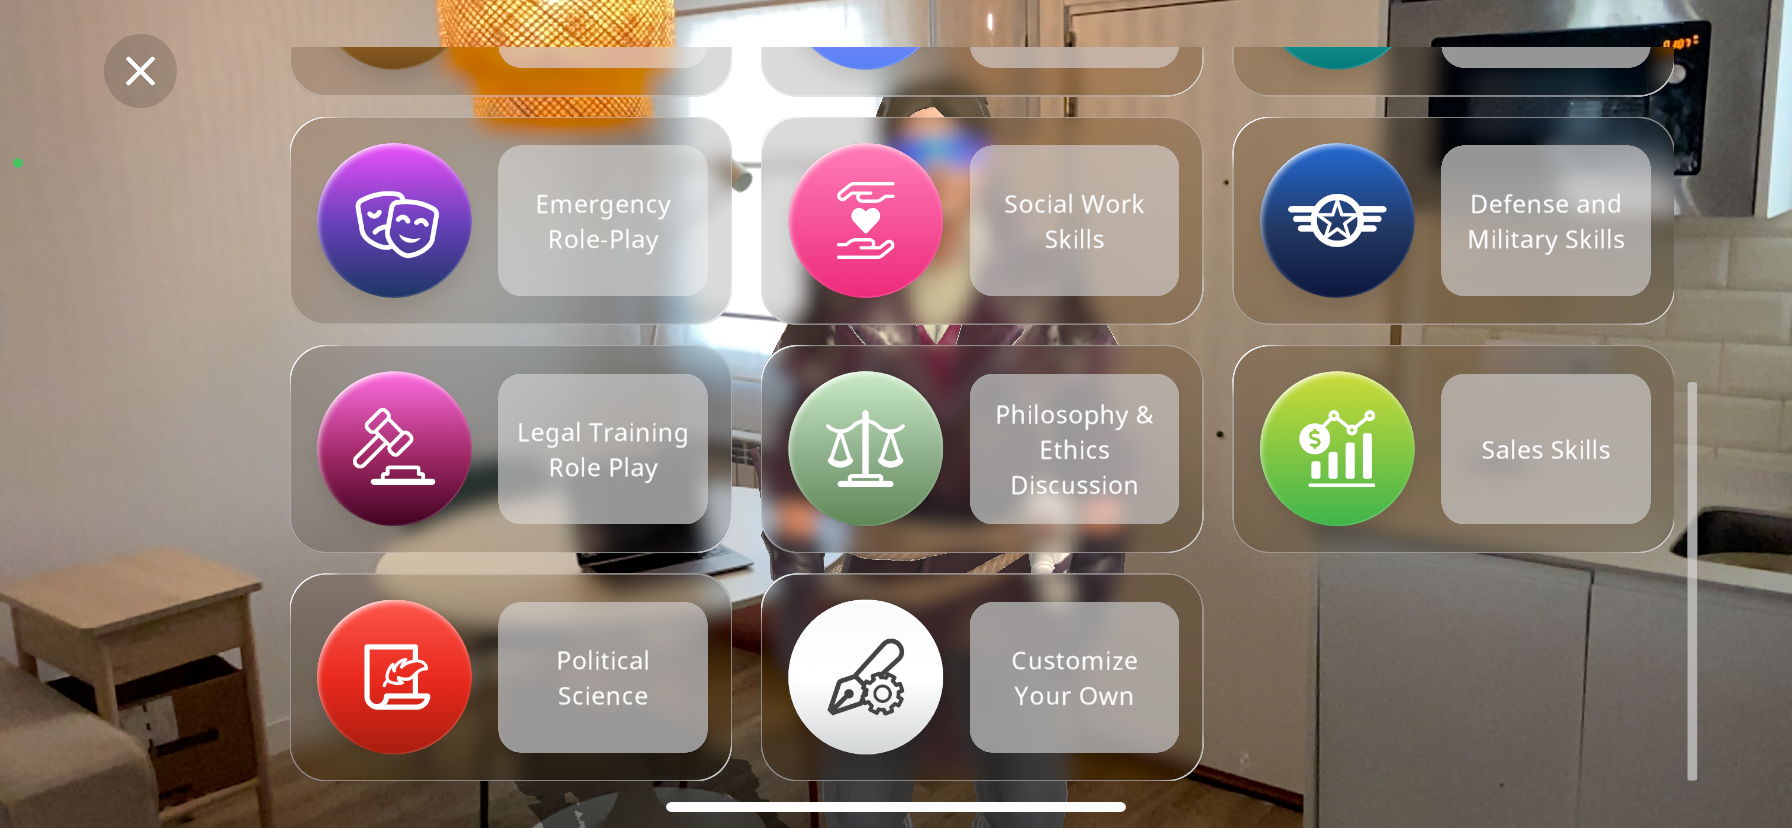
Here you will enter a virtual space with various soft skill categories. You can scroll down to view all of the options:
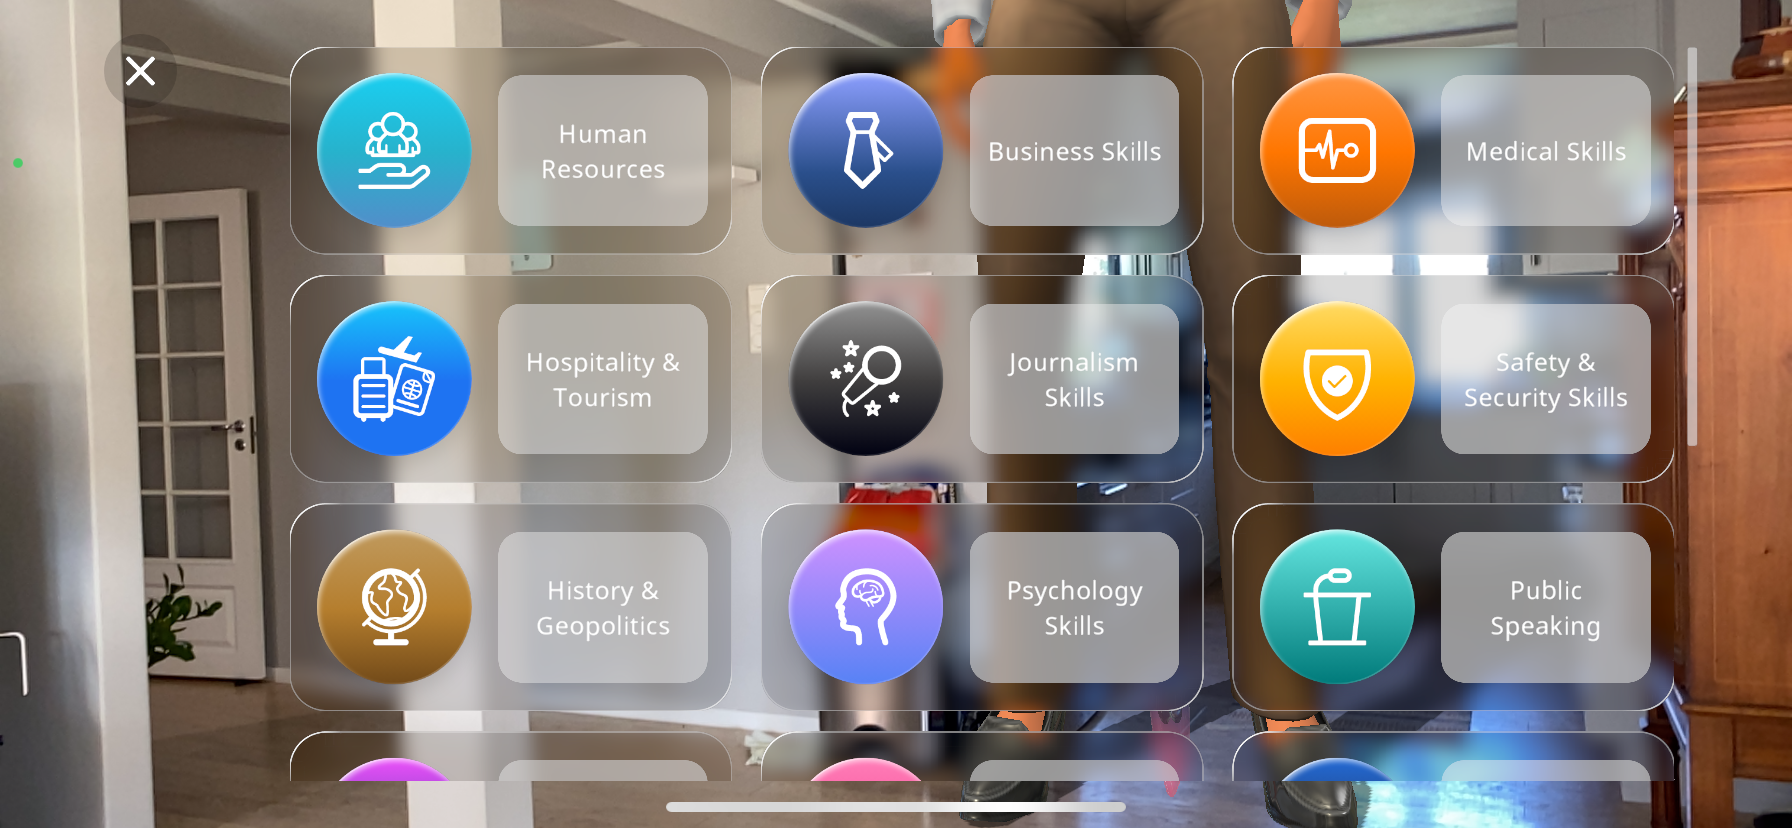
If you scroll to the bottom of the list, you can press the “Customize Your Own” option, where you can type in your own category and scenario that AI will generate:
The option to use text-to-speech immediately pops up, so simply say the custom category out loud, and this will be taken as the input:
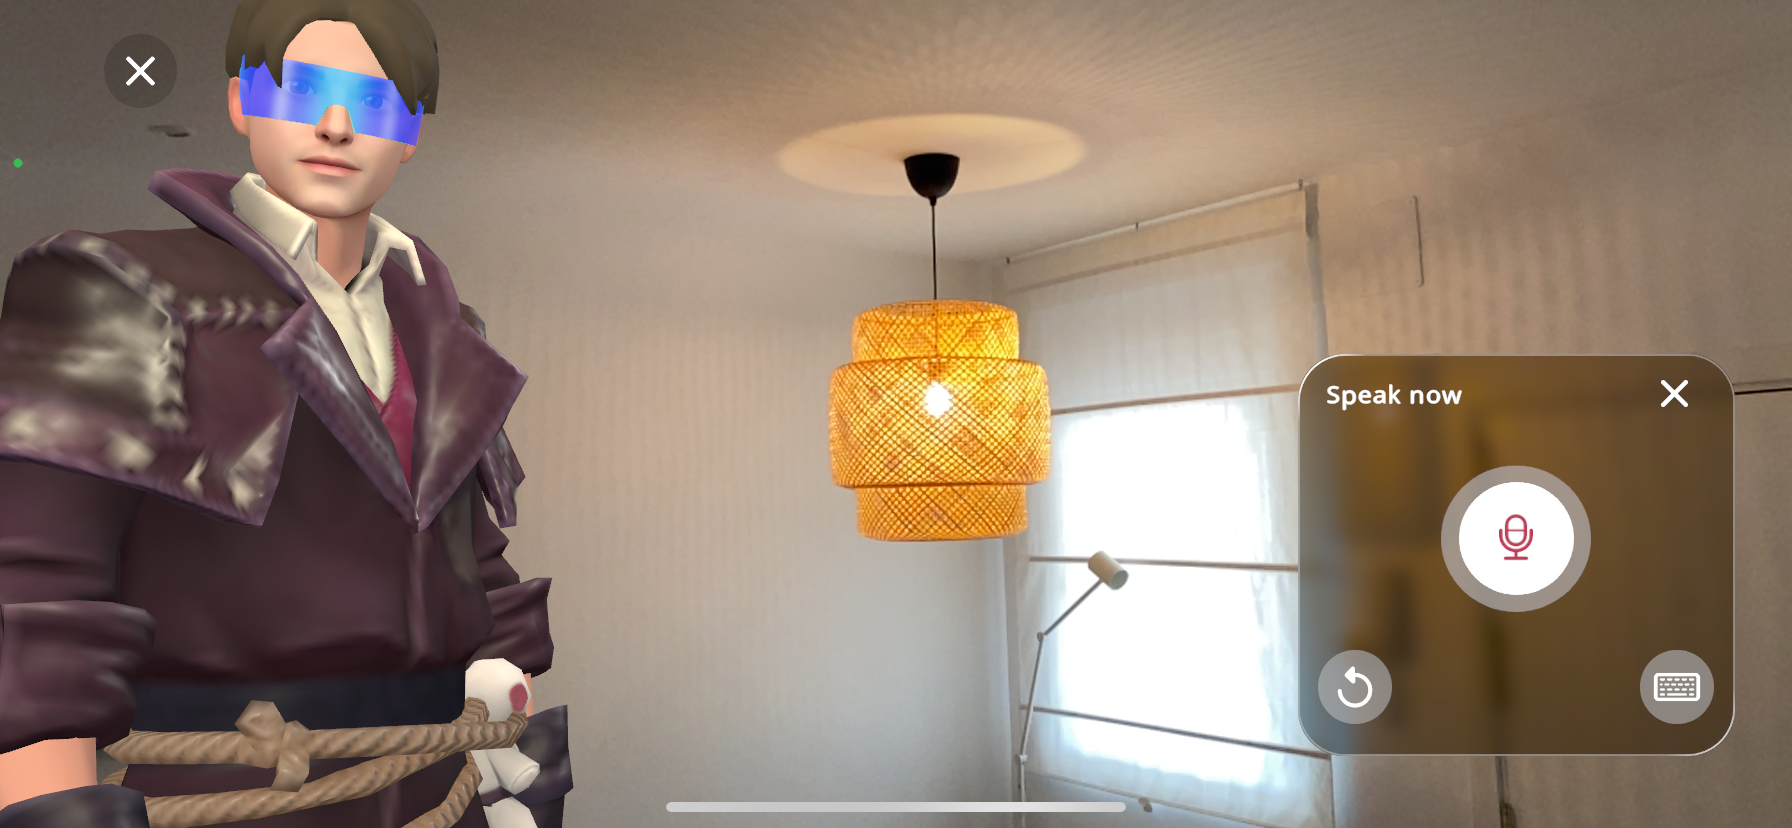
If you change your mind or there is a mistake in the text, you can press the
 button to redo the input.
If you prefer typing the category by hand, simply press the
 button to open your device’s keyboard and type your own category.
If you have selected one of the preset categories, you will be taken to a further screen to specify the scenario you are looking to create. In this example, “Business Skills” is chosen:
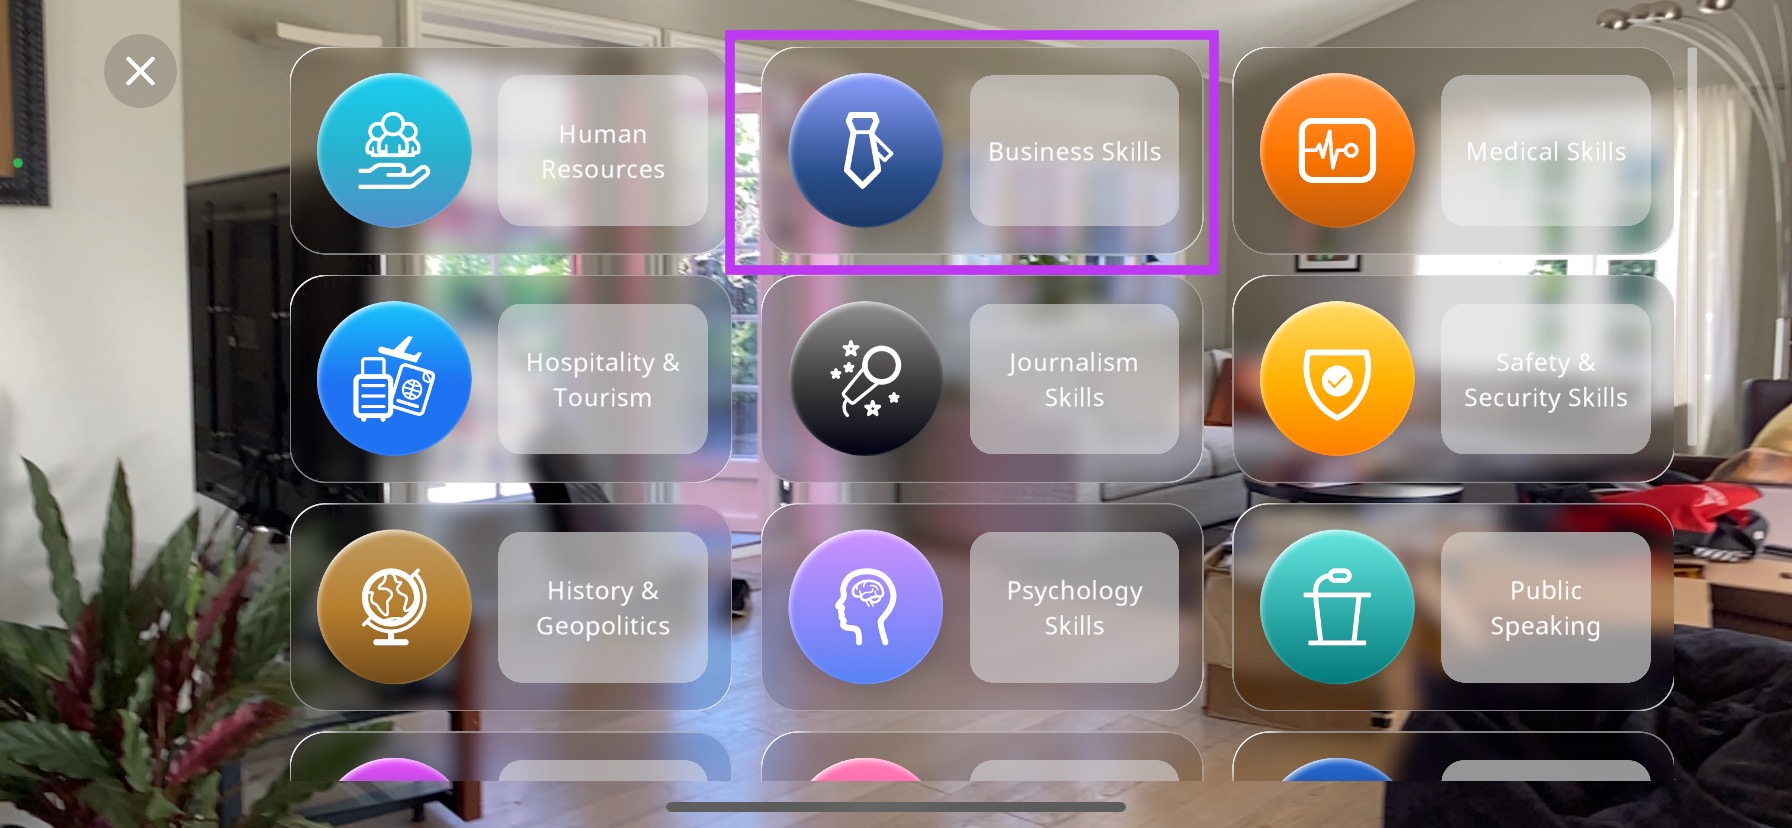
Within “Business Skills”, you may now choose a specific topic to base your experience on:

When you confirm your category by selecting one of the preset options or by creating a custom one, you will be taken to the following screen:

In the top right search bar, you will see the topic you have selected, and images related to this topic will appear below. Select an image that matches your topic:
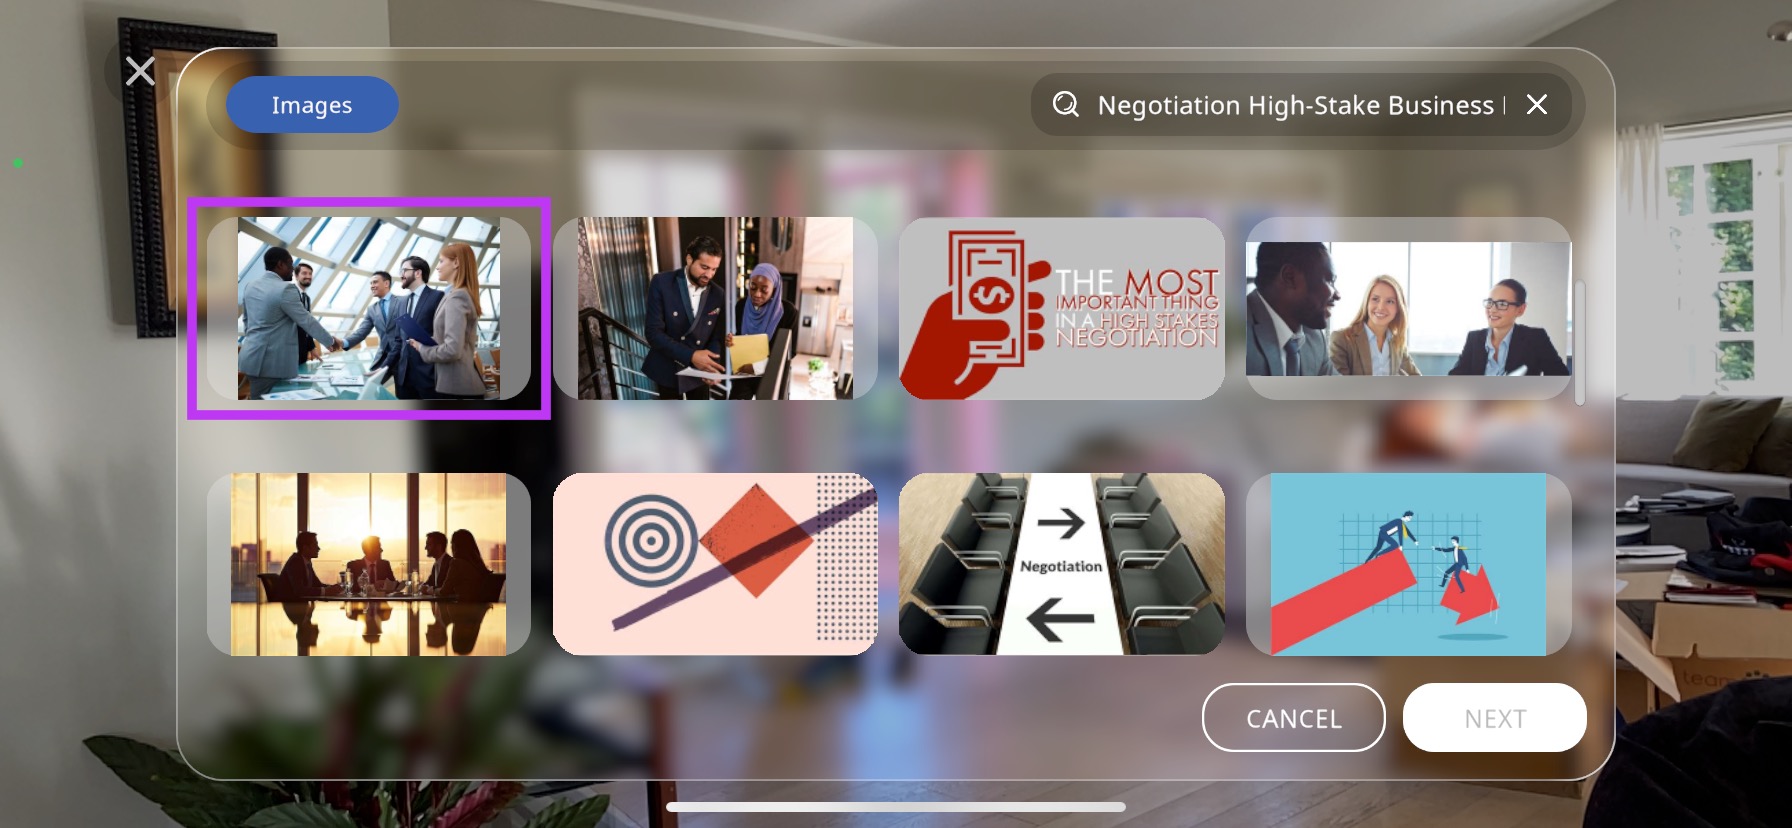
A small blue check (
 ) will appear in the top right corner of the selected image. Press the NEXT button to confirm and continue.
From the selected category, scenario and image, AI will generate a list of topics related to it, and your avatar will begin to explain each of these sub-topics to train the user for your roleplay scenario.
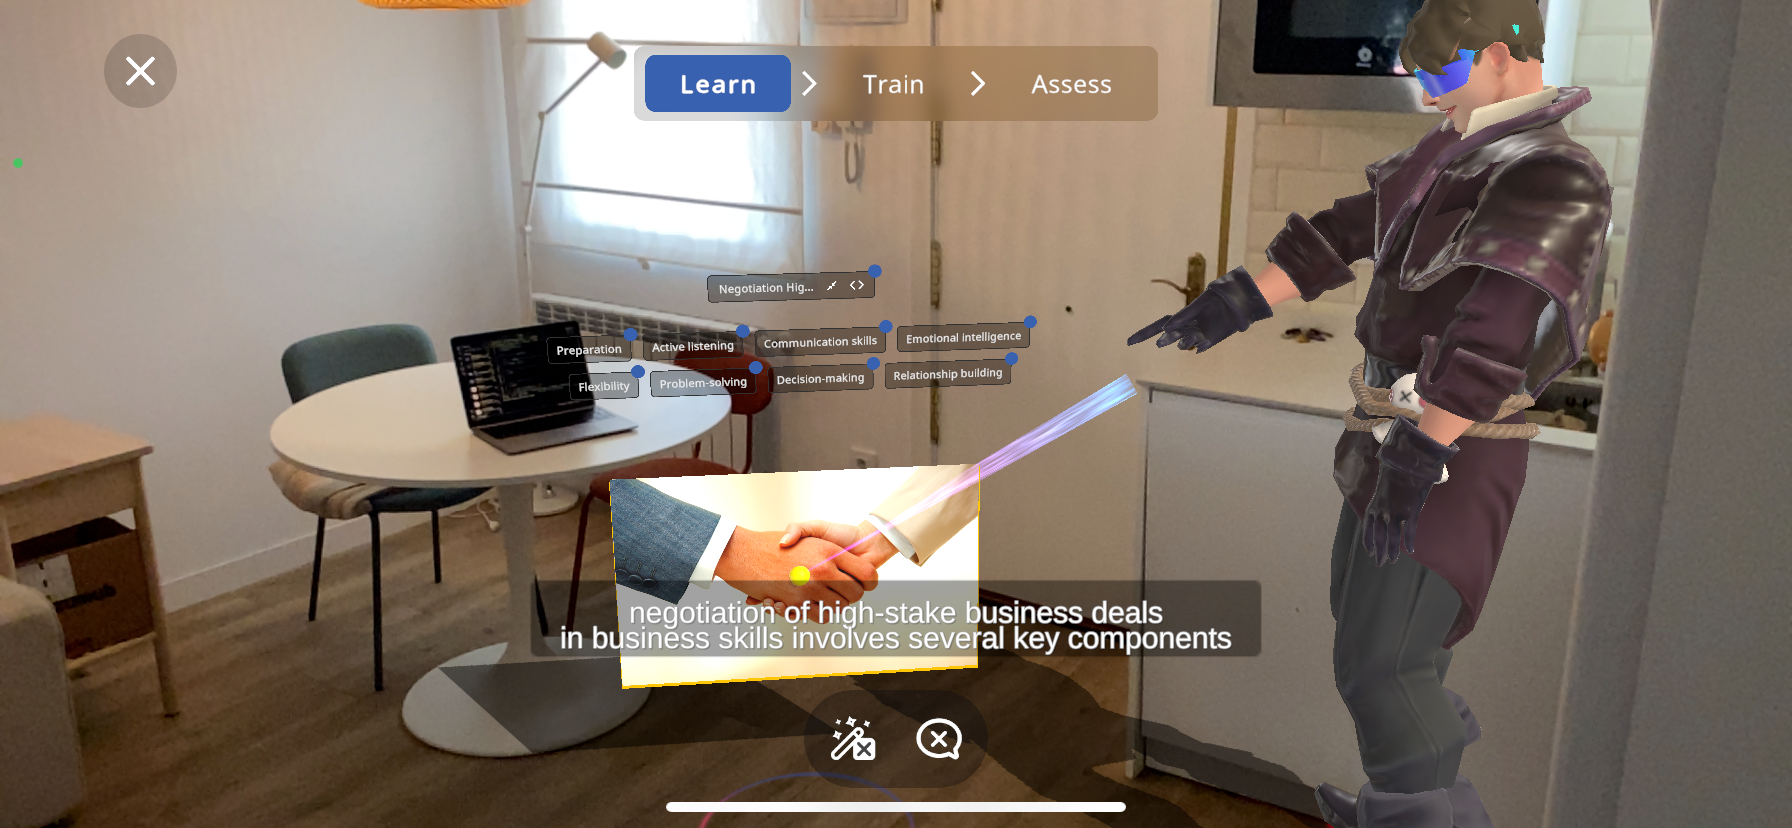
You may press the
 button to interrupt/ skip the explanation.
You may press the
 button to cancel the wizard (helper), and edit the Xperience by yourself. It is recommended to finish creating the Role-play Xperience before exiting the wizard and customizing this.
If you would like to increase/ decrease the size of the image and the subtopics, simply use two fingers on the image to enlarge/ pinch this to your desired size:
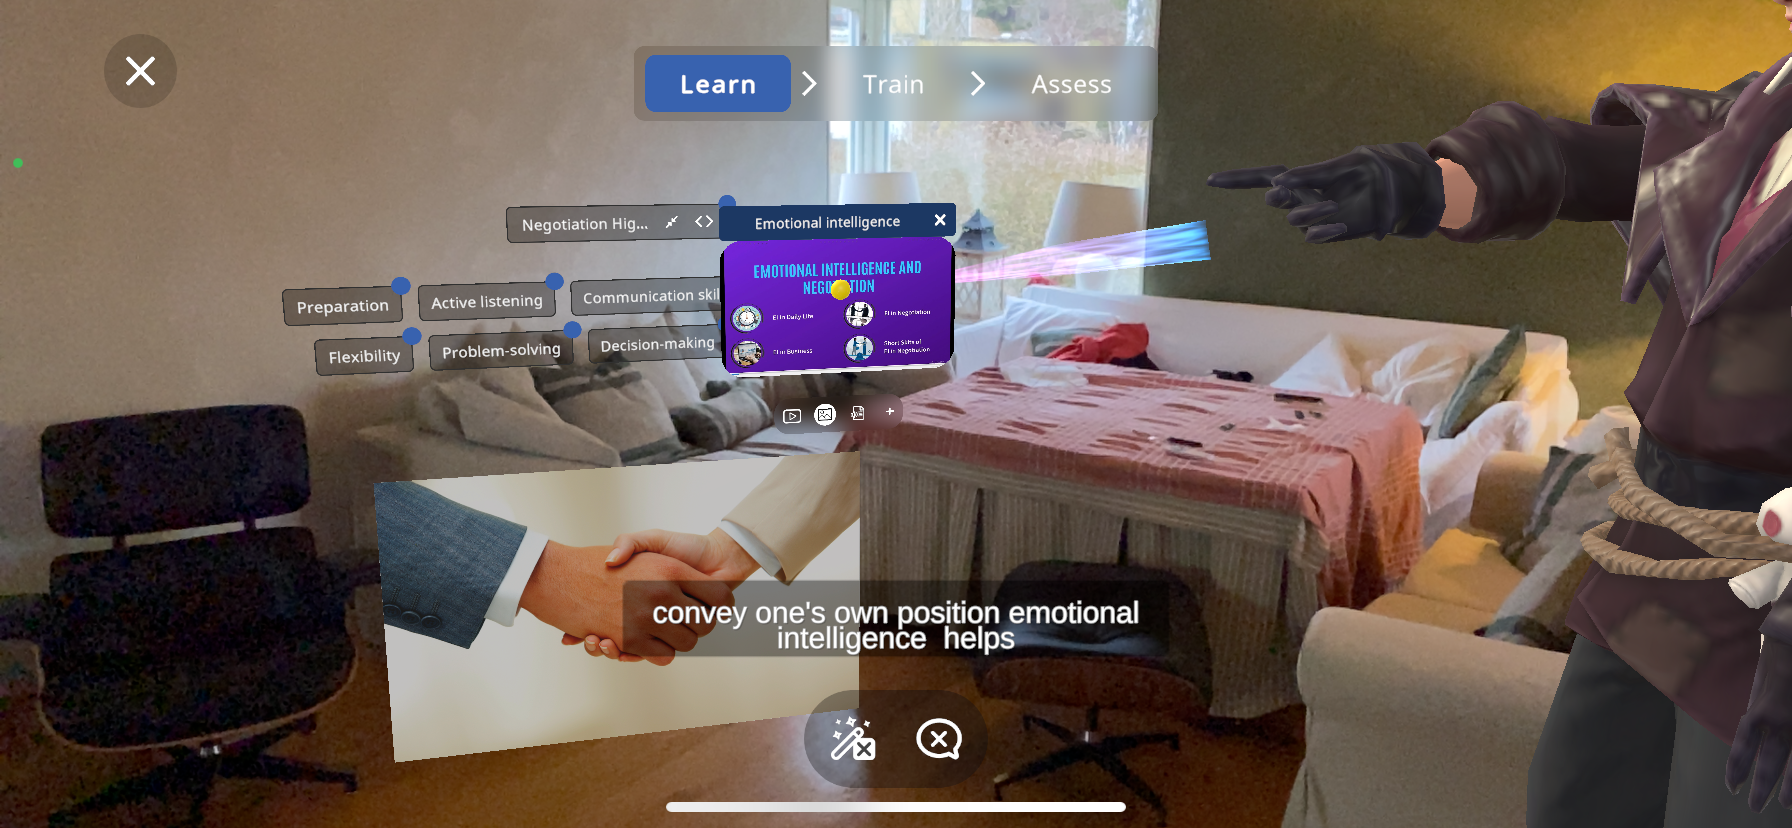
For each of these sub-topics, an image, text explanation and video will be accessible, and you can add your own media too.

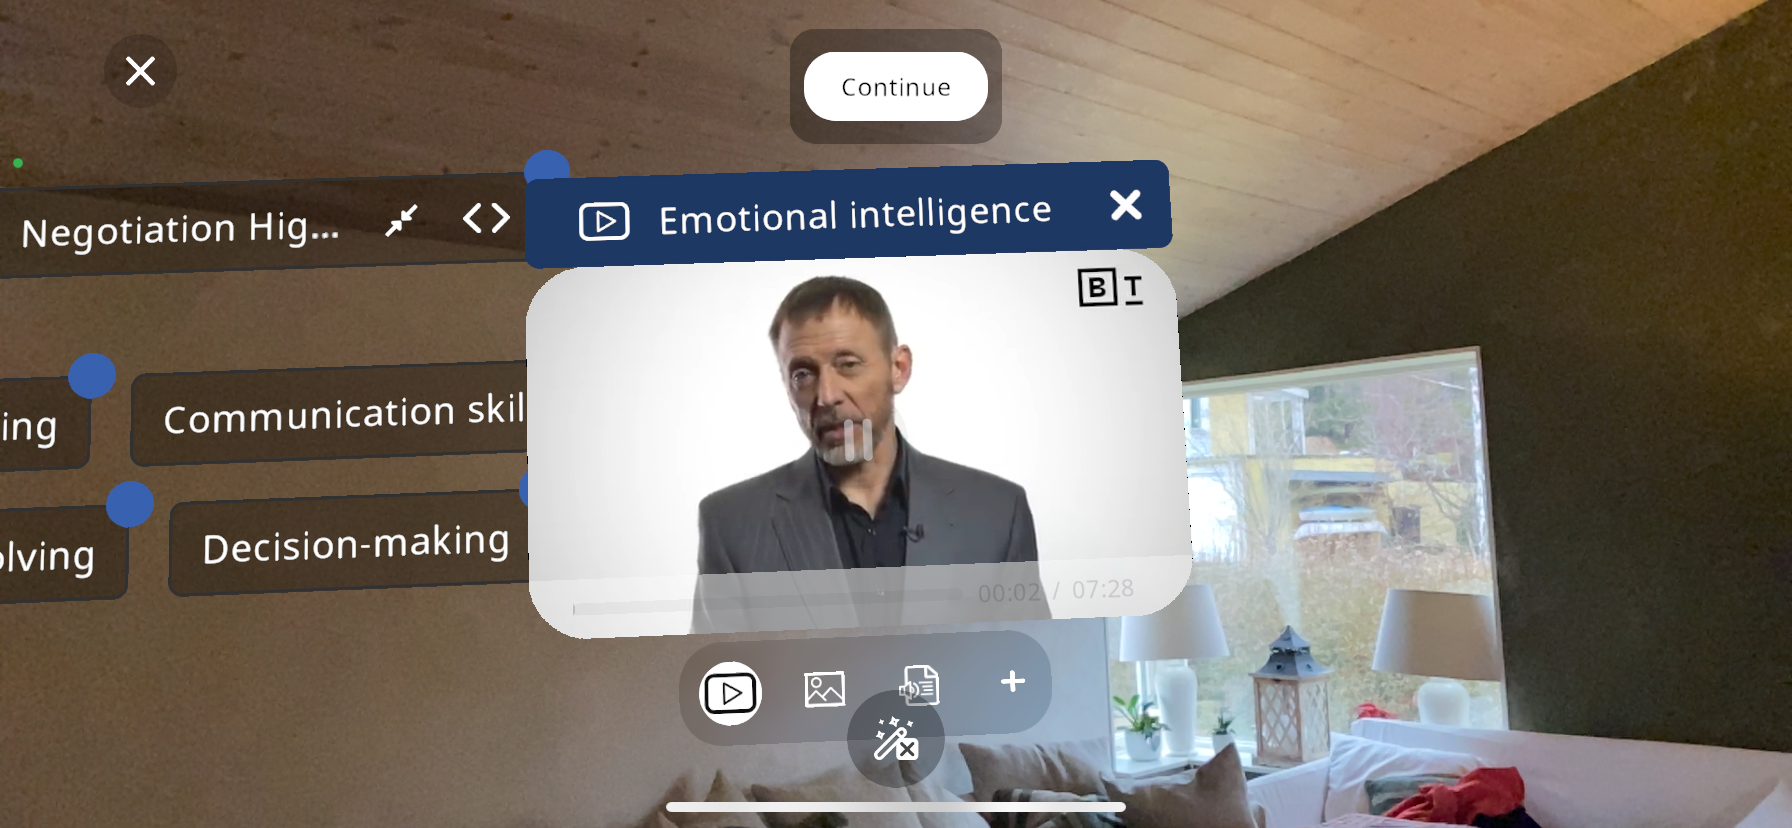
To do this, you must simply press the desired topic, in this example “Emotional intelligence” then through the 4 button menu press the
 button to view the video:
Press the
 button for image:
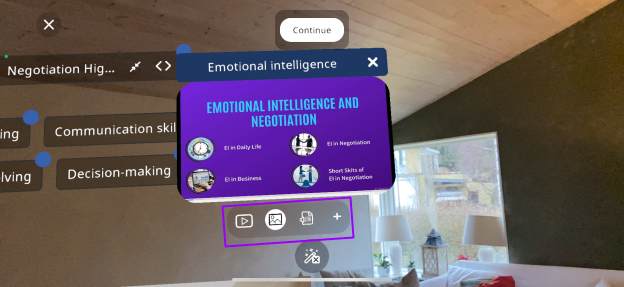
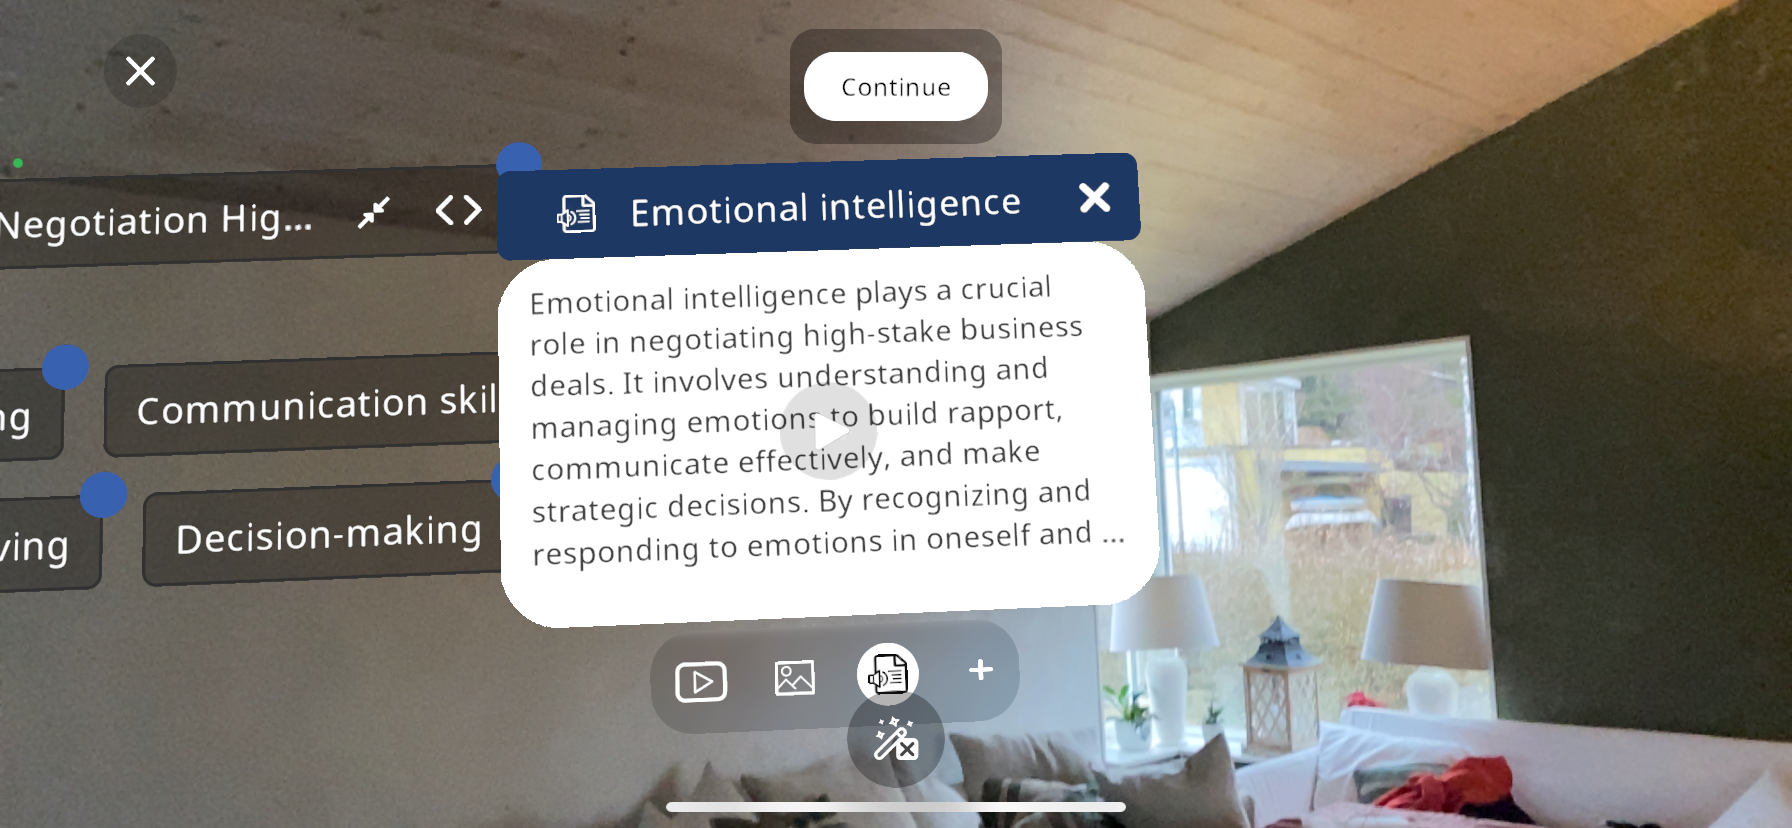
Press the
 button for text.
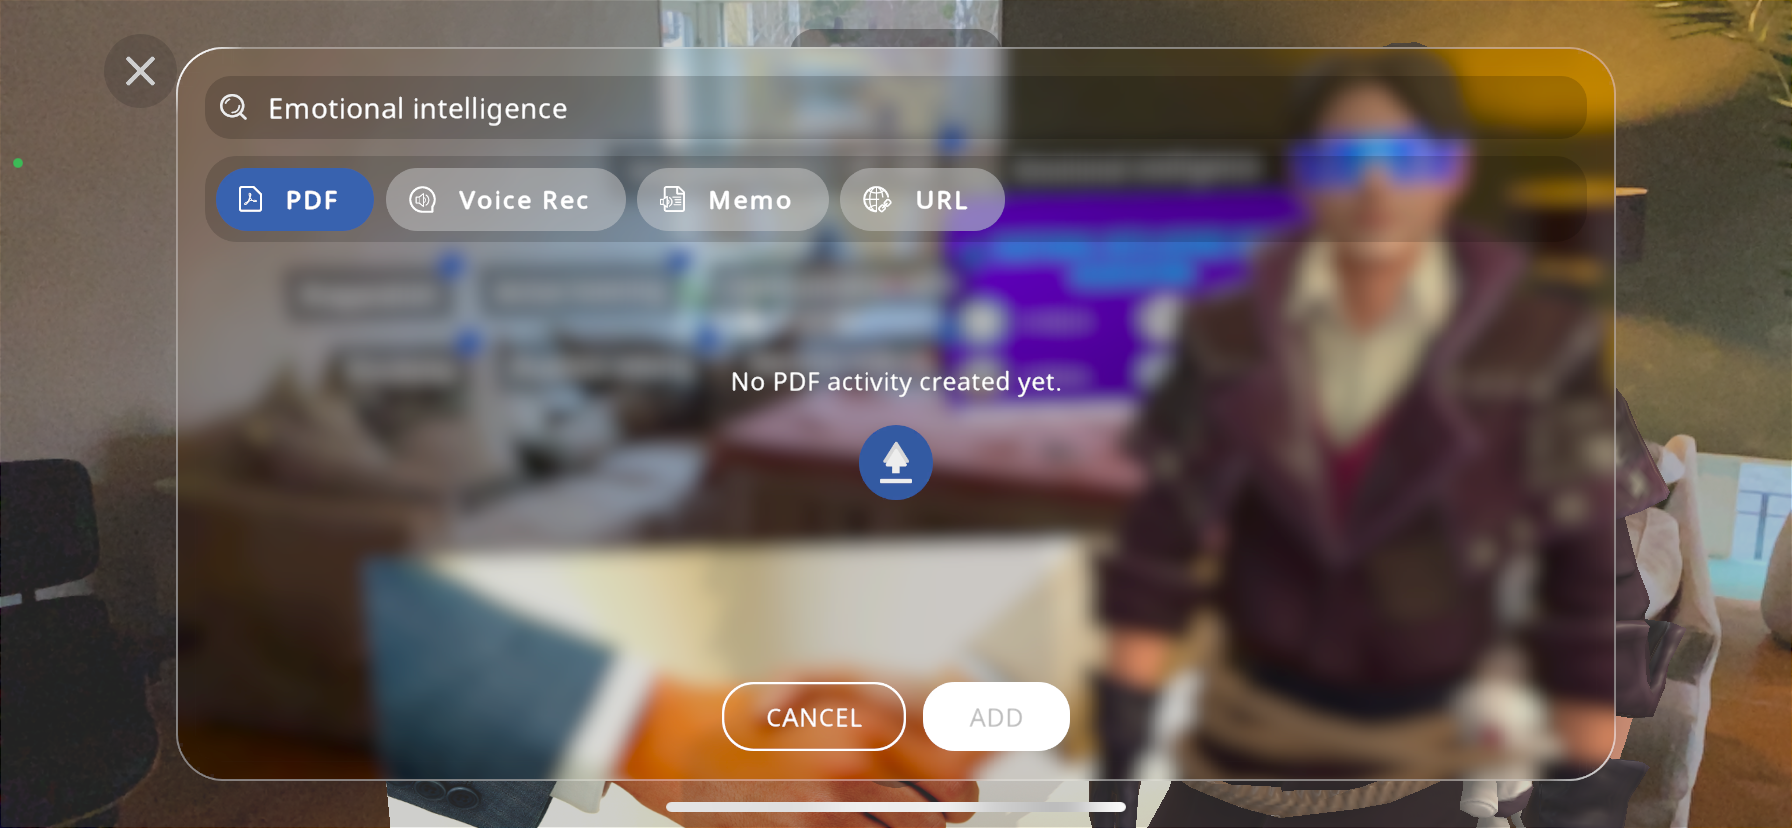
You may also press the
 button to add a custom PDF, voice recording, memo or a URL to additional sources. After pressing the :
PDF: Press the
 button to upload a PDF from your device.
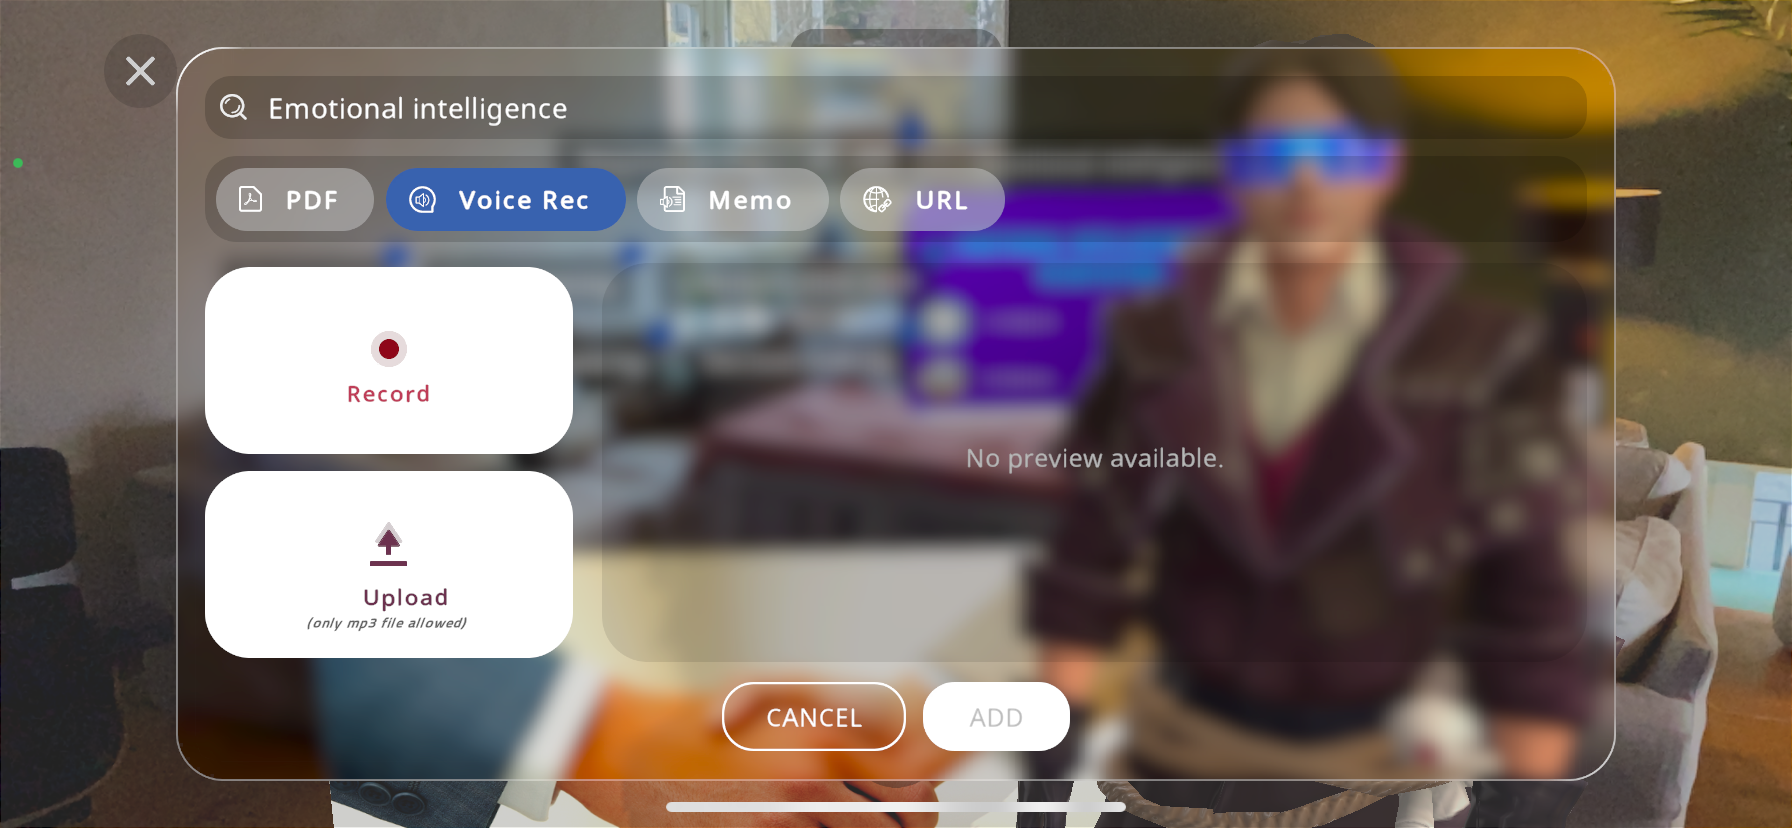
Voice recording: press the Record button to record a live voice recording, or the Upload button to upload a pre-recorded MP3 file from your device.
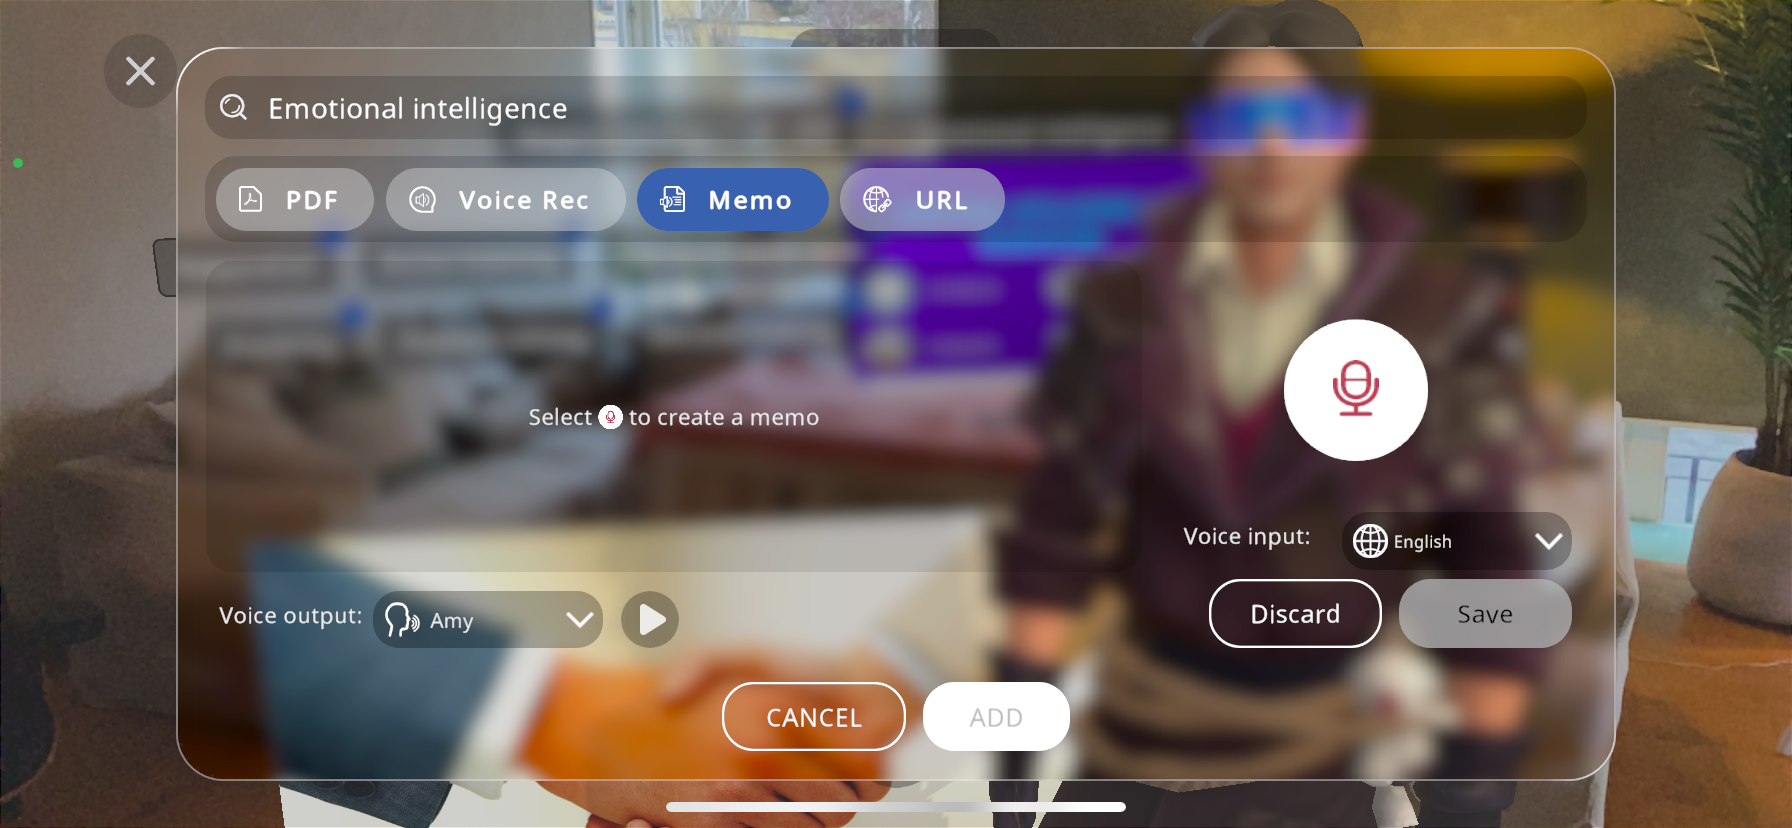
Memo: add a memo to the Xperience, you can use the microphone for the input, then choose the voice output from the dropdown menu next to “Voice output”, then press Save and Add:
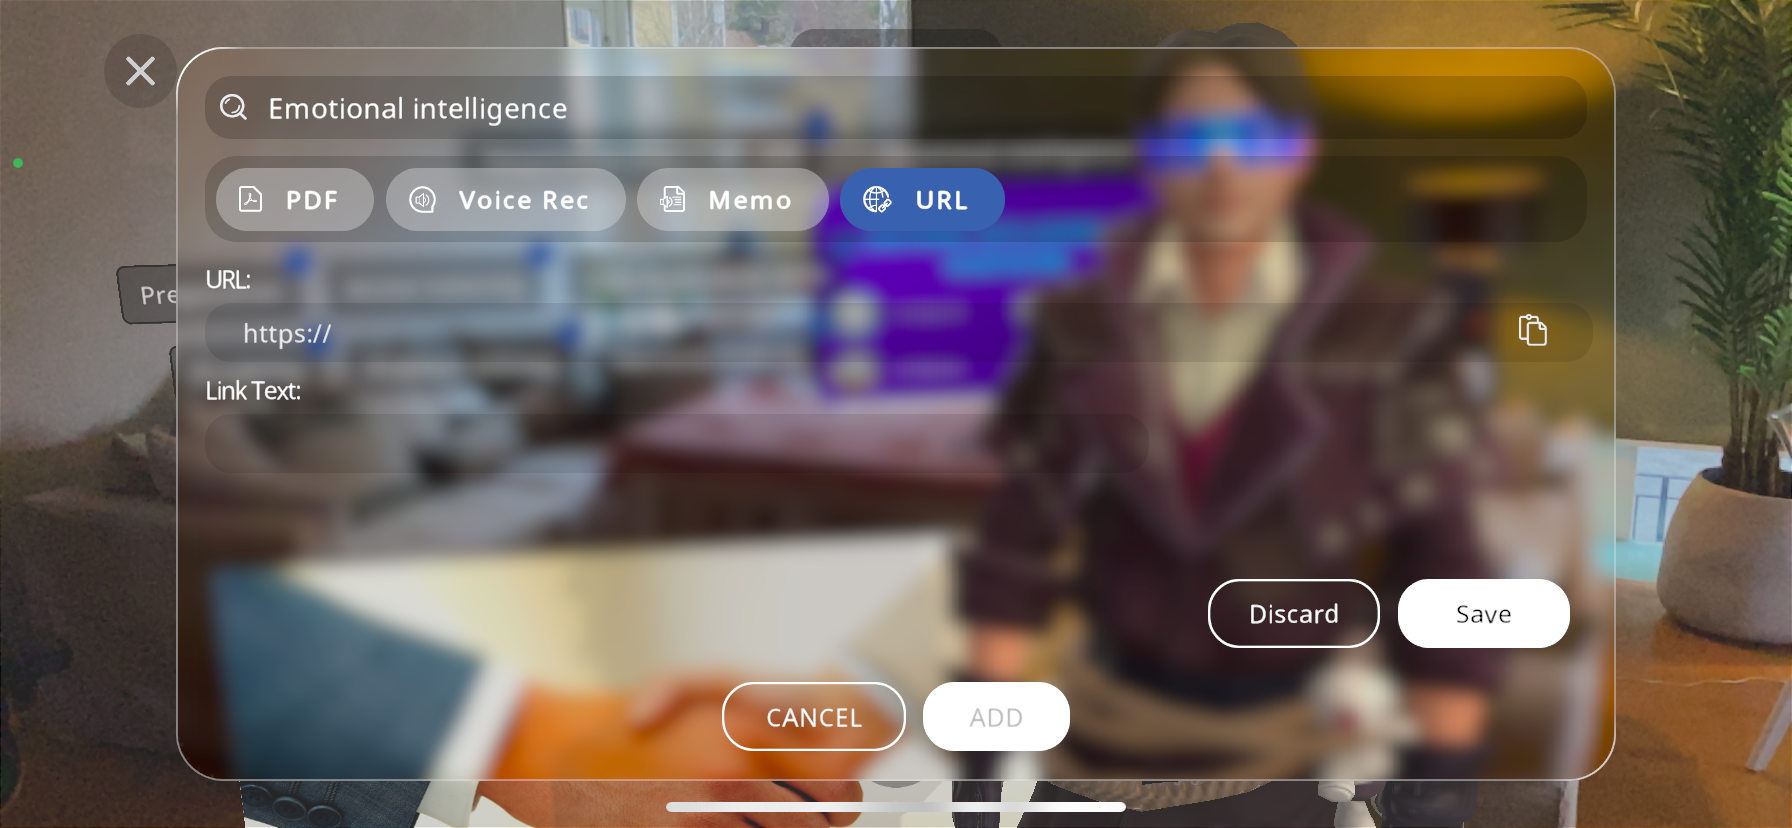
URL: type in the URL to add any extra information that is relevant to your Xperience, then press Save and ADD.
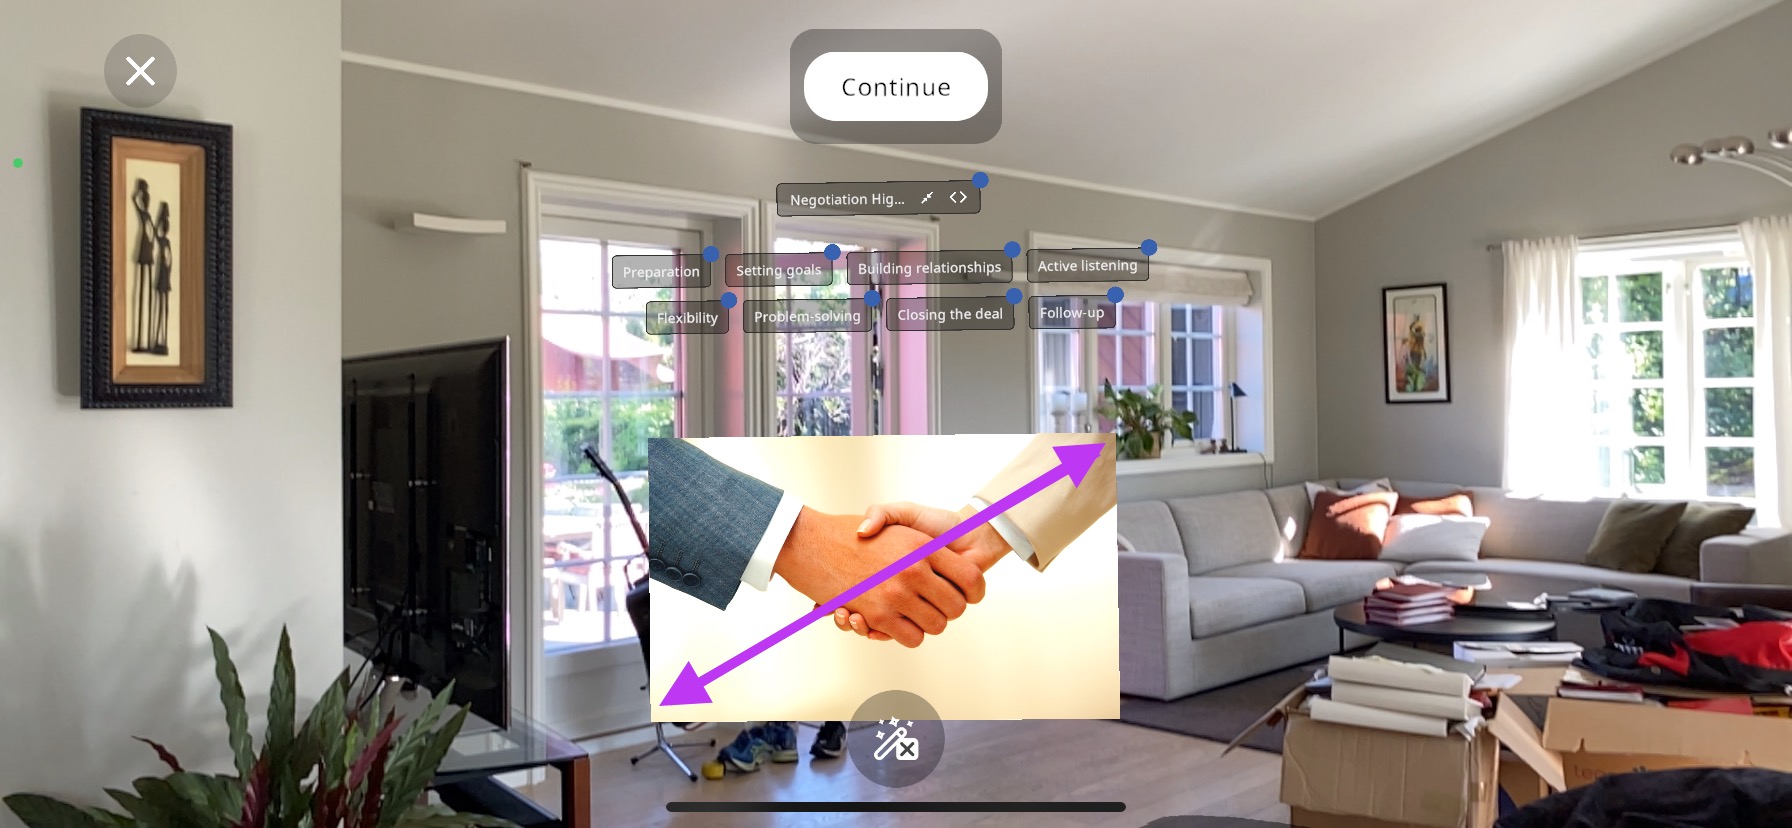
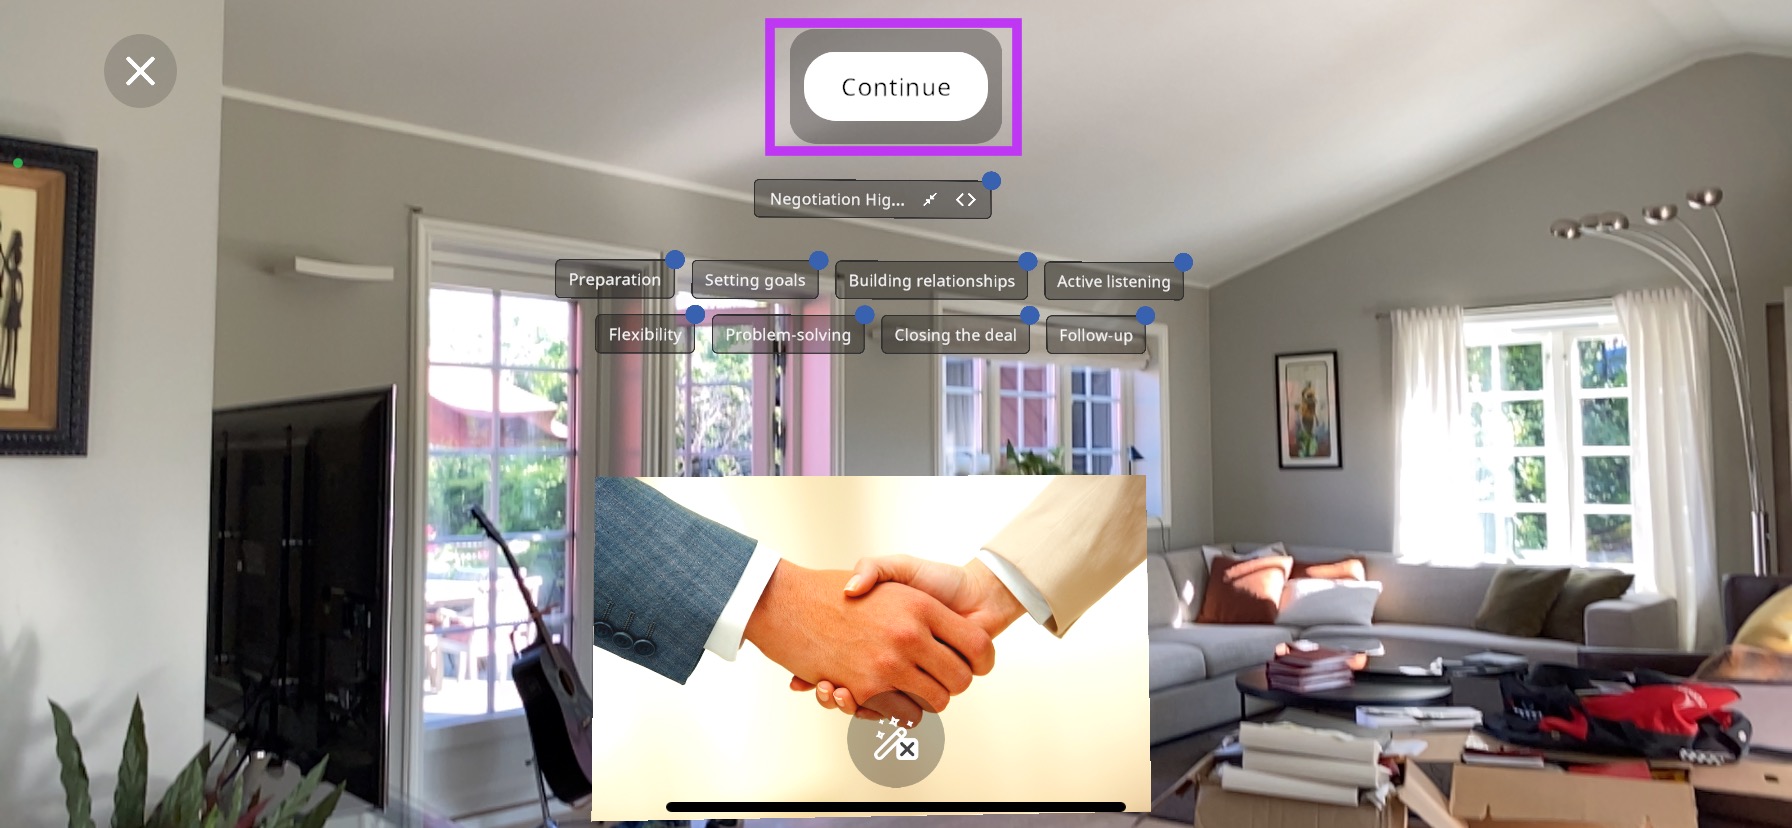
After you have added everything you would like to add, you can press the “Continue” button to proceed with the soft skills experience:
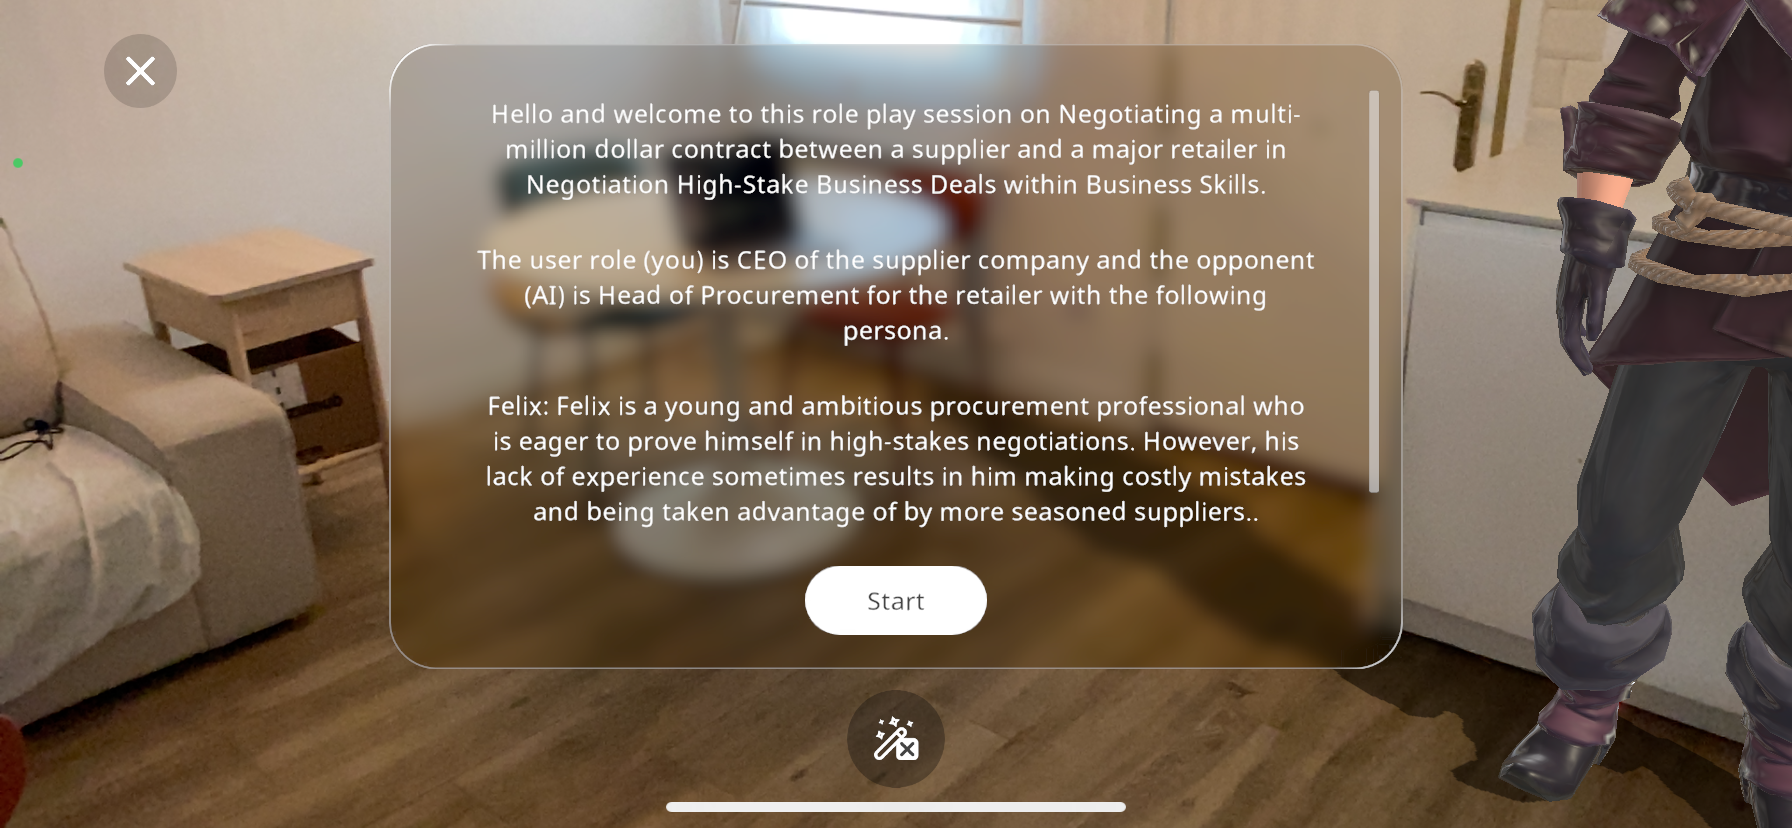
You will be presented with various specific scenarios to act upon based on your selected category and topic, for example “Negotiating a multi-million dollar contract between a supplier and a major retailer”.
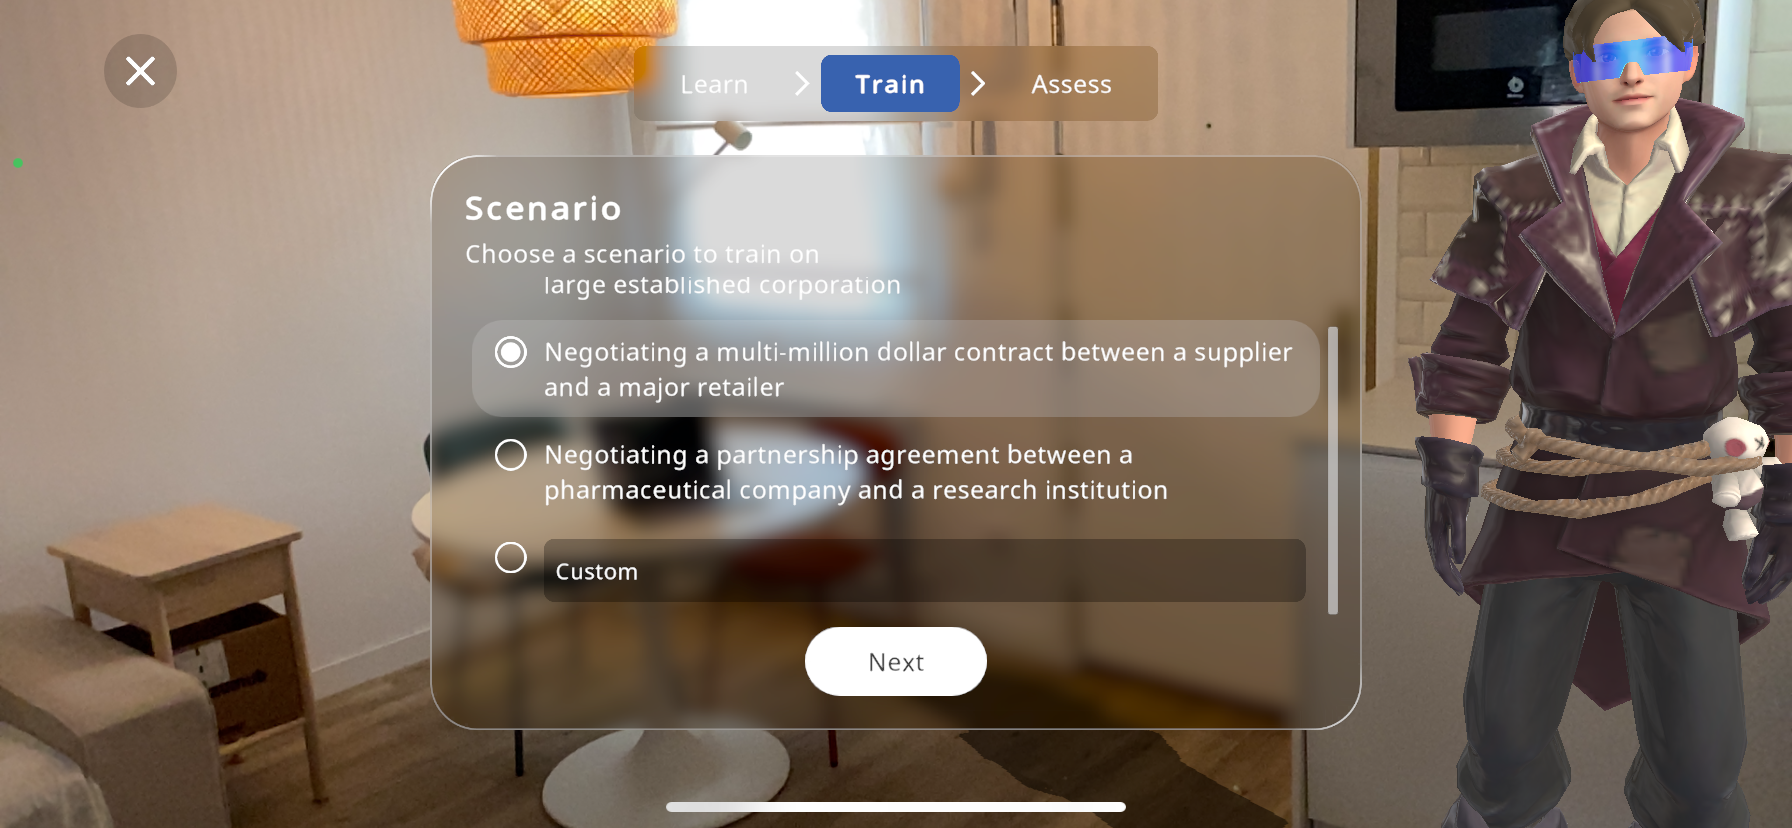
You may also create your own custom scenario by scrolling down and typing your own in the “Custom” option. AI will generate the experience according to your input.
Press “Next” to continue to the role selection screen. Here you can choose the user’s role in the scenario as well as the opponents.
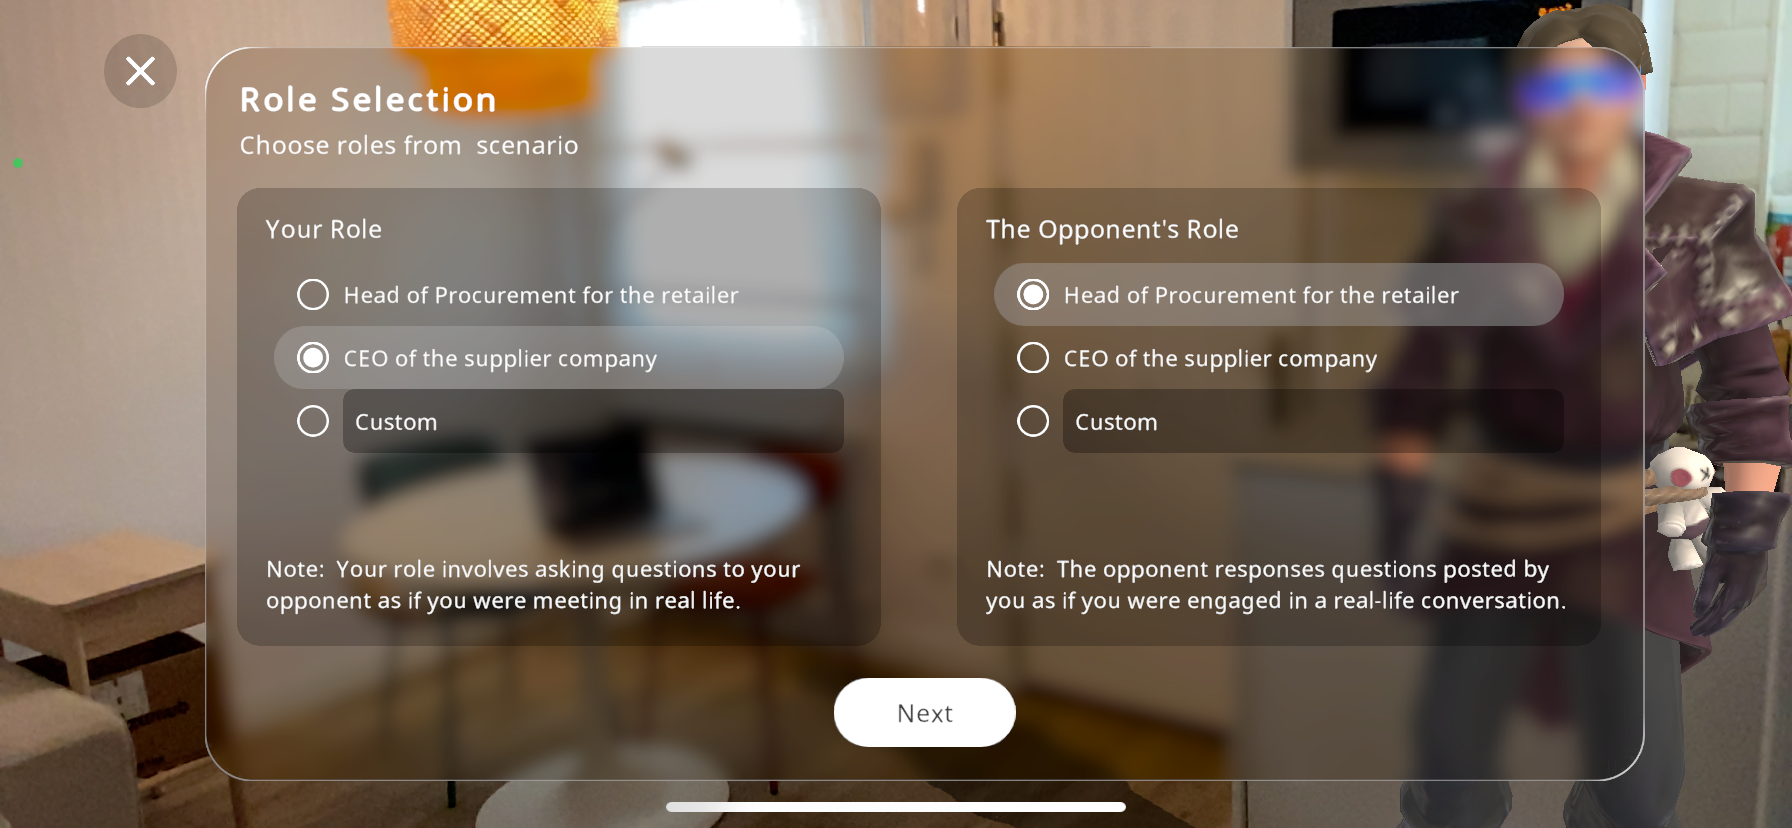
You can type custom roles if you would like to use different ones than those on screen then press “Next”.
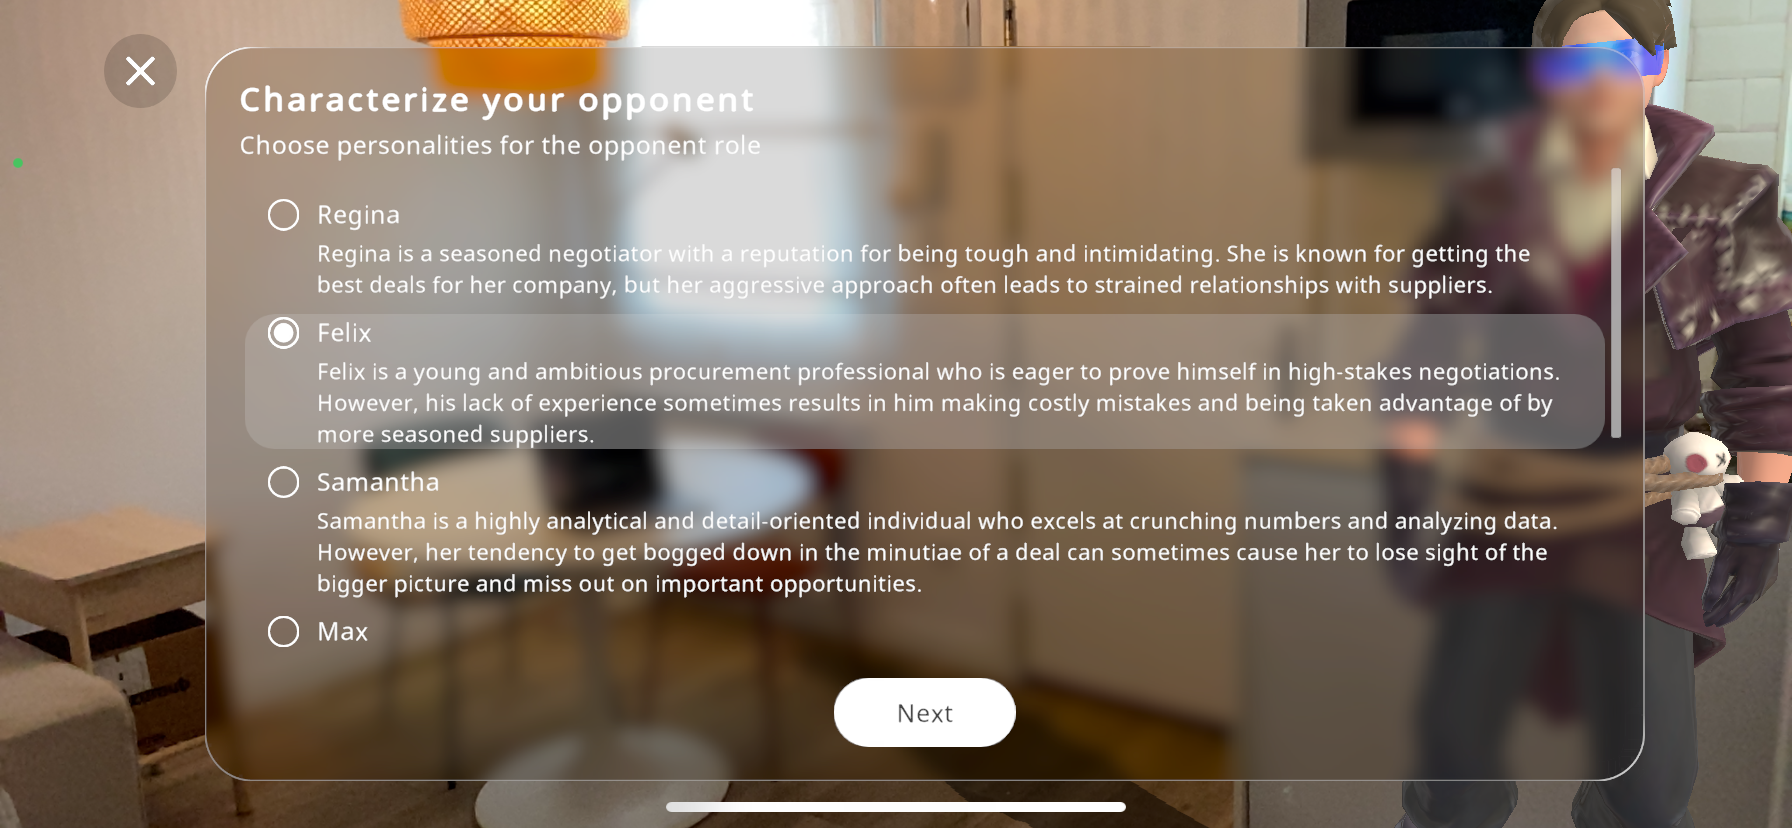
Now, you may characterize your opponent. Various characters will be generated with different personalities, moods, techniques, opinions etc. You may also scroll down to create a custom character, giving it a specific name and personality.
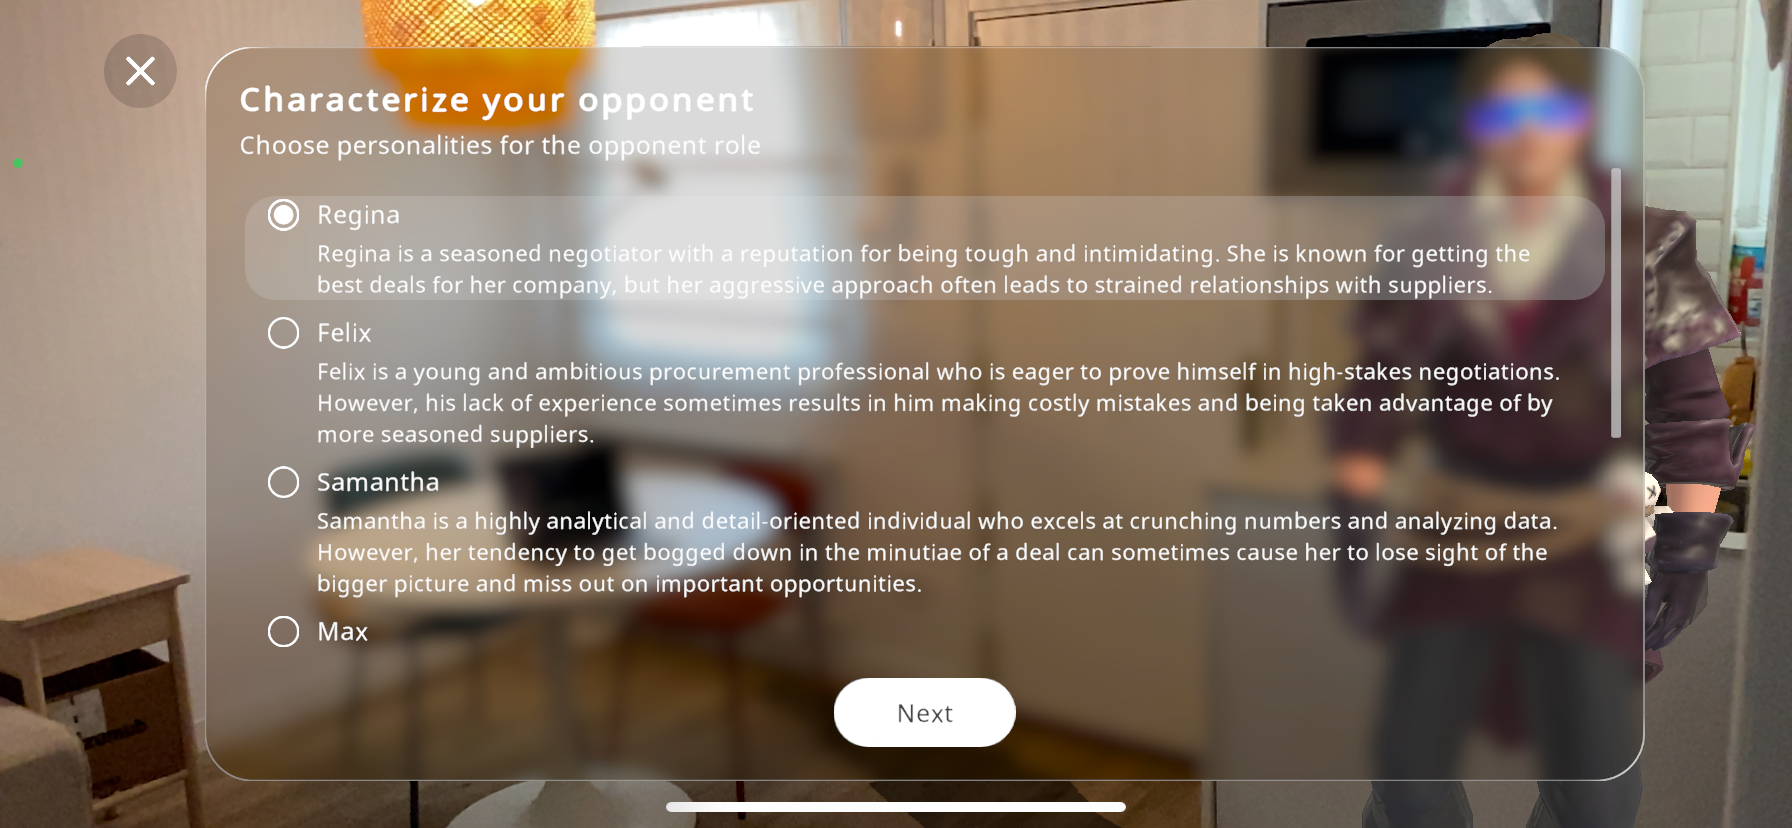
Select the character that better suits your idea for the role play then press “Next”.
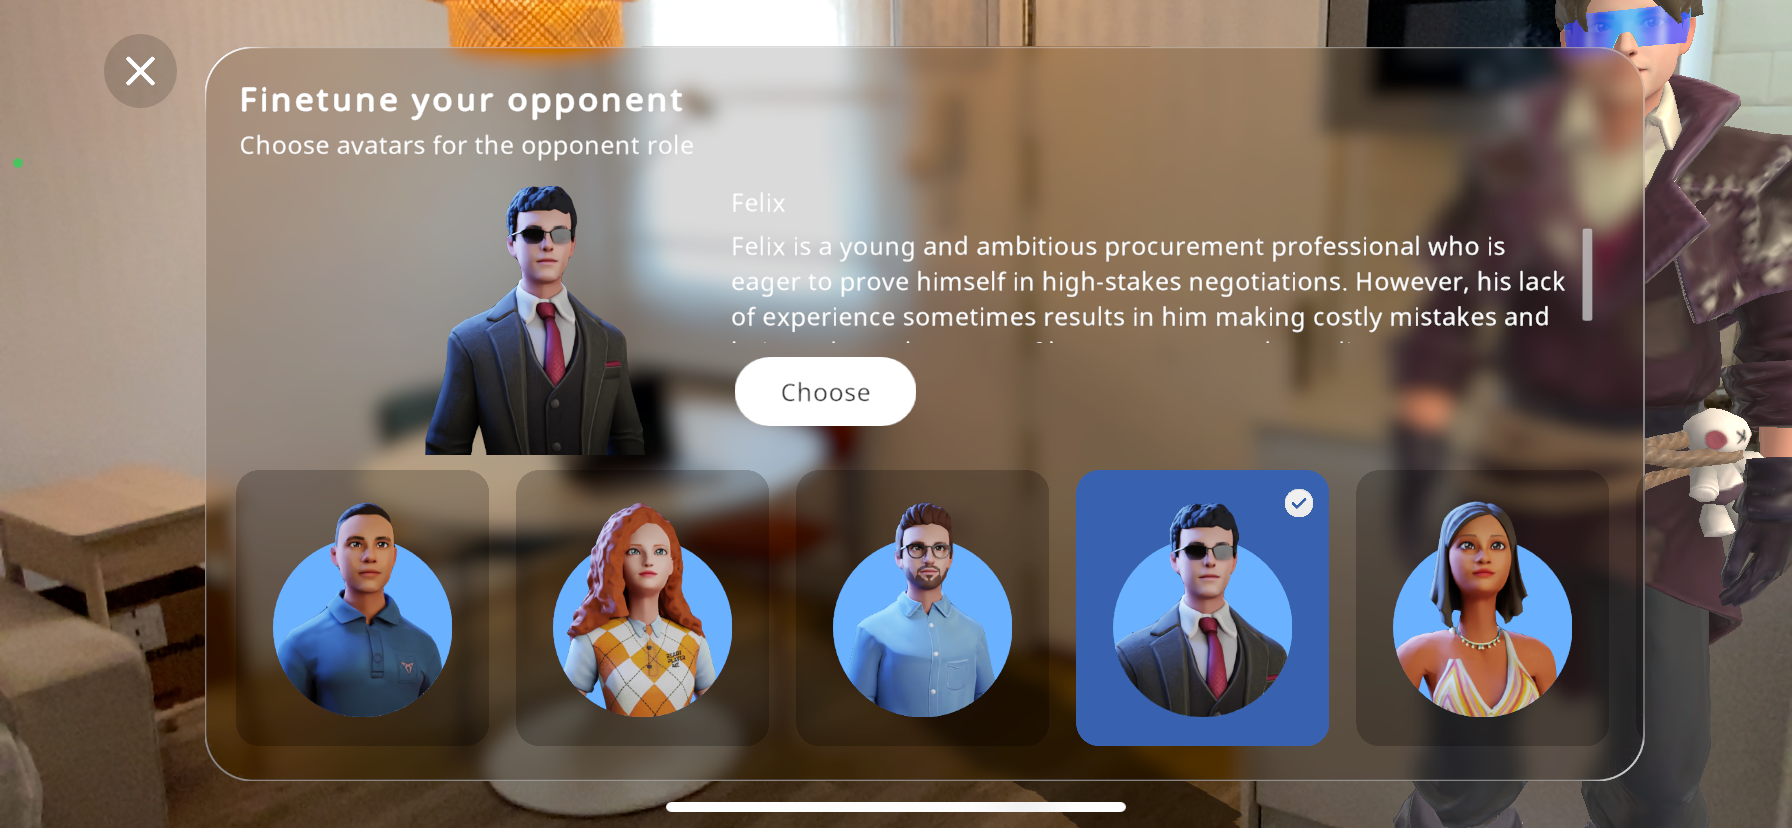
Now, you can select an avatar from the options. This is the 3D character that will appear as your opponent for the experience. Scroll through the options and select the one you are satisfied with. Then press “Next”
Finally before beginning the training, a short summary of the role play session will be shown, so the user completely understands the scenario. Press “Start” when ready.
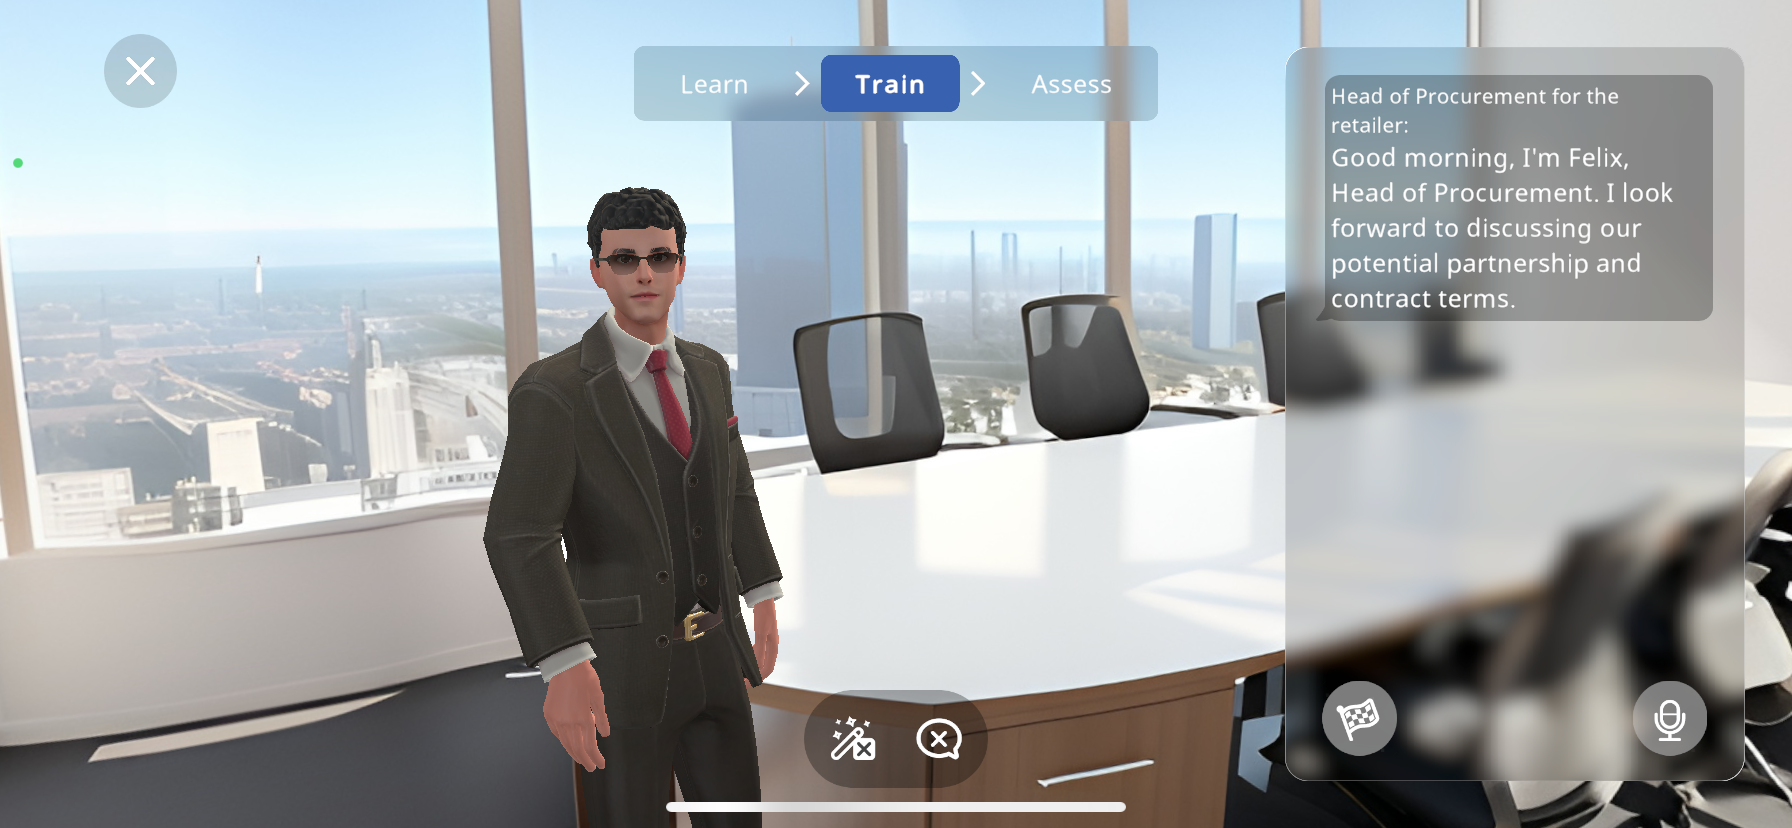
Now as you can see, your surroundings become a 360 environment that is generated by AI on the fly based on the chosen topic. Your opponent’s avatar will appear in front of you.
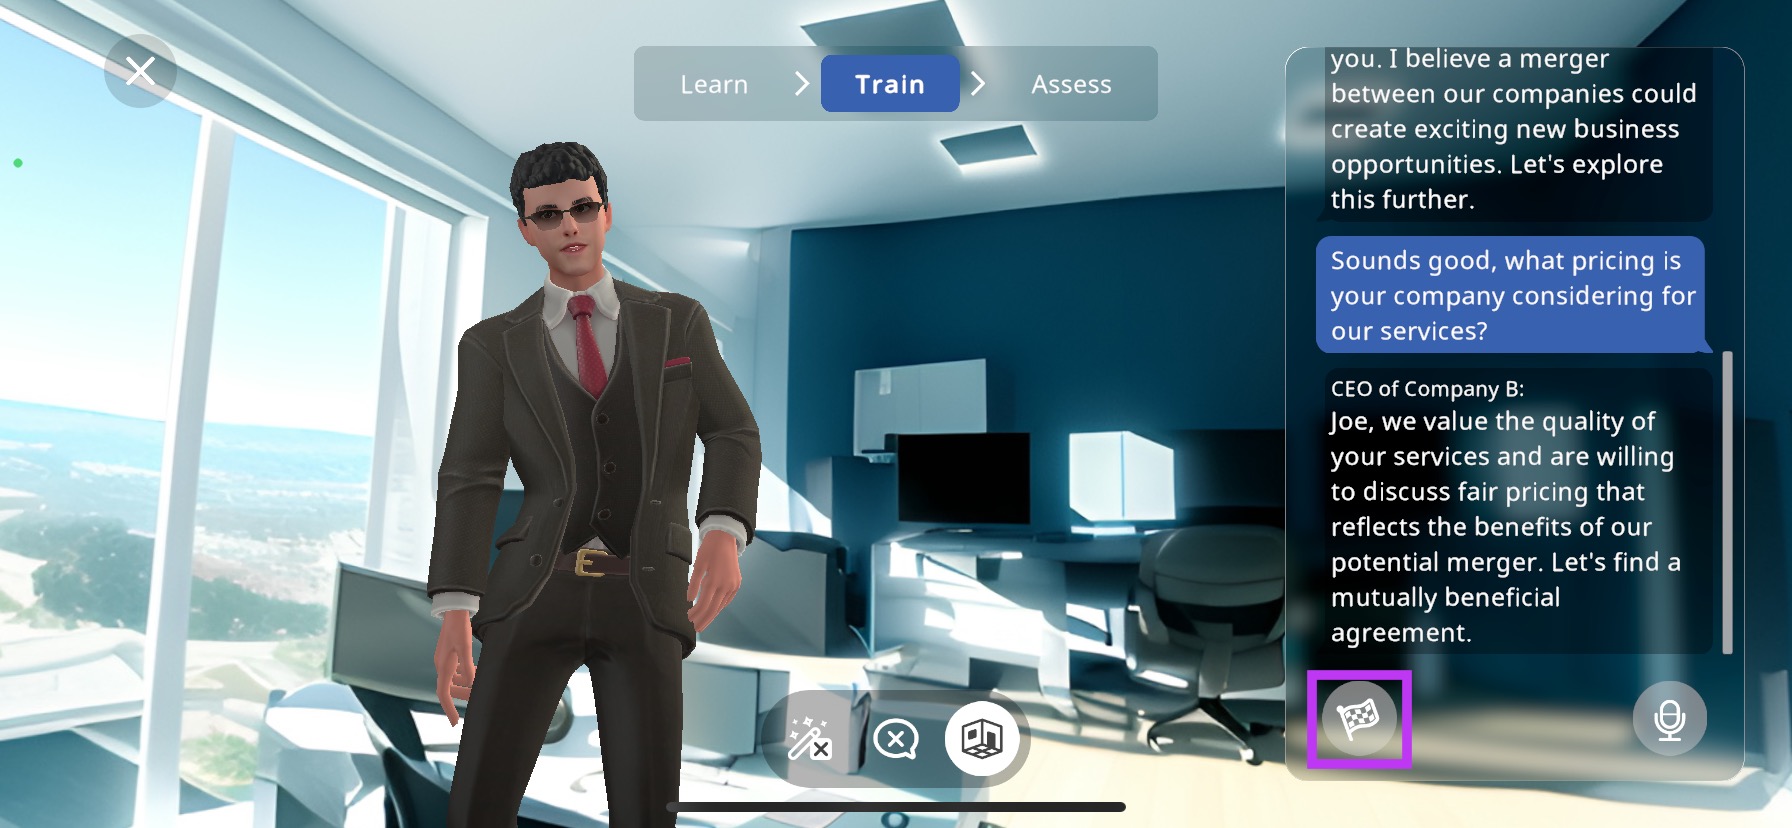
The avatar will deliver its introductory phrase according to their personality and the scenario. You can read the transcript of what they have said in the right part of the screen.
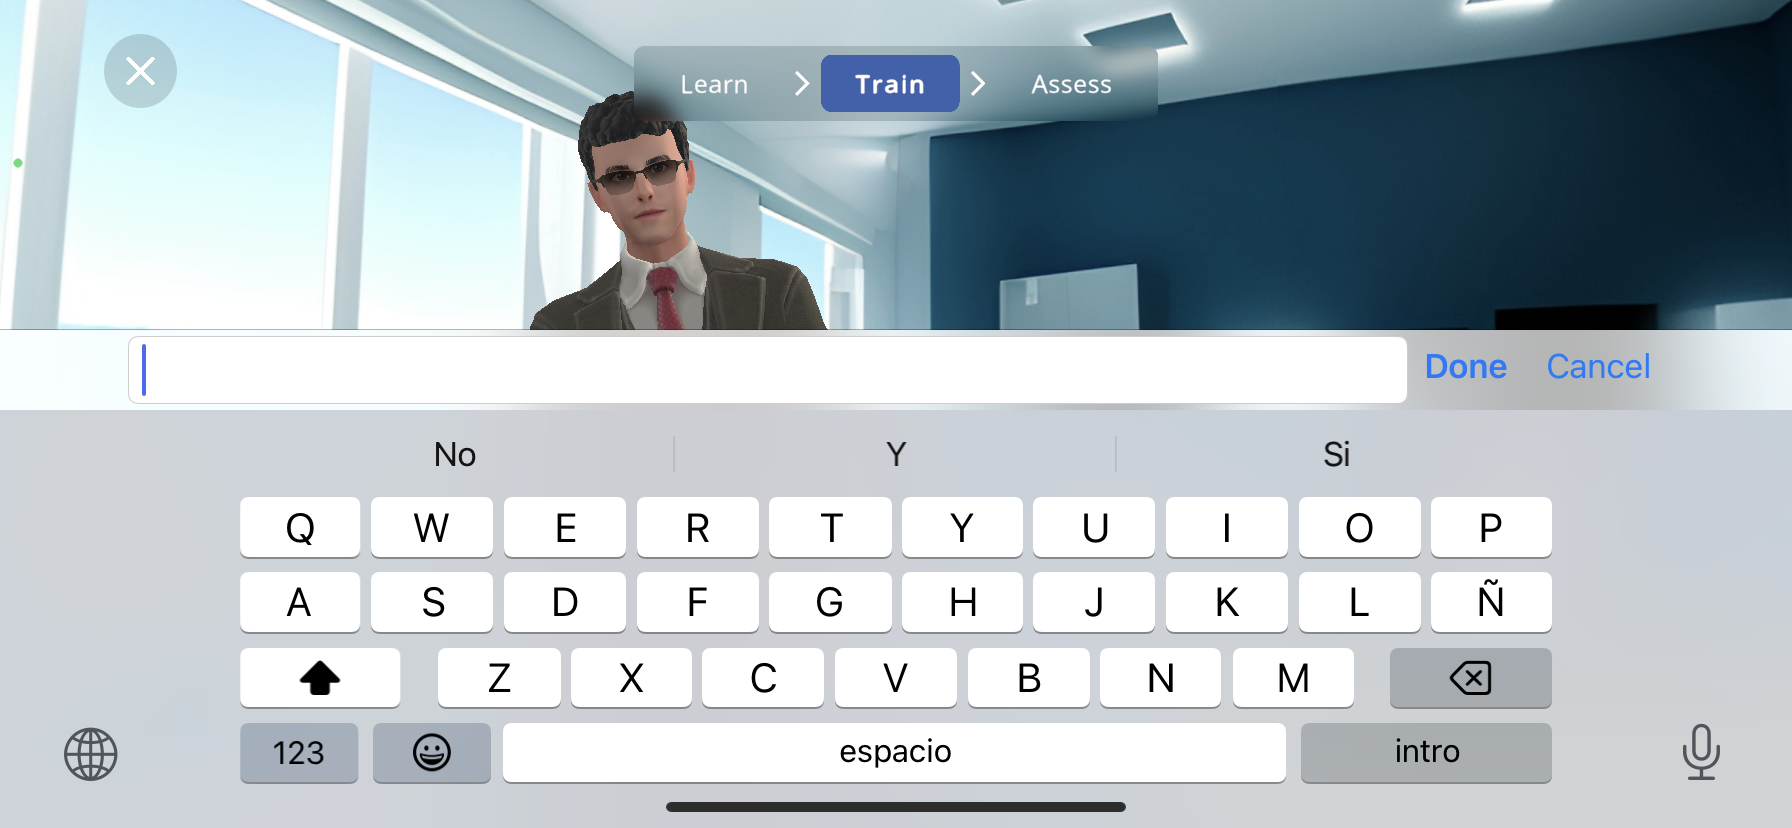
Now, you may reply to the avatar in this role play session by pressing the
 button to open the reply menu, then press the
  button to speak, or press the button to type out an answer:
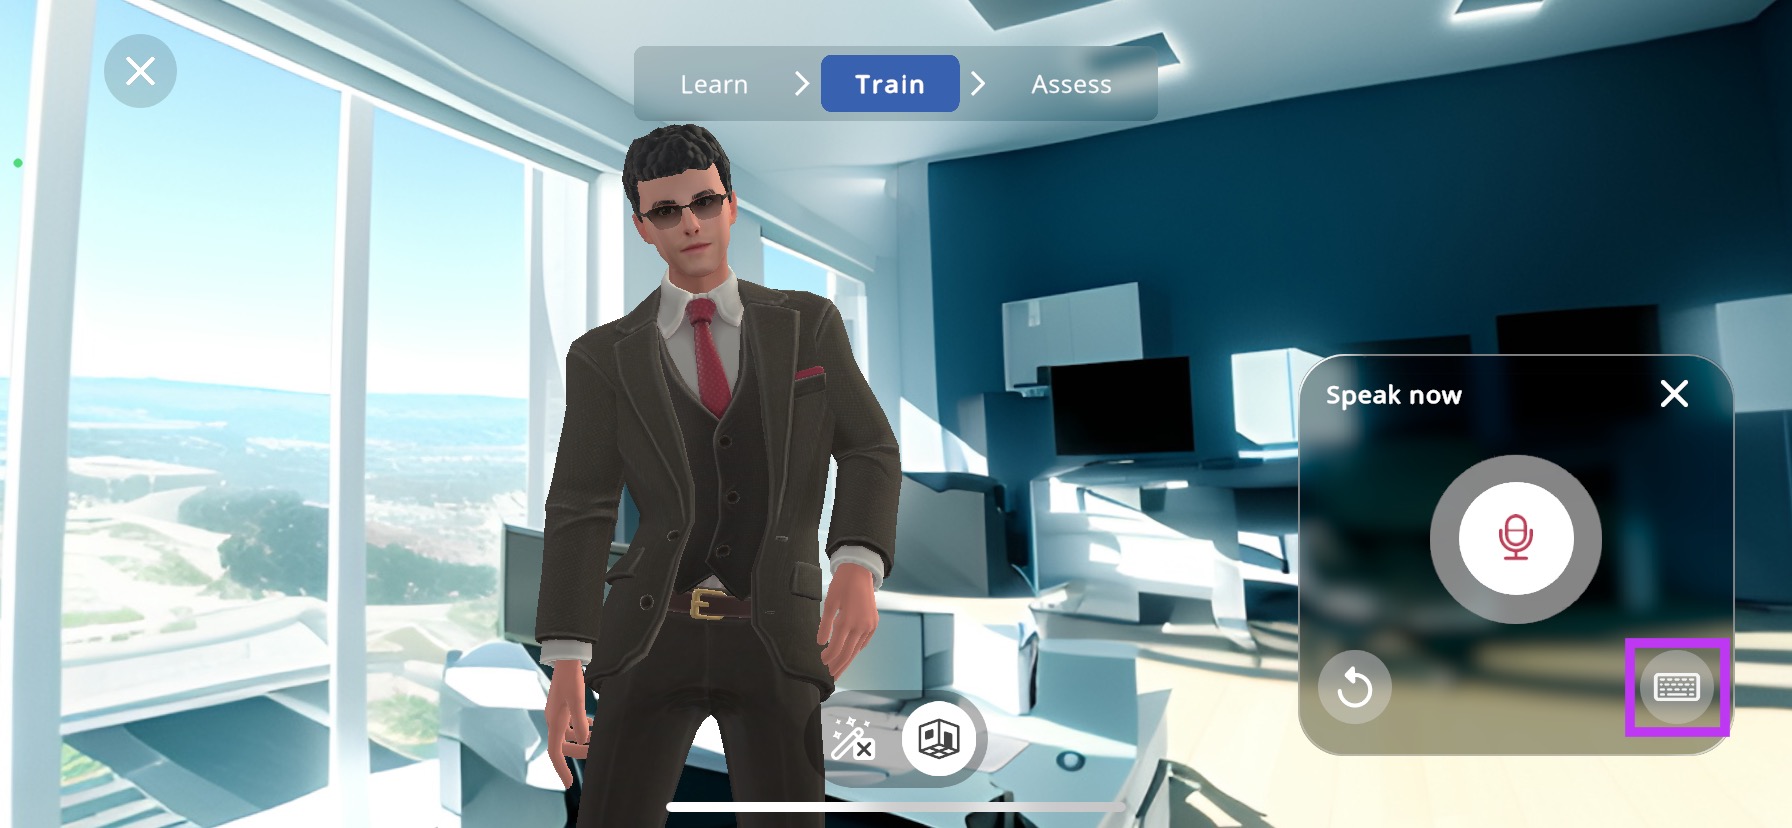
You can press “Done” when you are happy with your response. The avatar will react to your message accordingly through inverse kinematics and reply back to you.

You may do this for as long as you wish (Minimum 2 messages) before pressing the
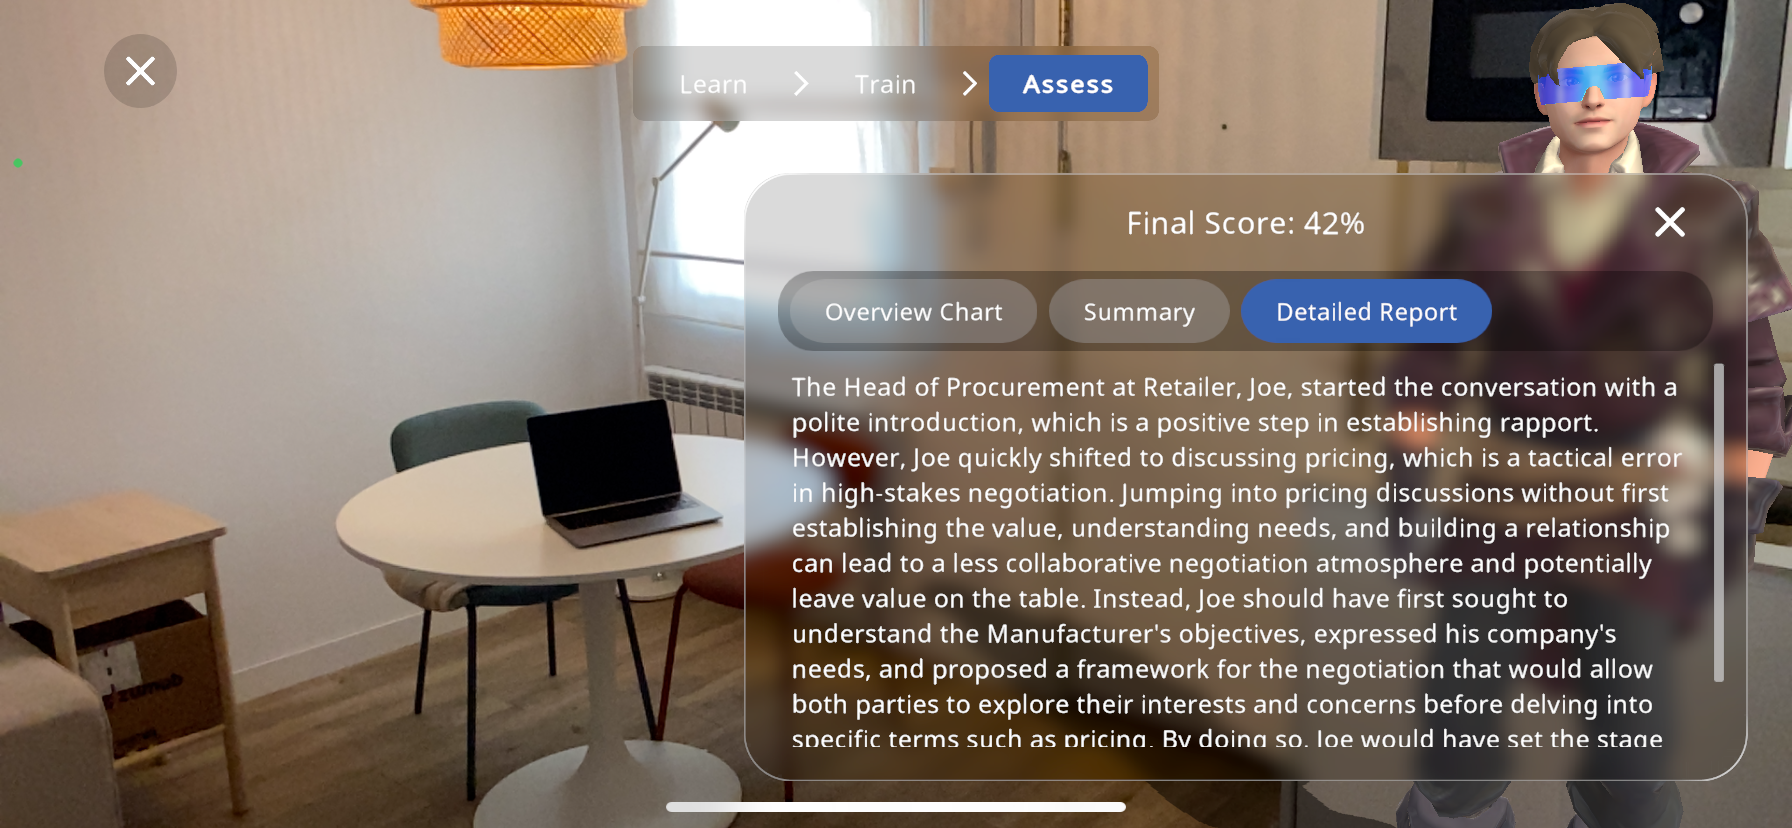
 button. This will mark the end of the role play session and take you to the “Assess” section.
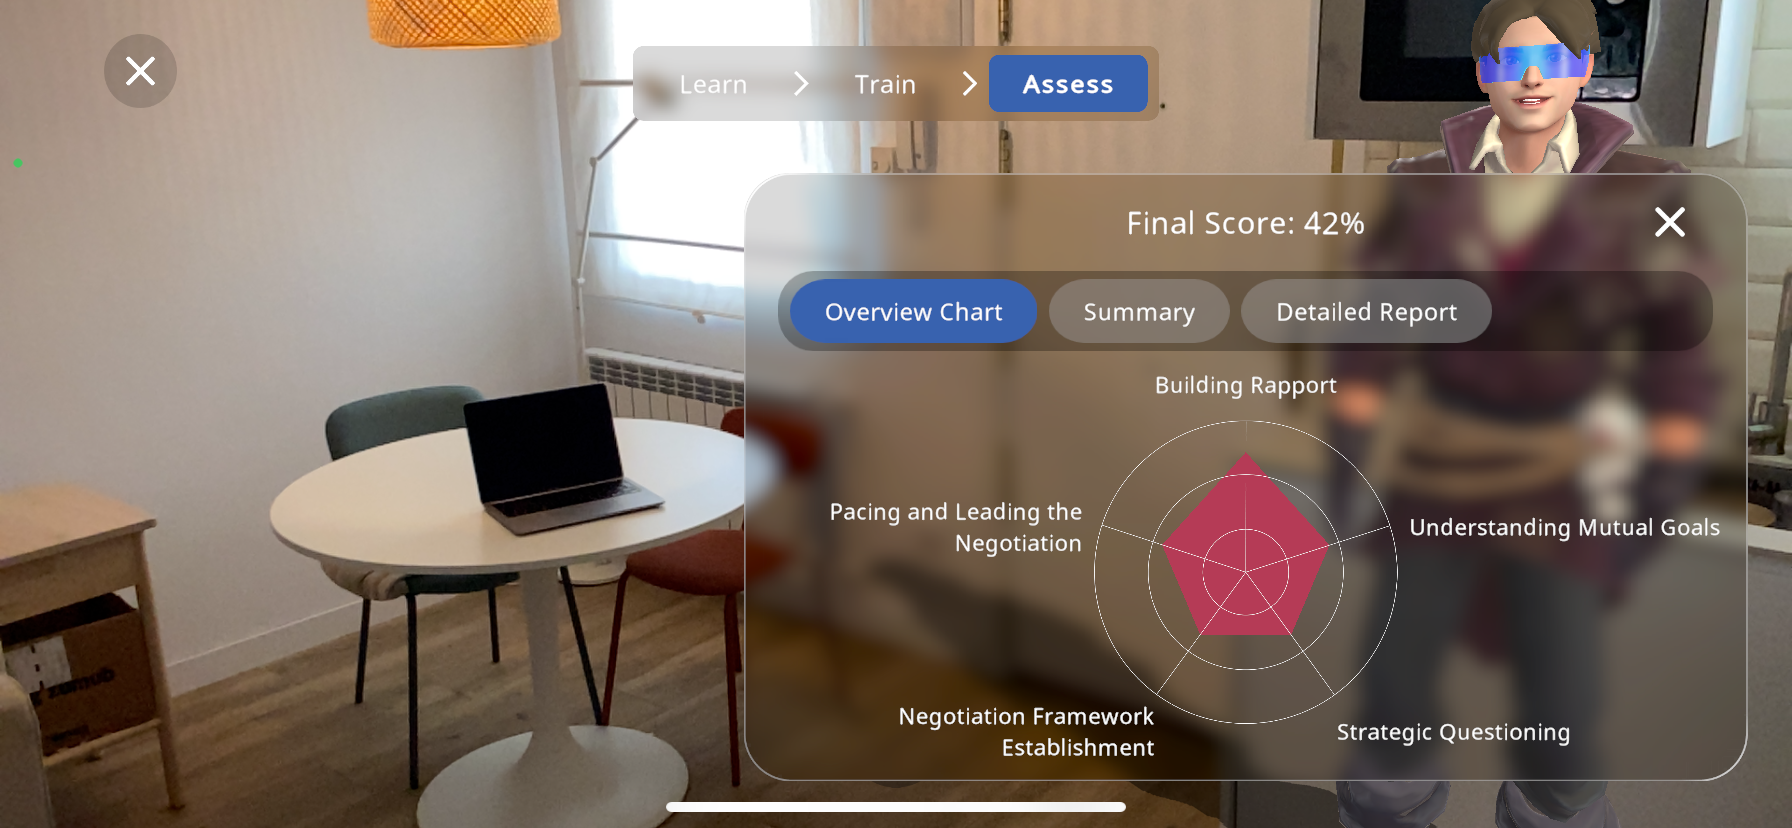
Here, you will exit the 360 environment, and the AI will assess your performance based on the scenario, providing a chart of your abilities and specific things you could improve at:
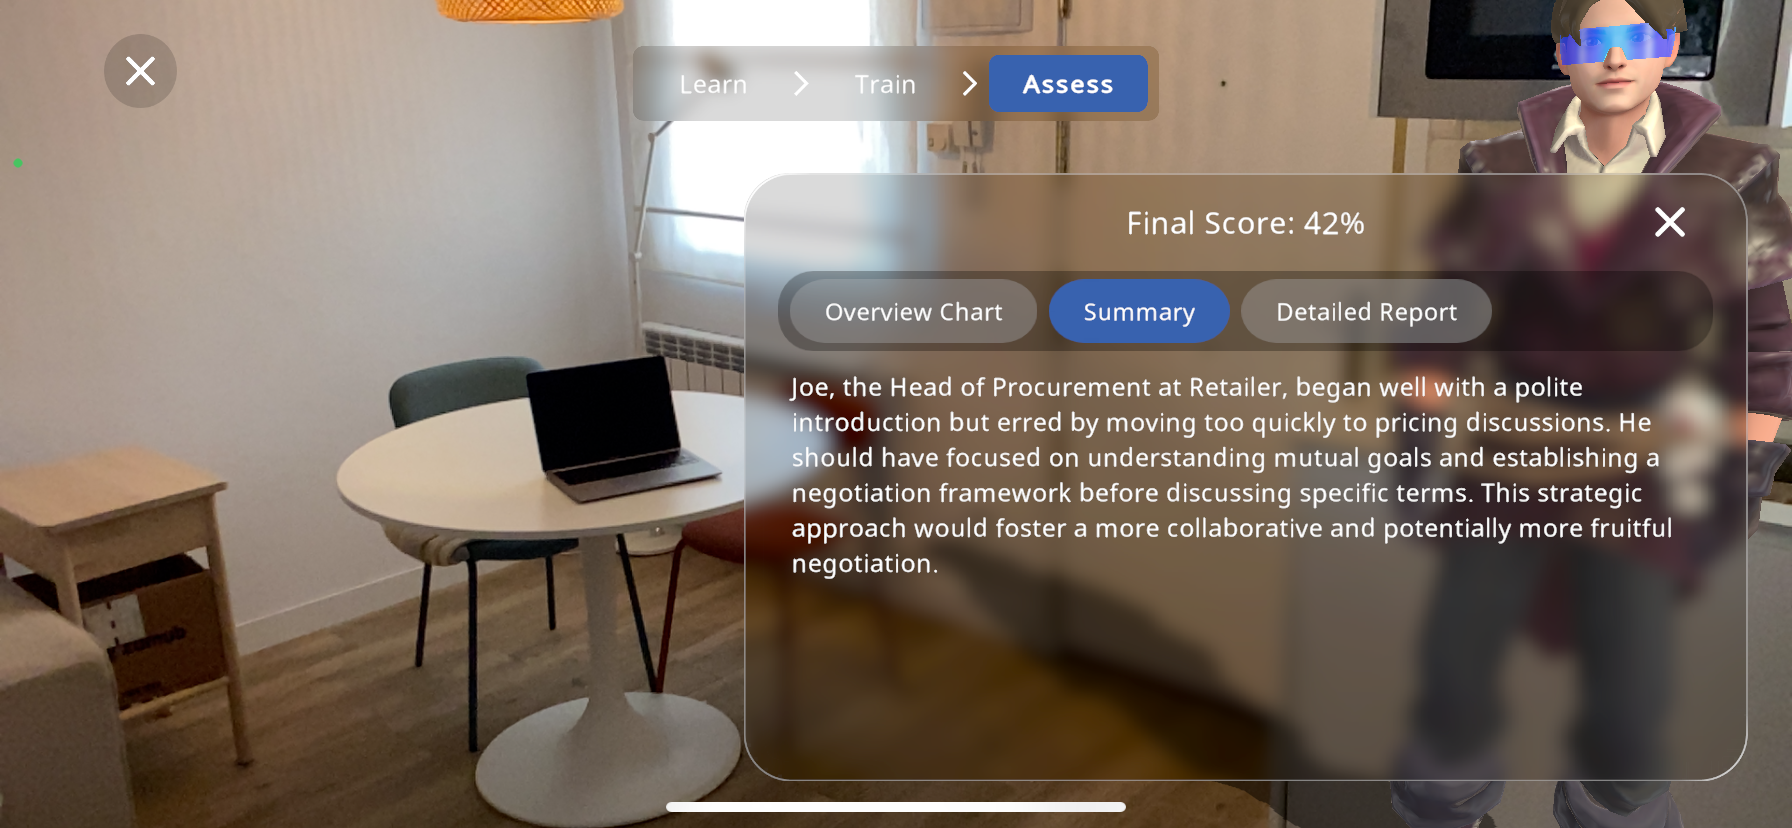
In the “Summary” tab, you will be able to read a short description of how the interaction went and your performance.
The final “Detailed report” tab shows a much more detailed description of the role play session, highlighting focus points and aspects of improvement:
Content menu#
You can select functionality in the Content menu to add annotations, activities, and additional objects to the MVB experience:
- show the Content menu, or select X to hide the menu
 open the Interact Portal to edit interactions
 create Interactions
 create 3D Recording and 3D Assessment
 create activities in the Assessment portal
 use the AI Camera
addannotation create new Annotations
- add objects in the MVB experience by following steps 5-9

Assessment portal#
The Assessment portal includes activities associated with each object in the Xperience.
You can add , view, edit  , and delete activities in the Assessment portal.
Select the object you want to add an activity to
Select Assessment portal
in the Content menuSelect and perform the necessary steps for the activity you want to create:


Auto-generated activities#
The auto-generated activities are created for existing annotations connected to the object.
If the number of annotations are 3 or fewer, the auto-generated activities are as follows:
1 annotation: Identify
2 annotations: Identify and locate
3 annotations: Identify, locate, and quiz
Knowledge portal#
Knowledge portals includes media content, such as text, videos, or images, associated with each object in the Xperience.
Select an annotation on the object you want to add a Knowledge portal to
Select
to add content

Select the media content you want to add:
Select Add to add the selected content to the Knowledge portal
The number of selected content is indicated within parenthesis


Select
to show / hide Knowledge portals
Auto-generated knowledge portal#
When you select auto-generate knowledge portal option, a knowledge portal is automatically created for the 3D object.
The knowledge portal includes video, image, and text related to the 3D object, based on the object name. Once the knowledge portal is created, you can edit the content.
Memo#
A Memo is a text element which EON-XR plays using the synthesized voice of your choice. You can add memos to Knowledge portals.
Select the Knowledge portal and select
to add contentSelect Memo
Select
to record your memo and view the voice transcriptionYou can change the input language in the Voice input list
You can install additional languages, select the + by the Voice input list. Then, select your desired language(s) in the system settings dialog

Select
to save the recordingOptionally, select the text field to edit the voice transcript
Select the desired voice used for the memo in the Voice output list
Select Add to save the memo, or Cancel to discard

AI Camera#
The AI Camera is used to search for content related to a captured AI Image. The AI Image can be used to find out more information about your 3D object and surrounding area, such as name, content tags, and images of similar objects.
You can use the terms when creating Knowledge portals using SERP.
Select
in the content menuSet an annotation point on the 3D object
Use voice input to create an annotation label
Select
 to capture an AI Image of the 3D model or the surrounding area
Note
Images captured are discarded when you exit the AI Camera.
Browse through relevant search results
Interactions#
You can create customized interactions from a selection of triggers and actions, using EON Interact.
Note
Creating interactions after the introduction period requires the EON Interact license.
Accessing Interact Feature#
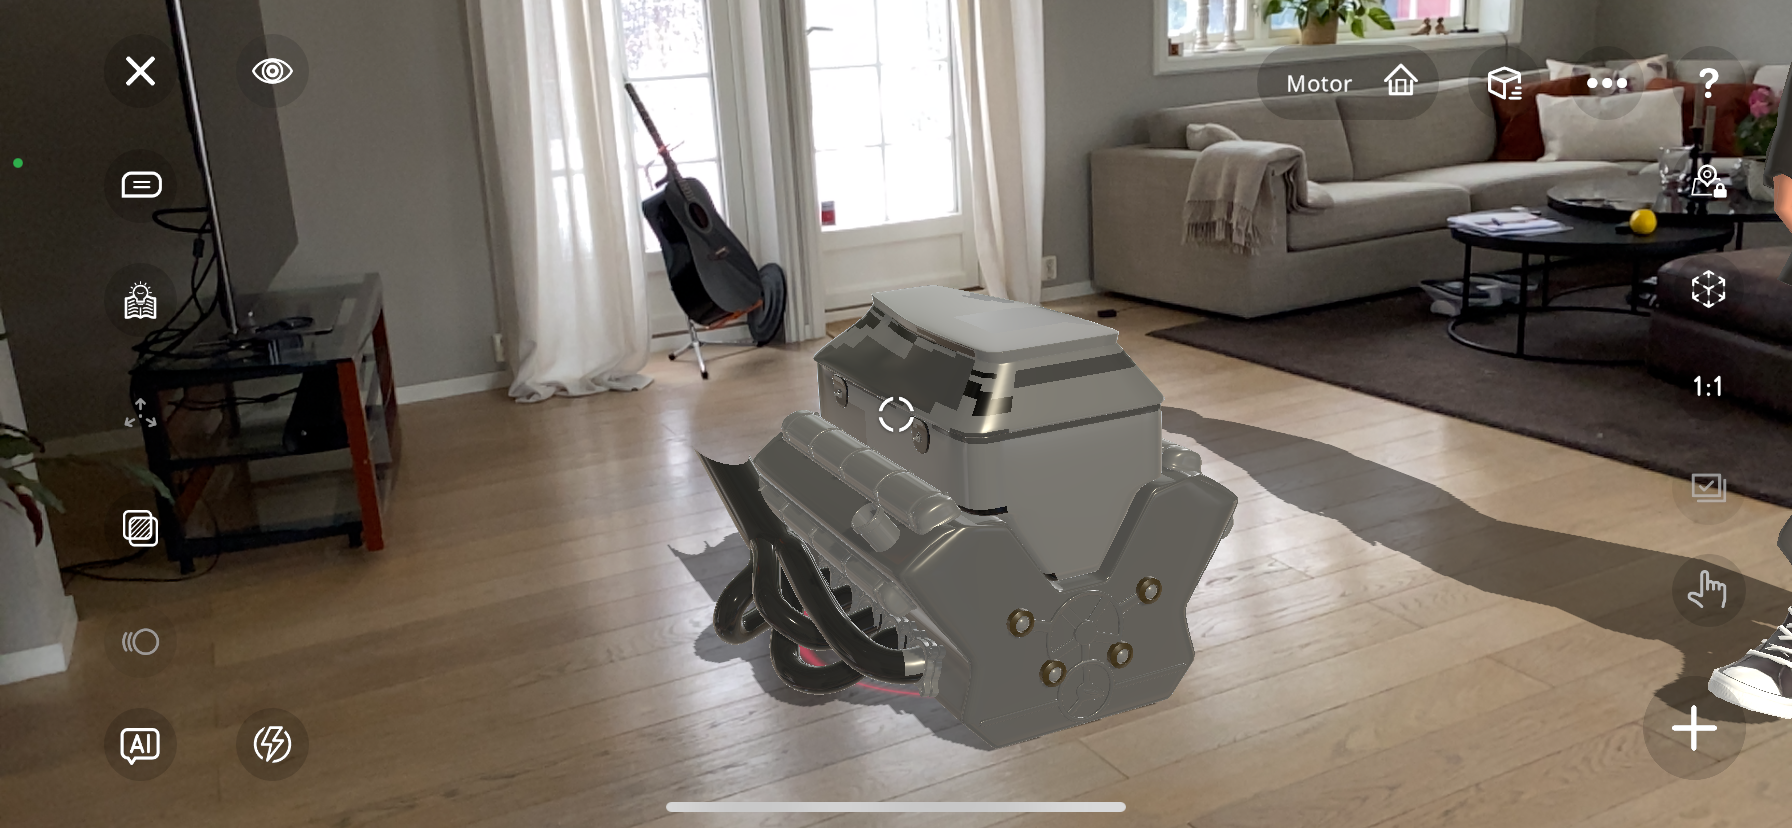
Once you have accessed/created an Xperience as an editor and have a 3D model loaded in you may access the interact feature, this will be demonstrated with a 3D model of a basic motor:
In the bottom right corner of the screen, press the “Plus” icon to add content.
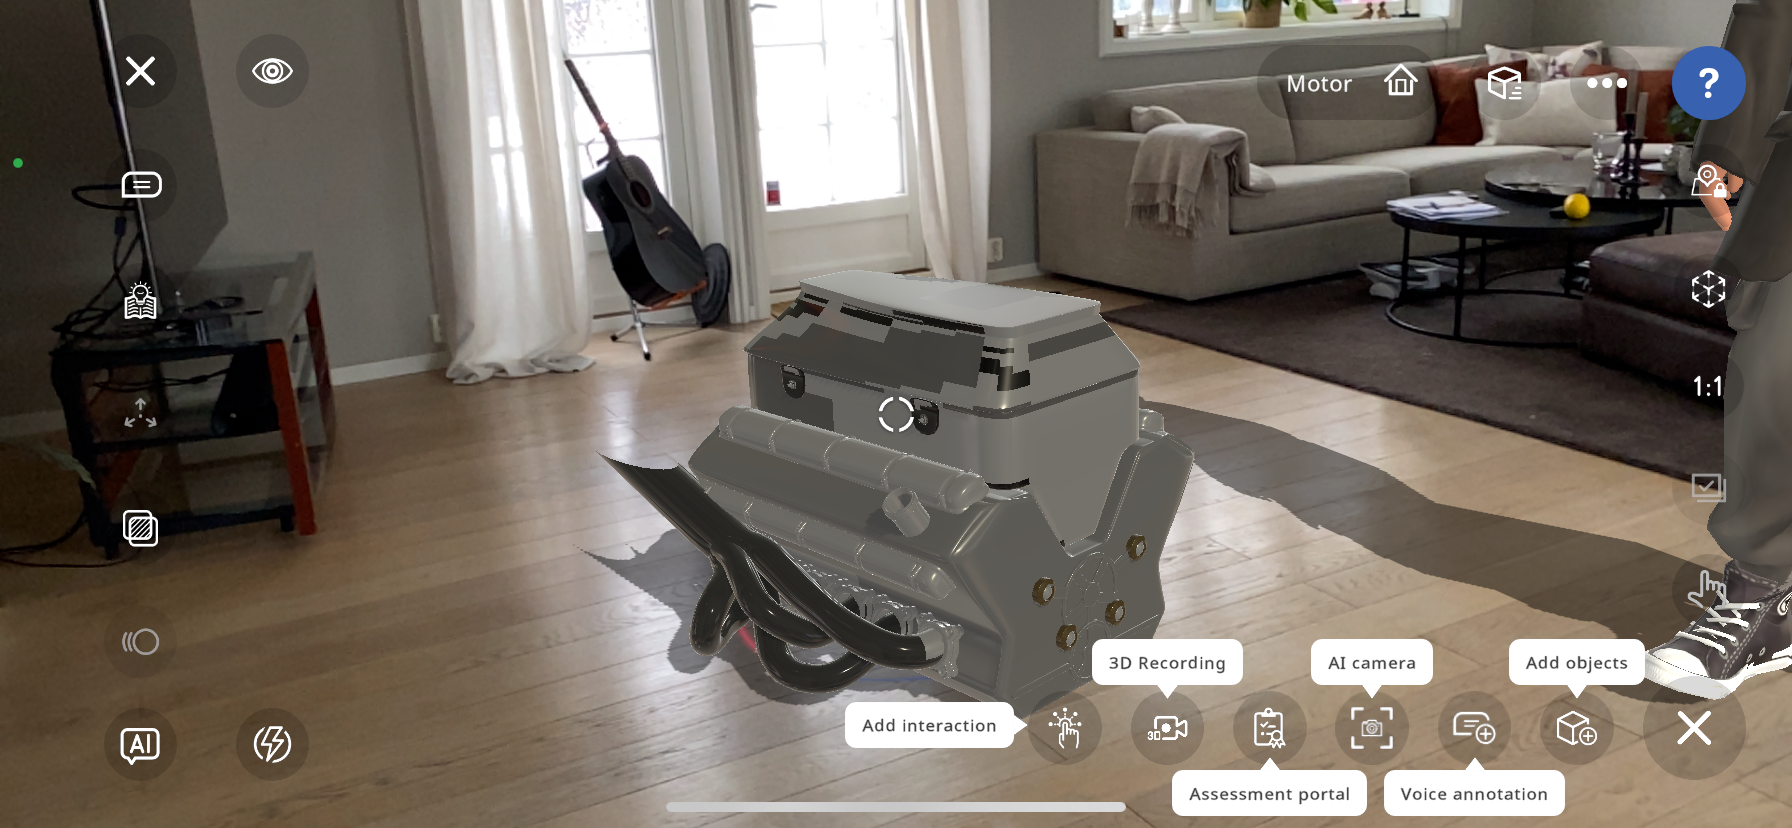
In the bottom menu, the “Add interaction” feature is now available. Press it to add an interaction.
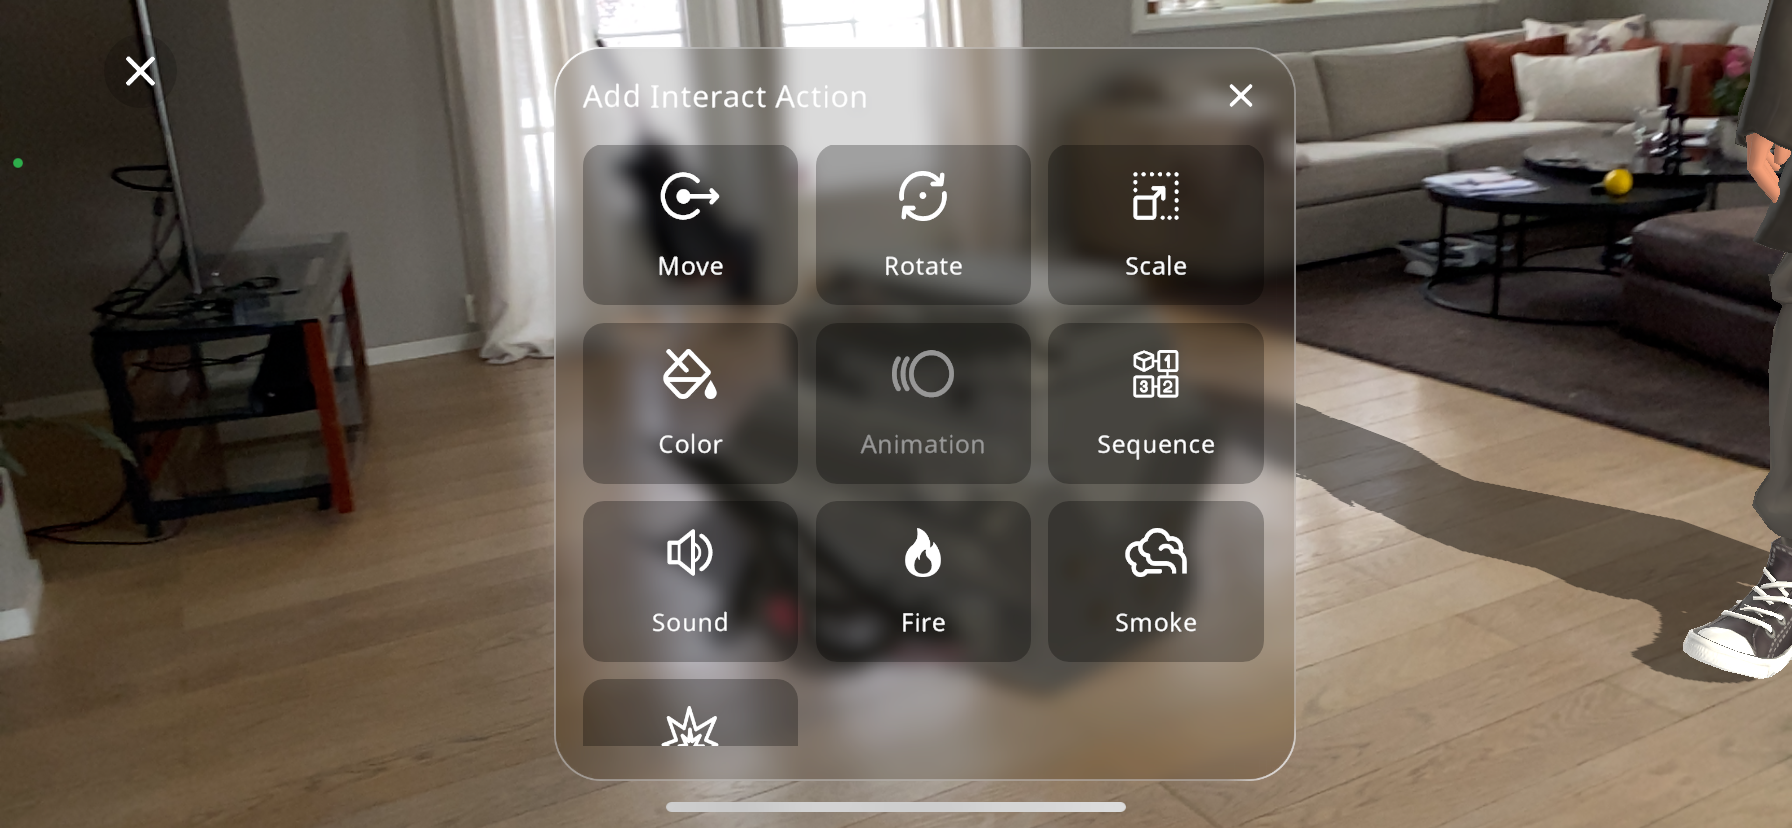
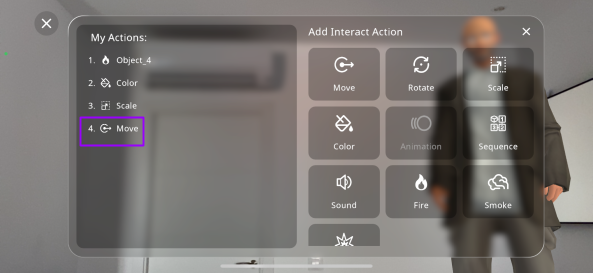
This will open the menu to select an action from the options:
Move
Rotate
Scale
Color
Animation (if available in 3D model selected)
Sequence
Sound
Fire
Smoke
Explosion
Addition of Interactions:#
Adding Fire Interaction#
From the actions menu select the “Fire” action.
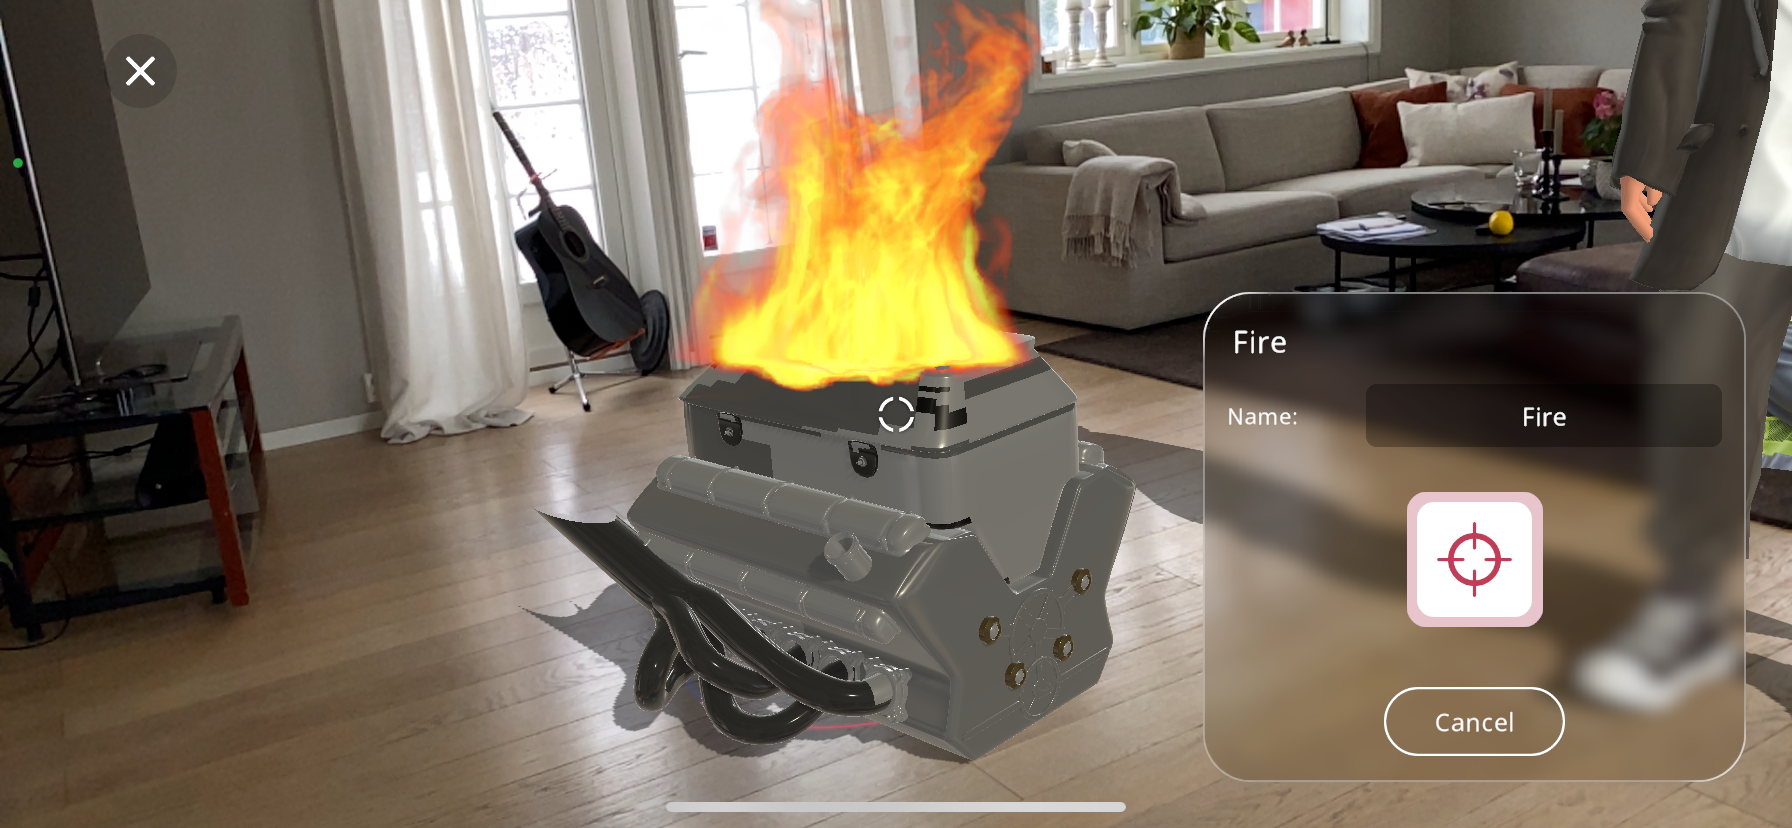
The small white crosshair in the center of the screen shows the position of the interaction; exactly where you would like the action to occur.
Move your device to a point where the crosshair is positioned where you would like the action to occur.
Use 2 fingers and pinch/enlarge the particle size, in this case the fire area.
Press the large red crosshair near the bottom right part of the screen to lock in the action’s position on the object.
If the placement isn’t quite right, you can reposition the crosshair by pressing the
button shown below and placing the crosshair again.
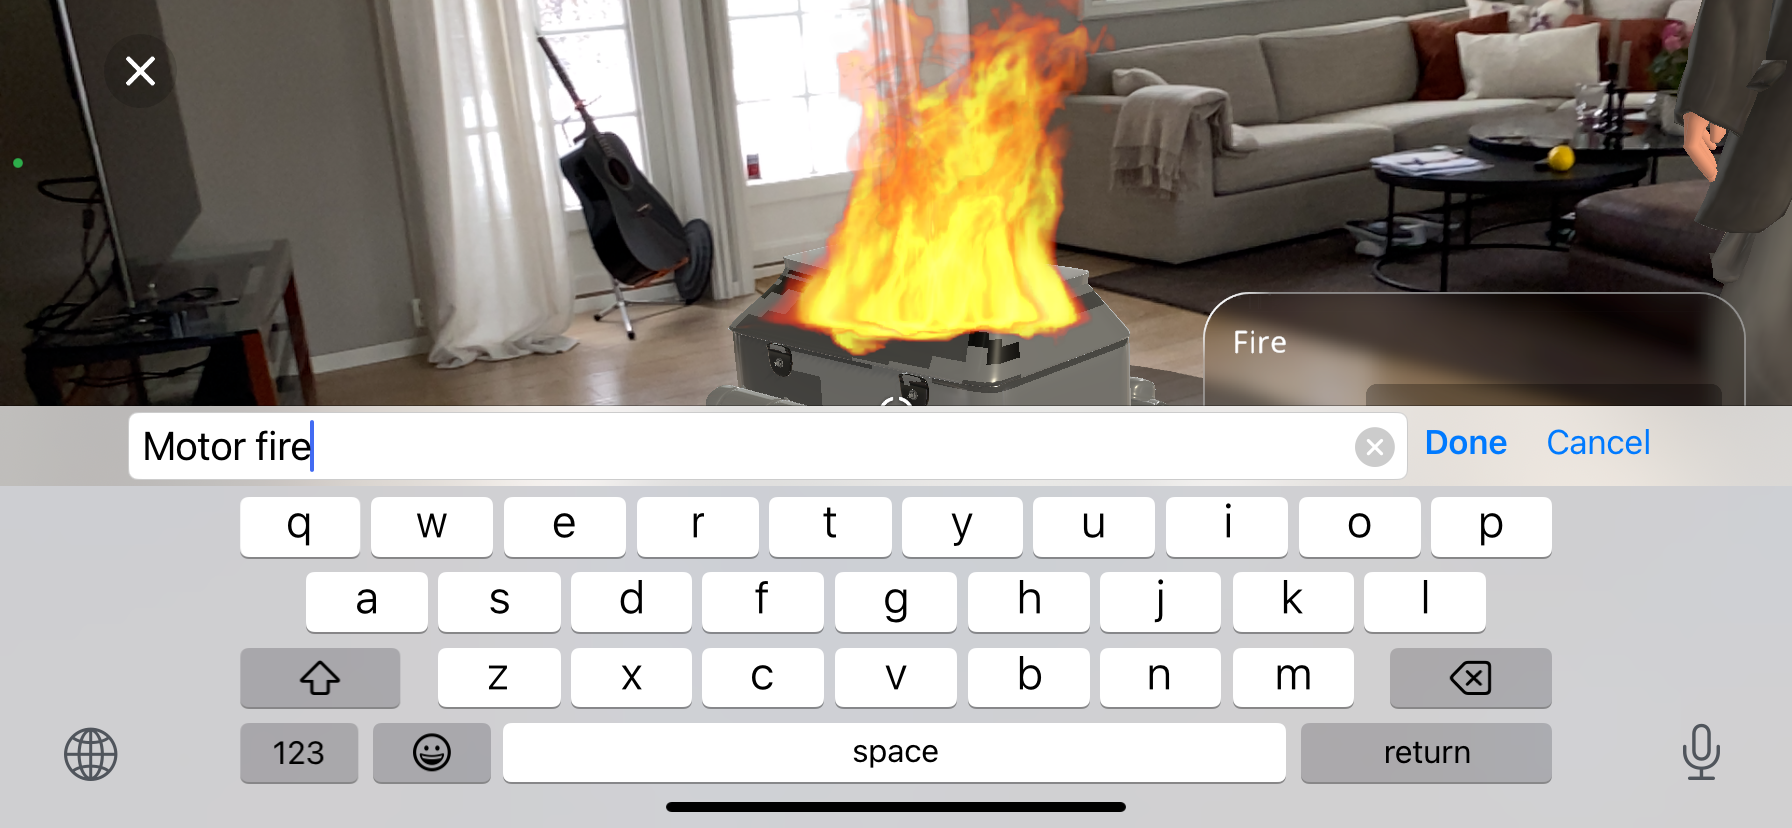
You may then rename the action you are adding, to do this, simply press on the name:

You may now type out the new name of your action and press “Done”. This is especially helpful as it can help distinguish actions once you have added many objects and actions to your Xperience:
After you are satisfied with the name given to the action, you may click on “Next”, this will take you to the “triggers” tab. For the triggers guide click on Triggers
Adding Scale Interaction#
The scale action can be added to an object to change its size when triggered.
From the actions menu select the “Scale” action.
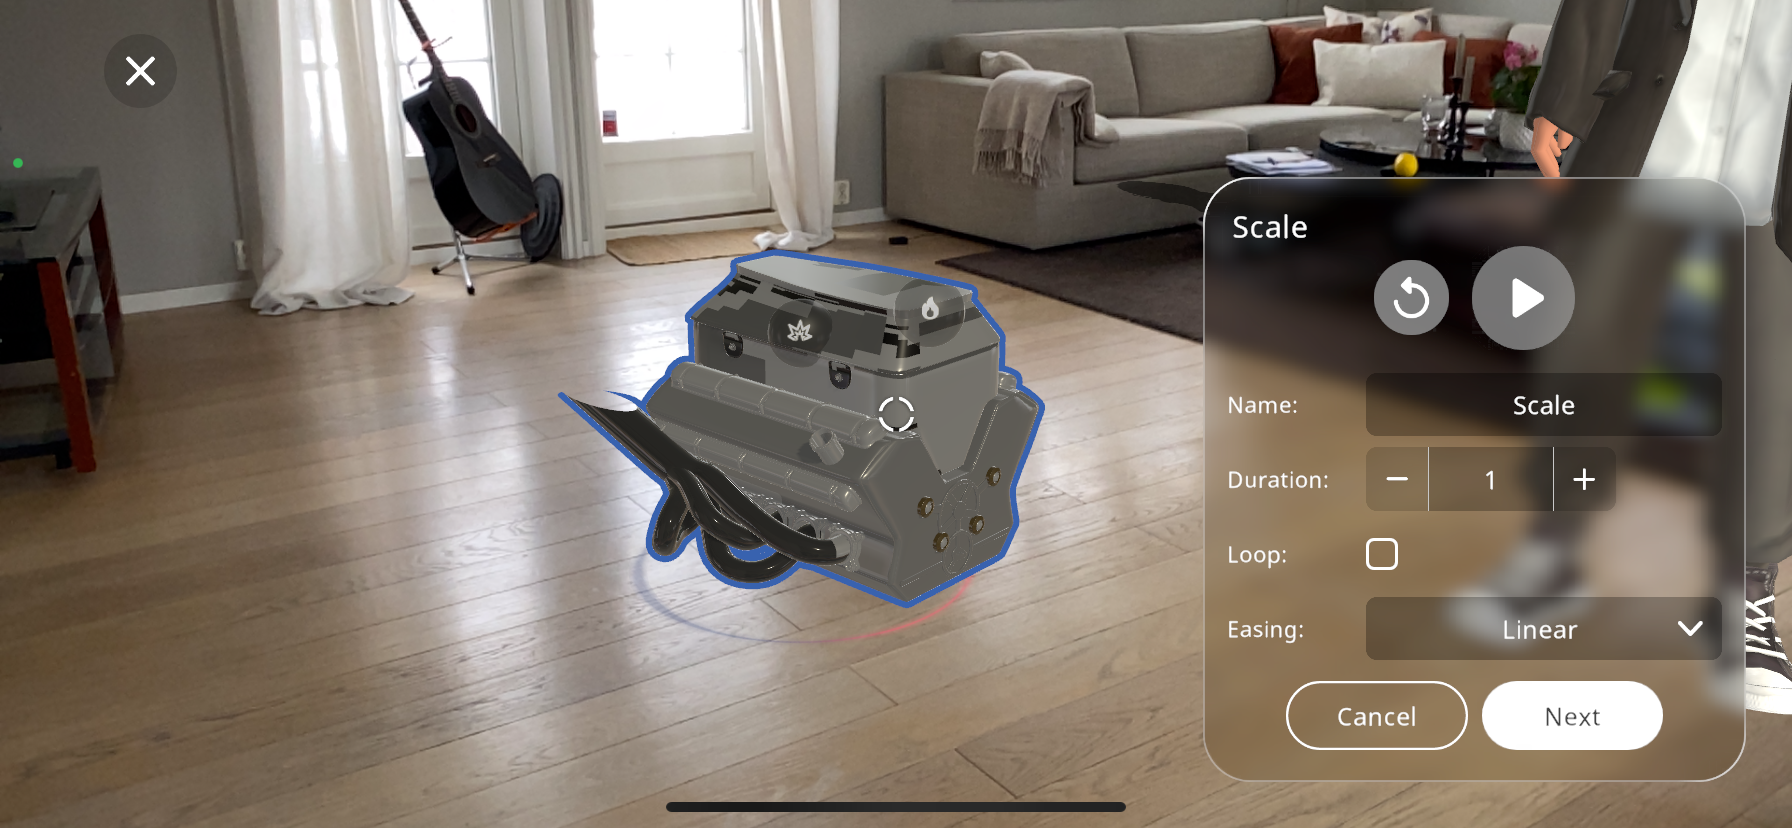
Many 3D objects are made up of multiple separate parts; you can select a child object by double tapping the child object. This will highlight it with a blue outline (you may get closer to the object the select the part with ease)
The object/part will start in its original size, use two fingers to pinch or enlarge the object to the desired size.
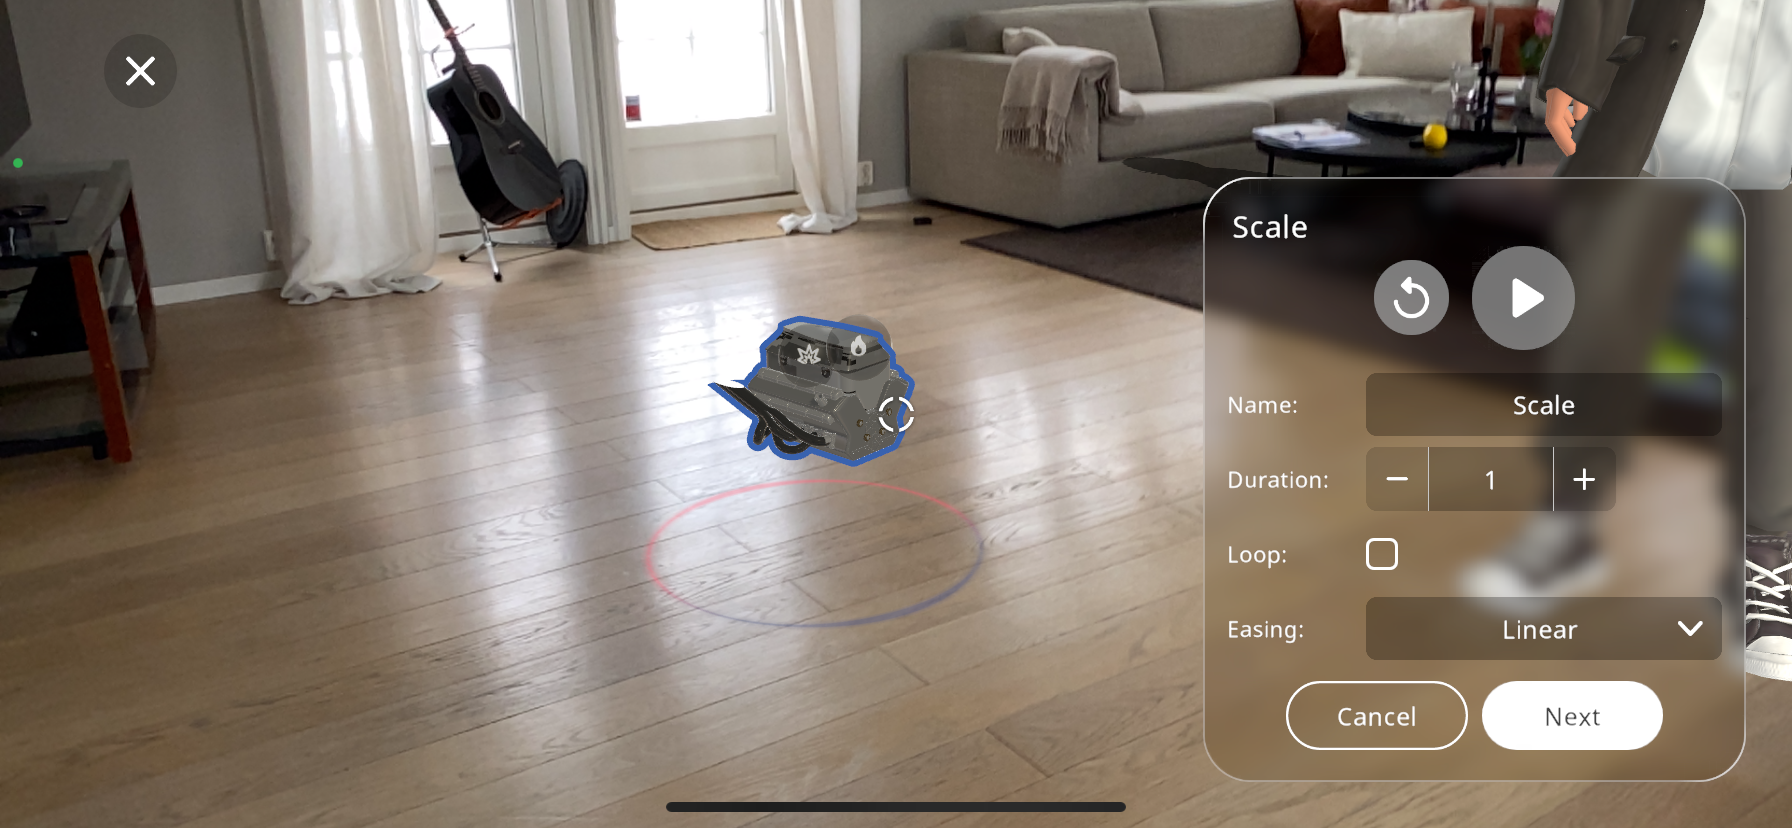
Press the
 button to view the scaling created, from the starting position to the final one. If you are not satisfied with the scaling, press the button to rescale the action.
Rename the action (Optional)
Change the “Duration” to edit the amount of time the object will take to reach its final size. This setting is in seconds, and you can use the + and - button to edit it. You may view the action by using the play button until you are satisfied with the time selected.
You may tick the “Loop” checkbox if you would like the scaling to continue looping after it has been triggered
The final “Easing” option gives an extra personalization aspect, the options do the following:
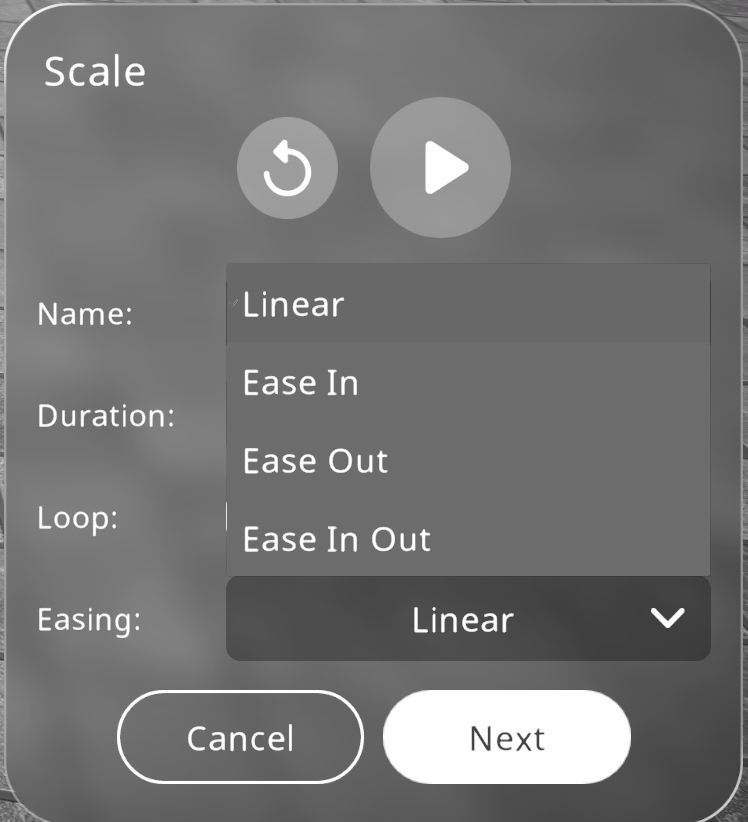
- Linear:
The object changes size at the same speed throughout the movement.
- Ease in:
The object slowly changes size at the start of the movement, then linearly for the rest of it.
- Ease out:
The object linearly changes size at the start, then slows down near the end of the movement until it reaches the final size.
- Ease in out:
This option combines the ease in and the ease out; it changes size slowly near the start, then speeds up, and finally slows down again near the end.
After you are satisfied with the name given to the action, you may click on “Next”, this will take you to the “triggers” tab. For the triggers guide click on Triggers
Adding Move Interaction#
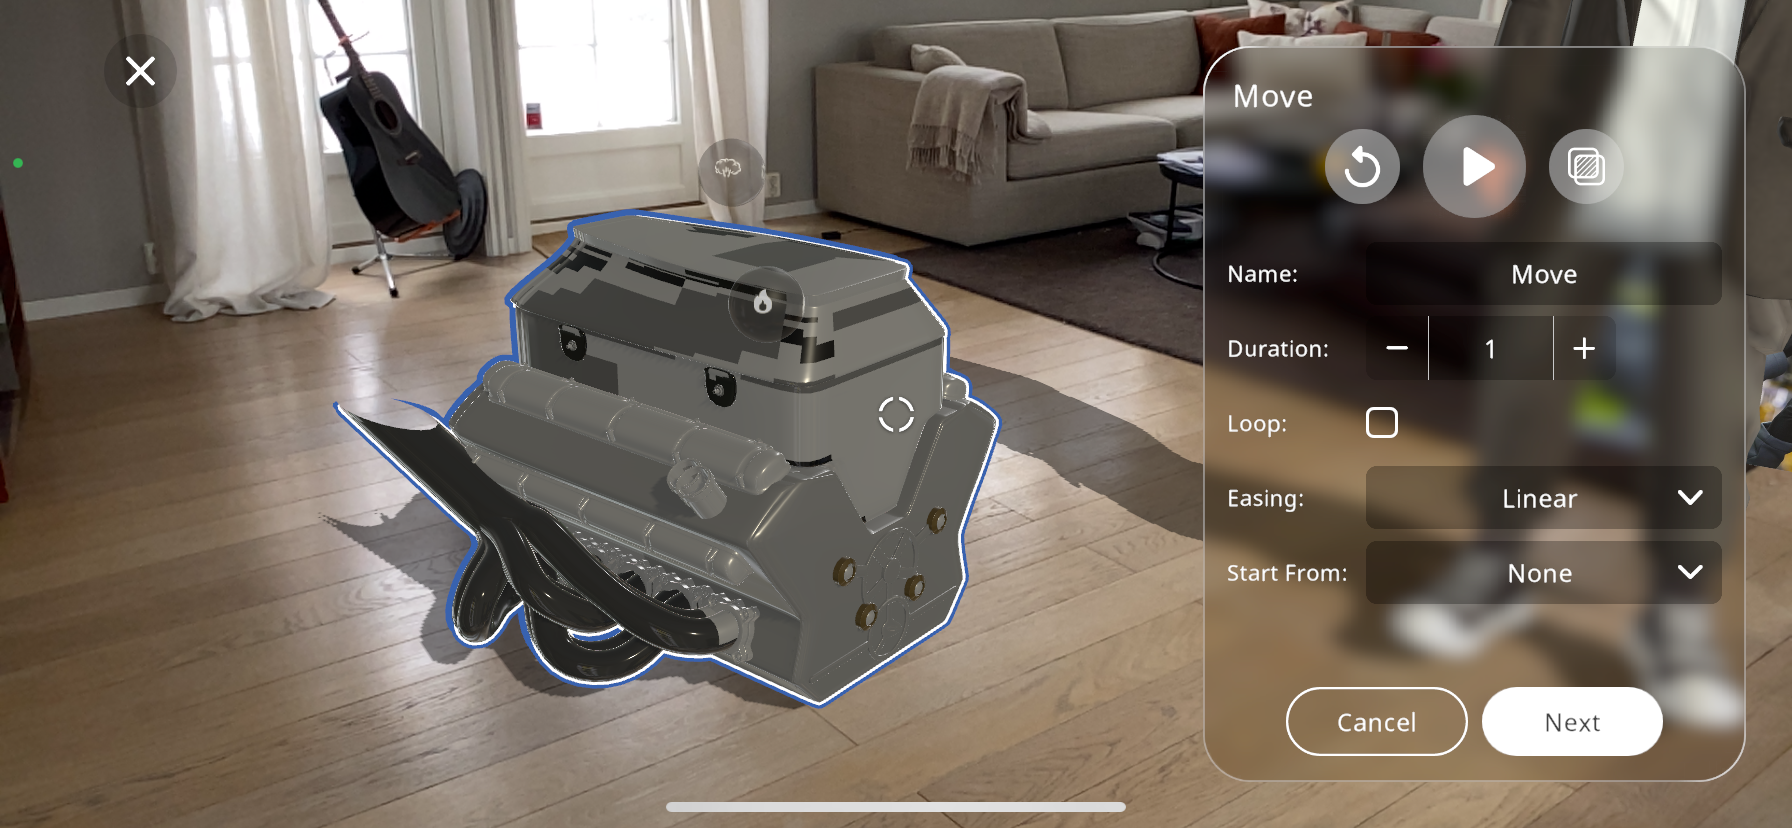
The “Move” action makes it possible to move the 3D object, from the desired starting position to the desired final position:
From the actions menu select the “Move” action.
Many 3D objects are made up of multiple separate parts; you can select a child object by double tapping the child object. This will highlight it with a blue outline (you may get closer to the object the select the part with ease)
Use two fingers to drag the object/part to the end position
Press the
button to view the movement created, from the starting position to the final one. If you are not satisfied with the movement, press the button to change the positions.Press the
 button if you would like to alternate the transparency of the object in order to reveal the surrounding elements around this object, enabling the user to precisely manipulate the object in precise reference to the rest of them.
Rename the action (Optional)
Change the “Duration” to edit the amount of time the object will take to reach its final position. This setting is in seconds, and you can use the + and - button to edit it, viewing the action by using the play button until you are satisfied.
You may tick the “Loop” checkbox if you would like the movement to continue looping after it has been triggered.
The final “Easing” option gives an extra personalization aspect, the options do the following:
- Linear:
The object changes position at the same speed throughout the movement.
- Ease in:
The object slowly changes position at the start of the movement, then linearly for the rest of it.
- Ease out:
The object linearly changes position at the start, then slows down near the end of the movement until it reaches the final position.
- Ease in out:
This option combines the ease in and the ease out; it changes position slowly near the start, then speeds up, and finally slows down again near the end.
The “Start From” dropdown menu allows you to choose an already created move/ rotate action, and the ending position of the selected action will be the starting position of the current action being created. This way you will be able to create a sequence of move and rotate actions when triggered.
After you are satisfied with the name given to the action, you may click on “Next”, this will take you to the “triggers” tab. For the triggers guide click on Triggers
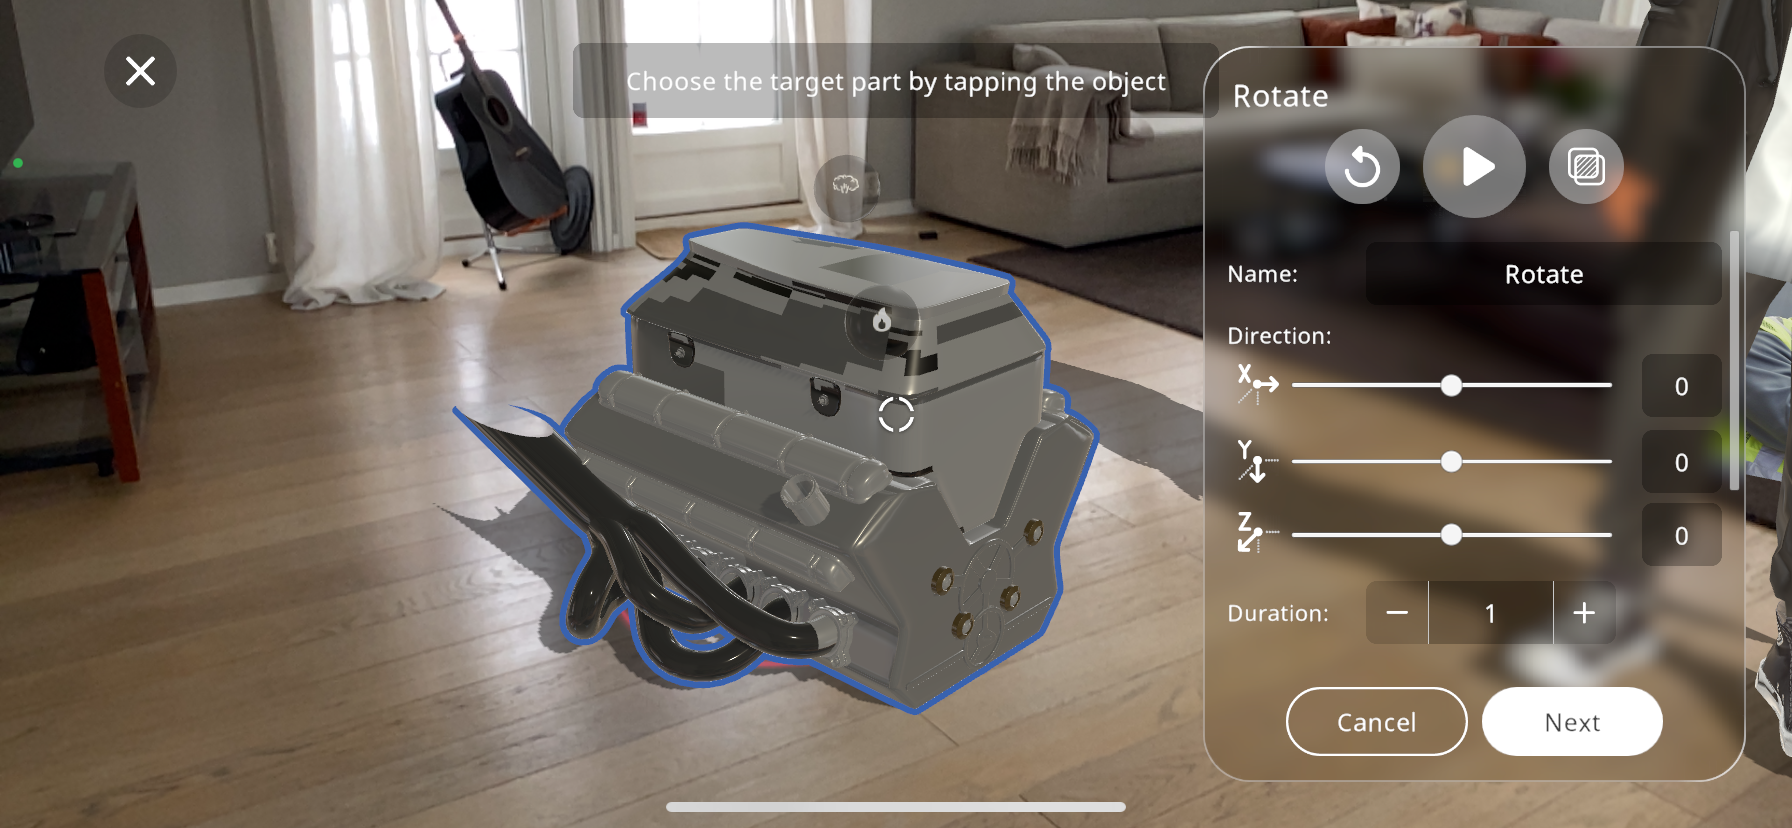
Adding Rotate Interaction#
From the actions menu select the “Rotate” action.
Press the
button if you would like to alternate the transparency of the object in order to reveal the surrounding elements around this object, enabling you to precisely manipulate the object in precise reference to the rest of them.Many 3D objects are made up of multiple separate parts; you can select a child object by double tapping the child object. This will highlight it with a blue outline (you may get closer to the object the select the part with ease)
The on-screen settings represent the axes around which the object can rotate. Use these sliders to define the rotation direction and axis.
Utilize the sliders corresponding to the X, Y, and Z axes to specify the degrees of rotation. The X-axis runs horizontally, Y-axis vertically, and the Z-axis perpendicularly out of the screen, for example:
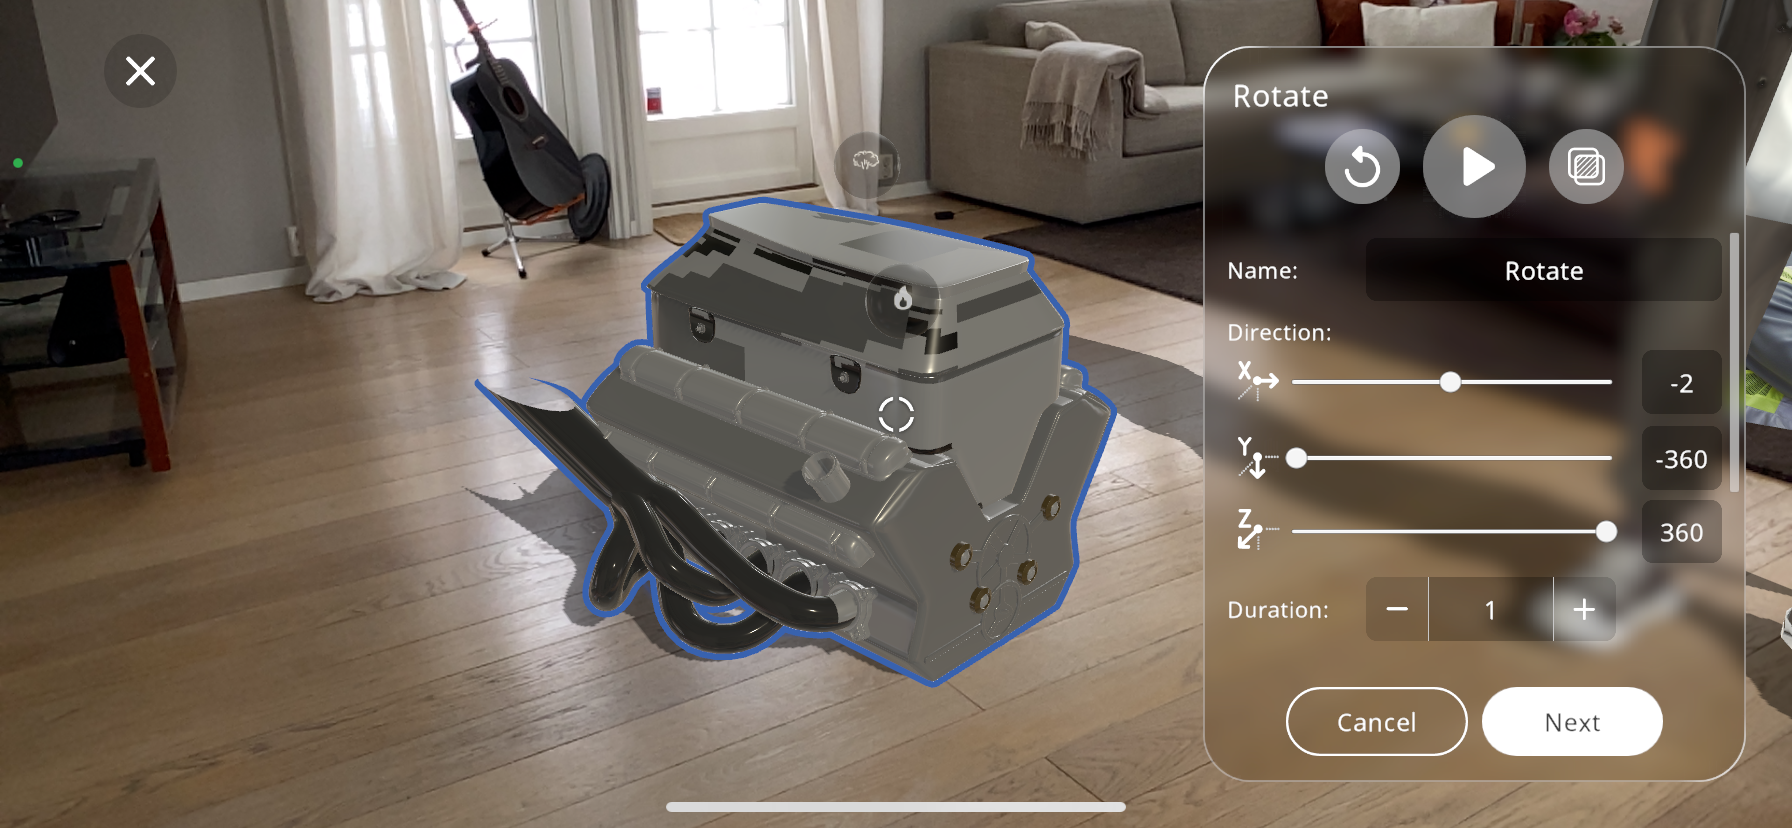
Adjust the “Duration” slider to set the time in seconds for the rotation to complete. This allows for controlling the speed of the rotation.
By toggling the “Loop” option, you can make the rotation continuous.
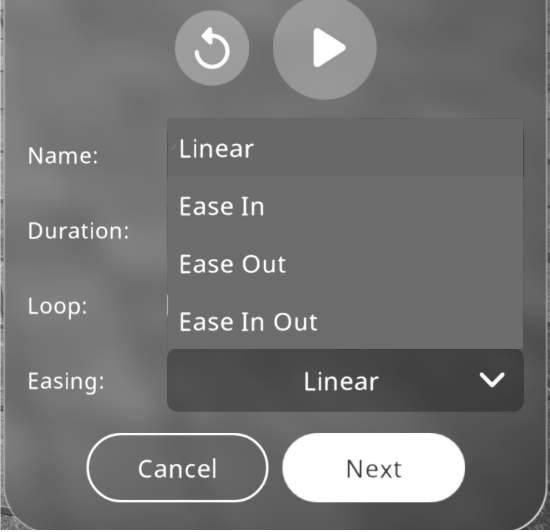
The “Easing” function offers further customization of the rotation’s motion dynamics:
Linear:
The object rotates at the same speed throughout the movement.
Ease in:
Starts the rotation slowly, then moves linearly for the remainder.
Ease out:
Begins rotating linearly, then decelerates towards the end.
Ease in out:
Combines both easing effects, starting and ending slowly with a linear movement in between.
The “Start From” dropdown menu allows you to choose an already created move/ rotate action, and the ending position of the selected action will be the starting position of the current action being created. This way you will be able to create a sequence of move and rotate actions when triggered.
Adjust the “Pivot Size” to control the radius around which your object rotates. This will generate a yellow sphere according to the pivot size you have selected. This can create a swinging effect if set larger than the object, or a standard rotation if it matches the object’s dimensions.
Press the
button to view the movement created, from the starting position to the final one. If you are not satisfied with the movement, press the button to restart to the initial position.Once the rotation appears as desired, you can optionally rename the action for easy identification later on.
After you are satisfied with the name given to the action, you may click on “Next”, this will take you to the “triggers” tab. For the triggers guide click on Triggers
Adding Color Interaction#
Enhance the visual appeal of your 3D model by applying the “Color” action, which allows you to change the color of an object within your Xperience.
From the actions menu select the “Color” action.
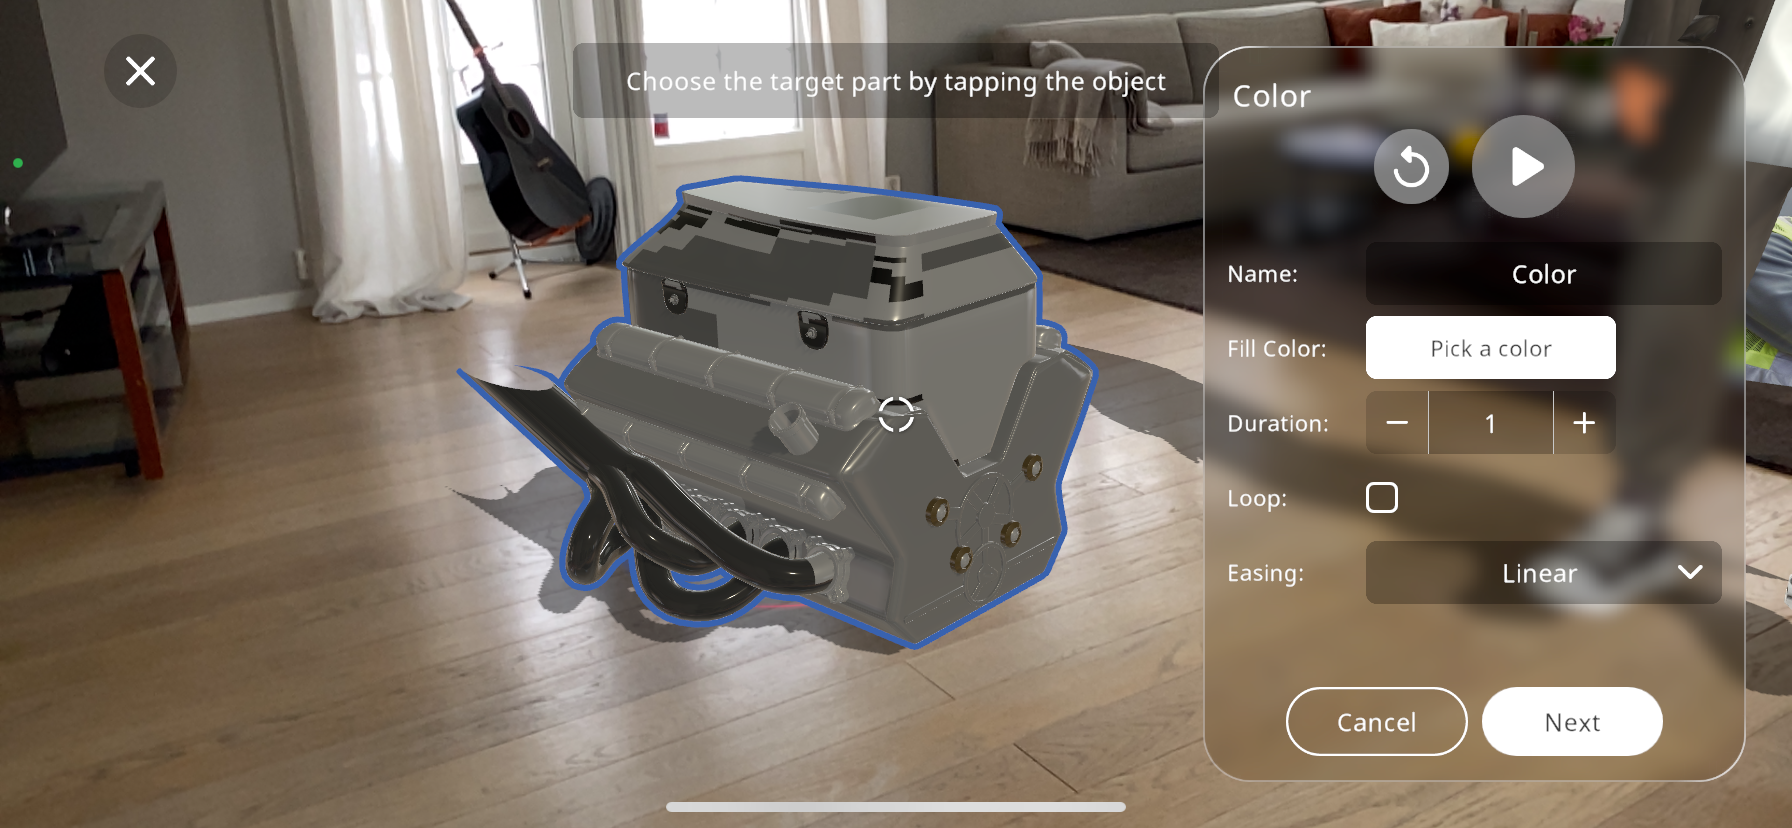
On the screen, you will be prompted to choose the target object you wish to color. Tap the desired object to proceed.
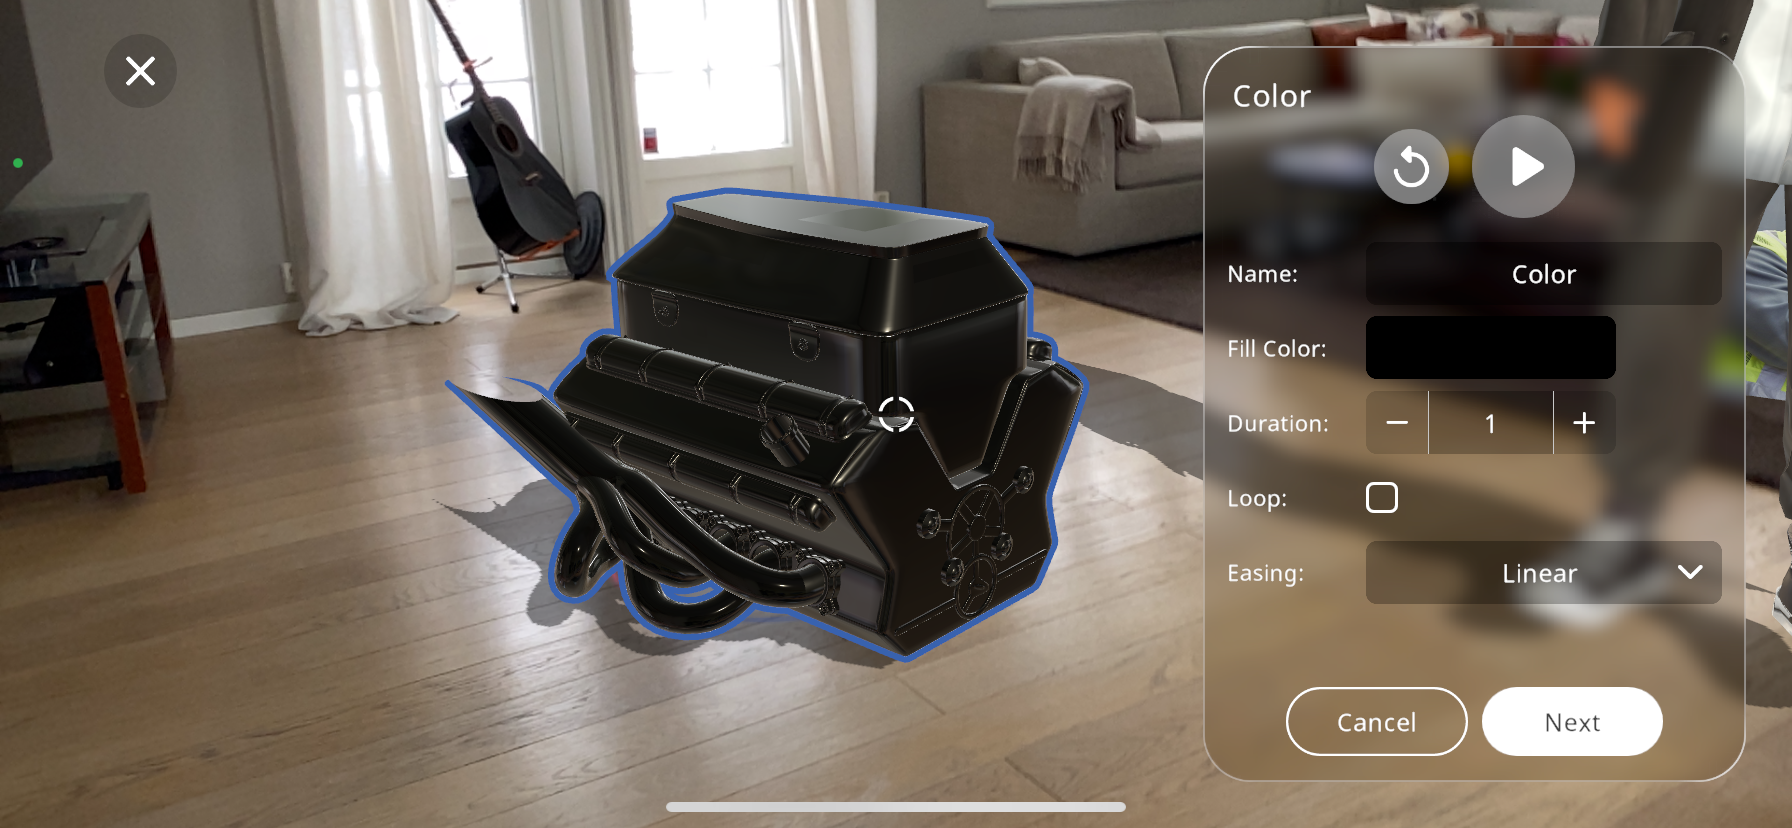
Once the target part is selected, tap on “Pick a color” to open the color palette. Here you can pick the new color you want the object to change to when the action is triggered.
Adjust the “Duration” slider to set the time in seconds for the color transition, controlling how quickly or slowly the color change takes place.
If you want the color change to repeat, toggle the “Loop” checkbox. This will cause the color change to continuously cycle.
Select an “Easing” option from the dropdown menu to determine how the color change will progress:
- Linear:
“Linear” ensures the color change happens at a consistent rate.
- Ease in:
“Ease in” will start the color transition slowly and then speed up.
- Ease out:
“Ease out” will make the transition start quickly and slow down towards the end.
- Ease in out:
“Ease in out” will begin and end the transition slowly, with a quicker transition in the middle.
Preview the color change by tapping the
button. If the effect is not as desired, you can easily go back and adjust the color or the settings.
Optionally, rename the action to keep track of it, especially useful if you have multiple color changes within the same Xperience.
After you are satisfied with the name given to the action, you may click on “Next”, this will take you to the “triggers” tab. For the triggers guide click on Triggers
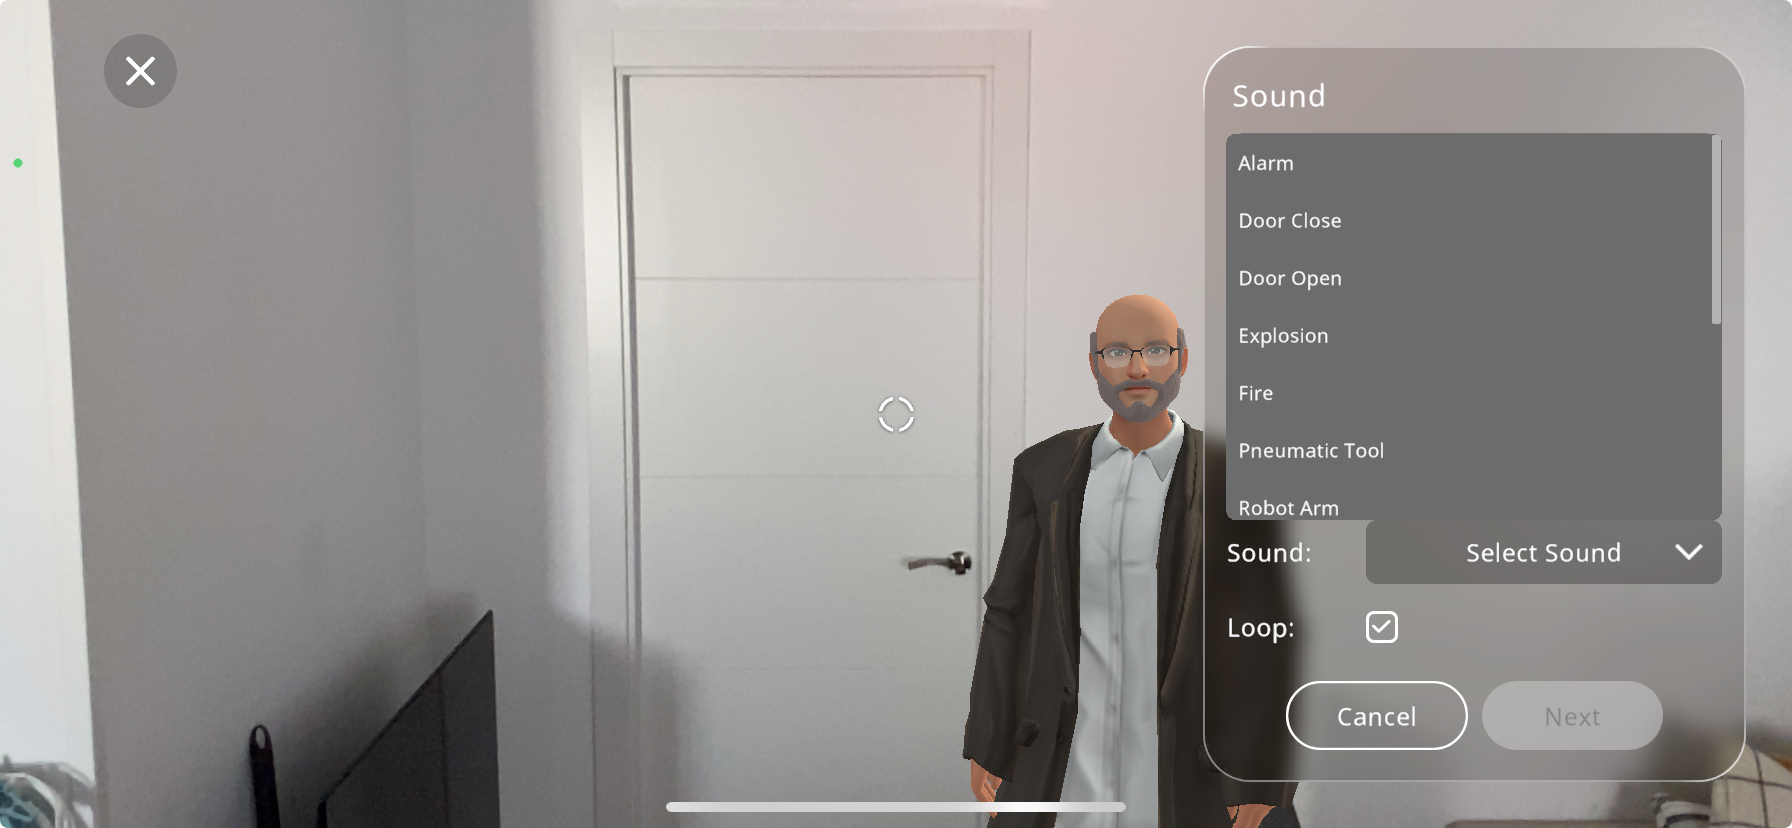
Adding Sound Interaction#
From the actions menu select the “Sound” action.
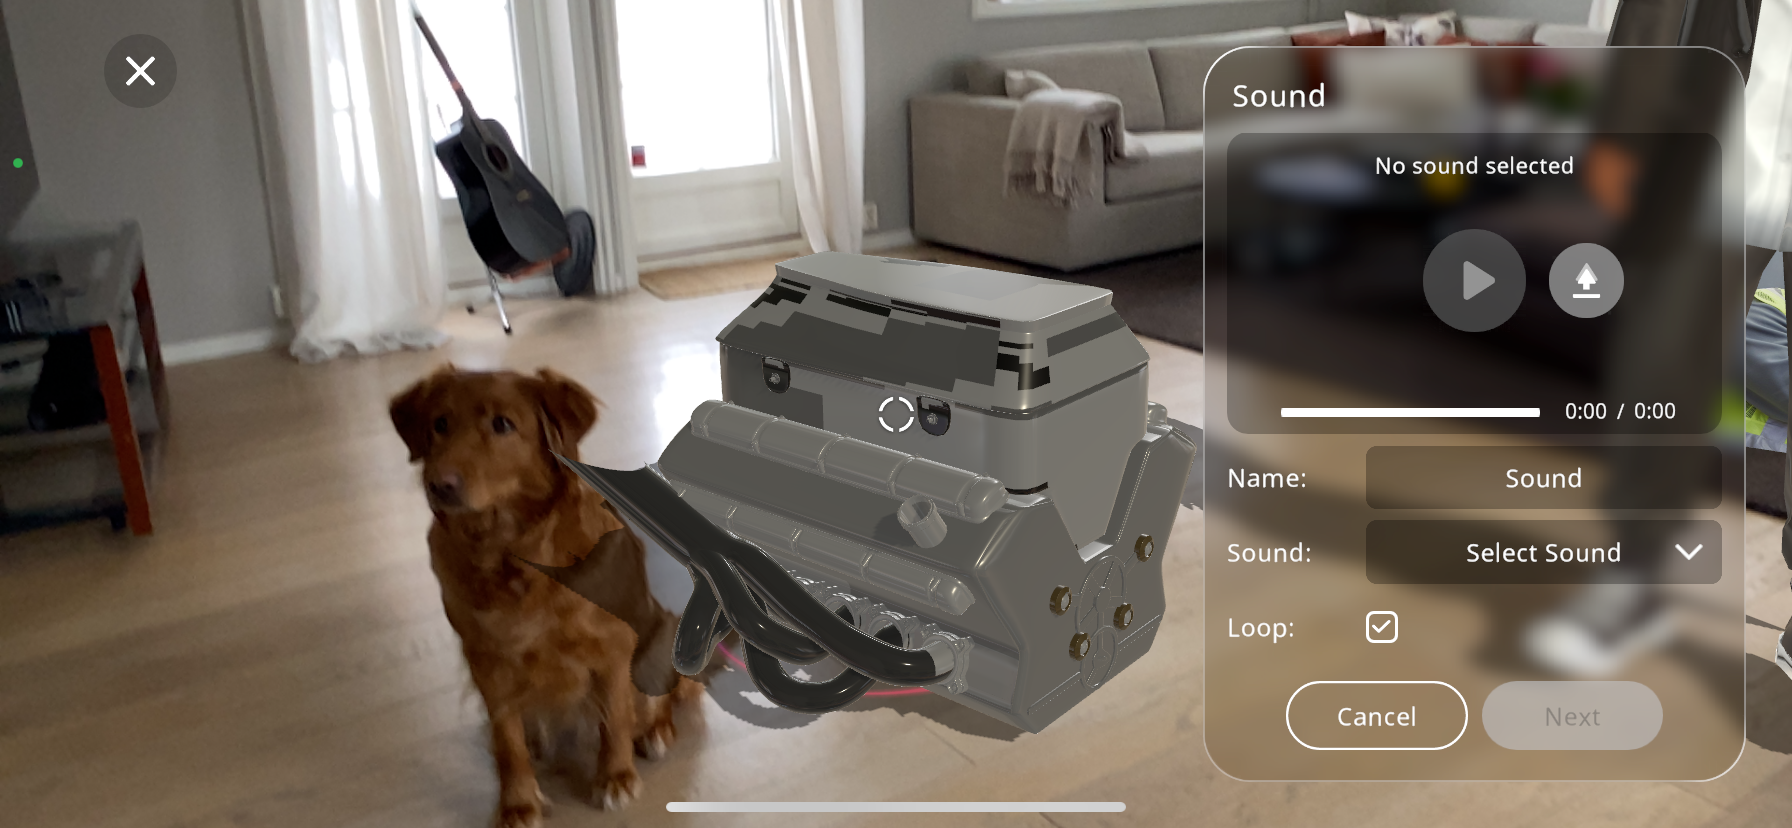
Tap on the
 button to upload a new audio file from your device. Choose the sound that best fits the interaction you are designing. You may also pick an existing sound effect from our library if you wish by pressing the drop down menu labeled “Select Sound”:
After selecting the sound, you have the option to preview it by pressing the play button. This ensures that the correct audio file is chosen and it functions as expected.
The “Loop” checkbox is available for you to make the sound repeat continuously. This is useful for background music or continuous sound effects.
Optionally, you can rename the action to something more descriptive, which can be beneficial for organizing multiple sounds within the same Xperience.
After you are satisfied with the name given to the action, you may click on “Next”, this will take you to the “triggers” tab. For the triggers guide click on Triggers
Adding Smoke Interaction#
To add a sense of realism or indicate a malfunction within your Xperience, the “Smoke” action can be utilized to simulate a smoke effect and sound emanating from a particular part of the 3D model.
From the actions menu select the “Smoke” action.
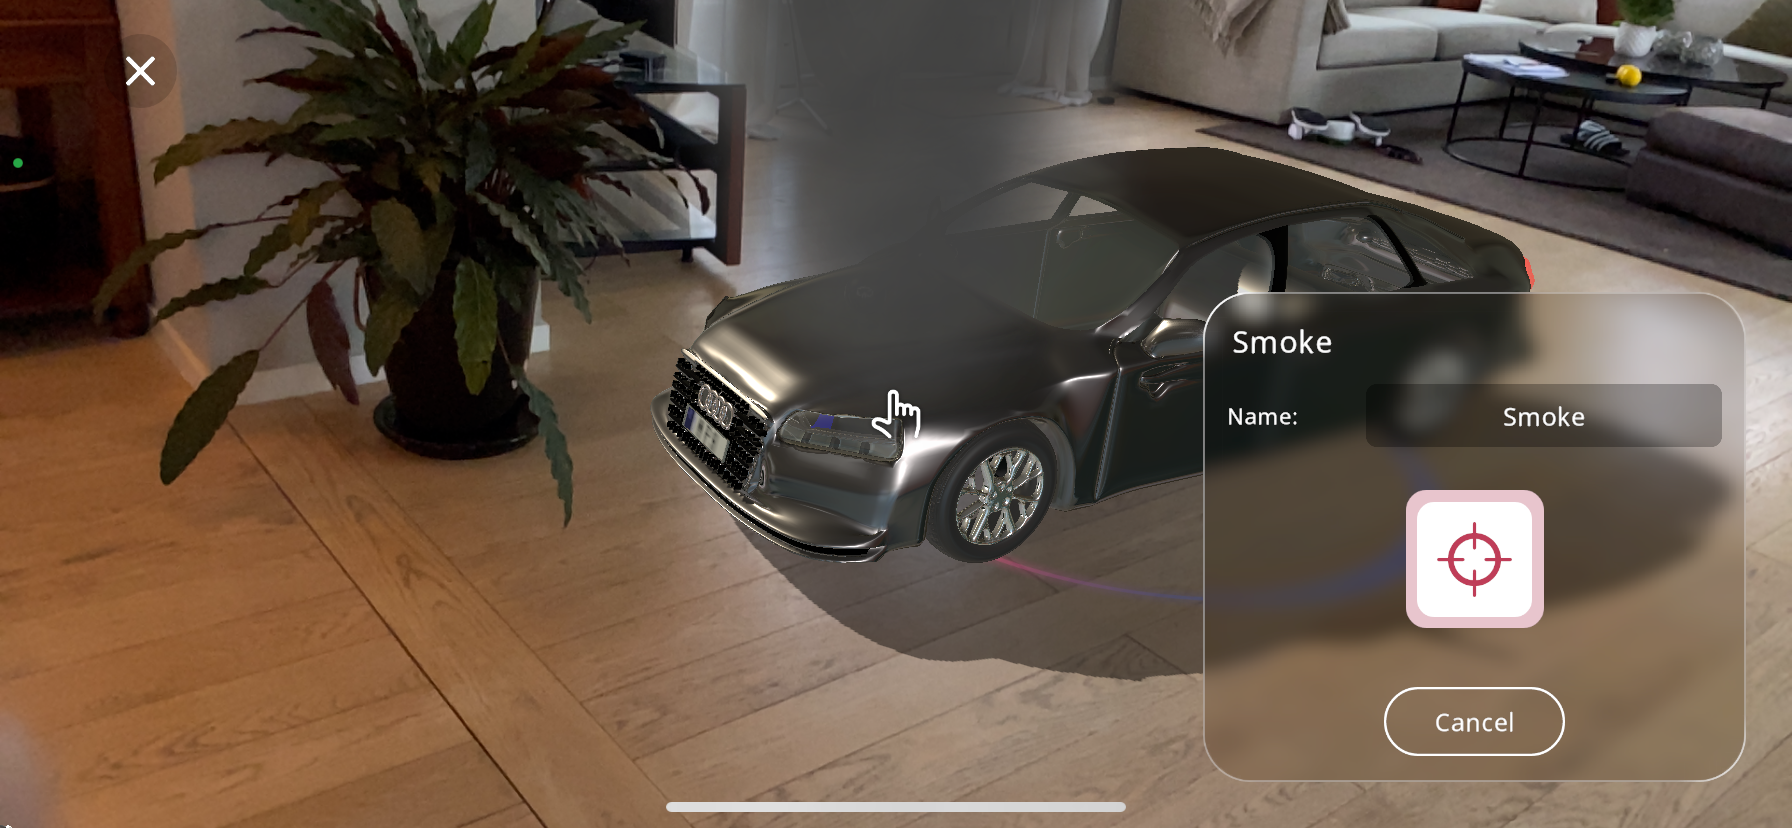
Position your device so that the crosshair aligns with the area of the object where you want the smoke to originate.
Use 2 fingers and pinch/enlarge the particle size, in this case the smoke area.
Tap the large red crosshair button, located at the bottom right part of the screen, to set the smoke action’s location on the object. If you need to adjust the positioning, simply tap the cancel button and reposition the crosshair accordingly.
In the “Name” field, enter a specific identifier for the smoke action. This is particularly helpful when your Xperience includes multiple effects and you need to differentiate between them.
After you are satisfied with the name given to the action, you may click on “Next”, this will take you to the “triggers” tab. For the triggers guide click on Triggers
Adding Explosion Interaction#
To create a dramatic effect within your Xperience, the “Explosion” action can be added to simulate a powerful burst, appropriate for creating high-impact scenes or emphasizing interactions.
From the actions menu select the “Explosion” action.
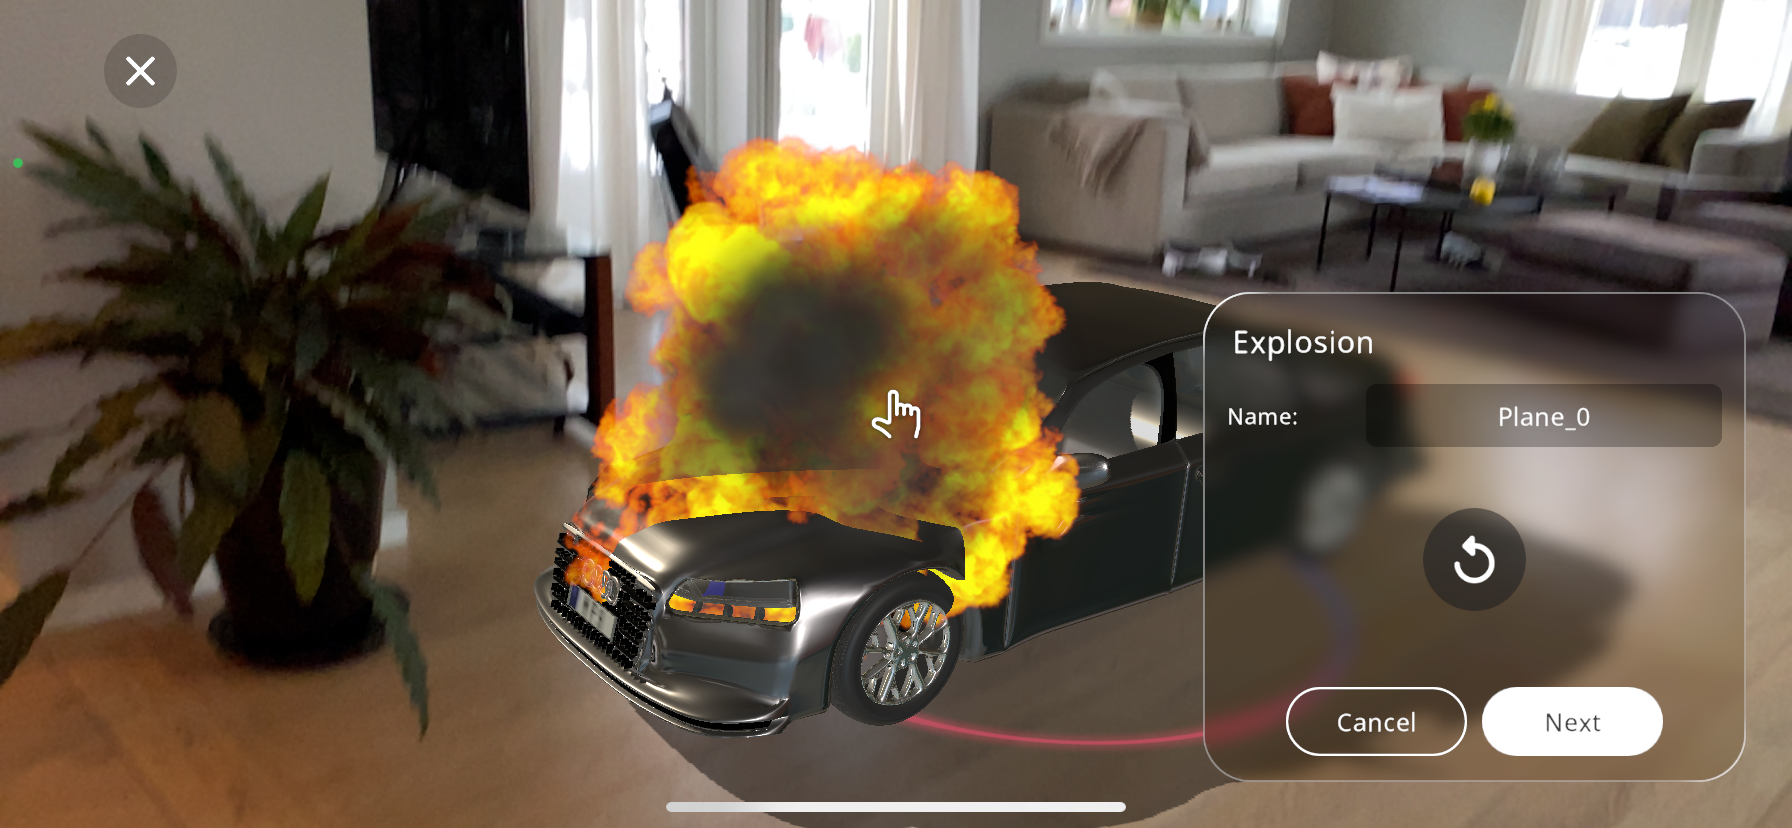
Move your device to a point where the crosshair is positioned where you would like the action to occur.
Use 2 fingers and pinch/enlarge the particle size, in this case the explosion area.
Press the large red crosshair near the bottom right part of the screen to lock in the action’s position on the object.
If the placement isn’t quite right, you can reposition the crosshair by pressing the cancel button and placing the action again.
The “Name” field allows you to assign a unique identifier to the action, which is especially useful for distinguishing between multiple effects within your Xperience.
After you are satisfied with the name given to the action, you may click on “Next”, this will take you to the “triggers” tab. For the triggers guide click on Triggers
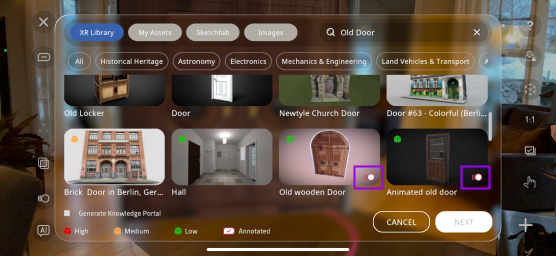
Adding Animation Interaction#
There are many 3D models available in the EON-XR library that have animations that can be activated on triggers. To check if a 3D object has an animation, look for the symbol in the bottom right corner of the model when selecting it:
If you have already imported an object, and are unsure whether it has an animation, you can check the “Animation” button when creating an interaction. If the animation button looks darker than the rest of the actions, it means the selected object does not have an animation and you will not be able to press it:
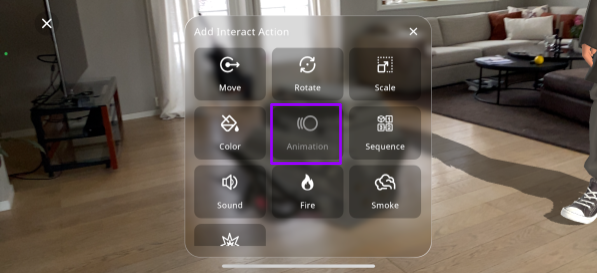
However, if the button is the same color as the rest, you are able to create an interaction with the object’s animation:

From the actions menu select the “Animation” action.

A list of pre-made animations applicable to your model will appear. Select the desired action that suits your needs. In this example, this “Old Door” model for example has the action, “DoorAction”, which opens the door.
The animation plays out once selected, if you are satisfied with the animation you may continue, if not, you can return and add a different 3D object with animation.
Give your animation a unique name for easy reference (Optional).
Check the “Loop” checkbox if you’d like animation to loop continuously.
After you are satisfied with the animation settings, you may click on “Next”, this will take you to the “triggers” tab:
7. Select a trigger. For this example “Part” is chosen: 1147-doorpartselect.png
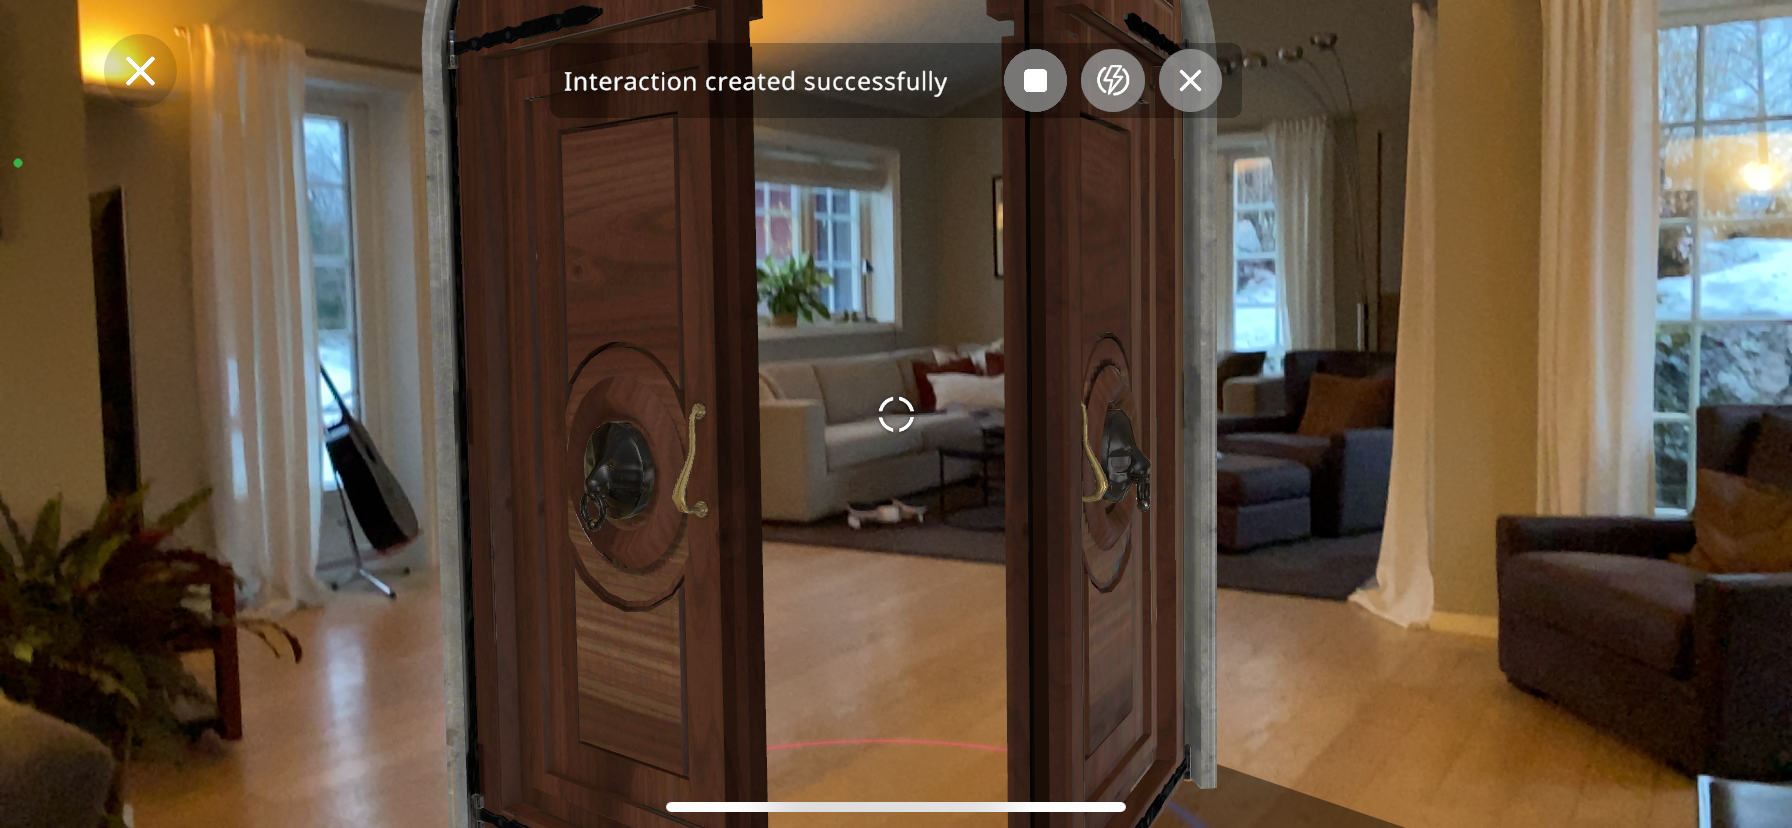
The animation is created successfully.
Press the  button to stop the animation.
Press the  button to go to the Interact Portal.
Press the  button to return to the “add content” screen.
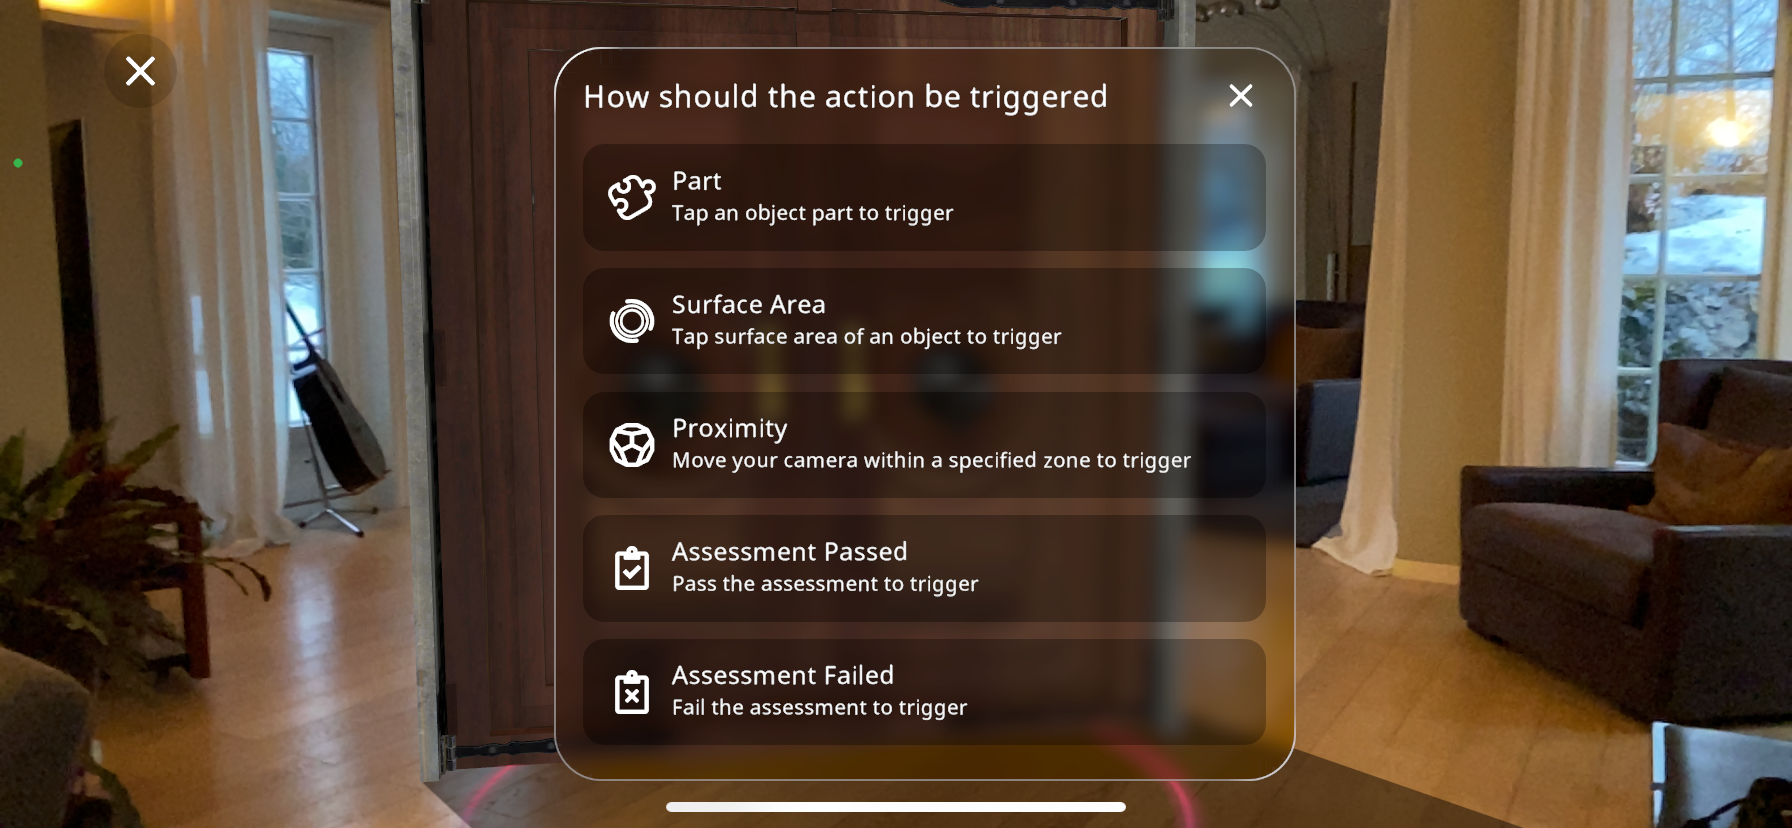
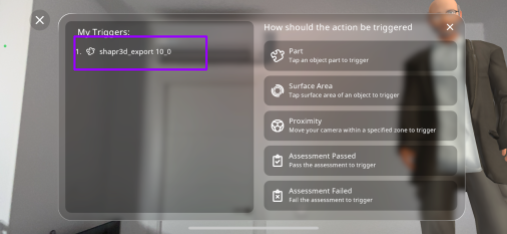
Triggers#
Once you have chosen the desired action you’d like to add to your Xperience, you must select a trigger. This is where you decide how the viewers of the Xperience will trigger the action when viewing the Xperience. The options are the following:
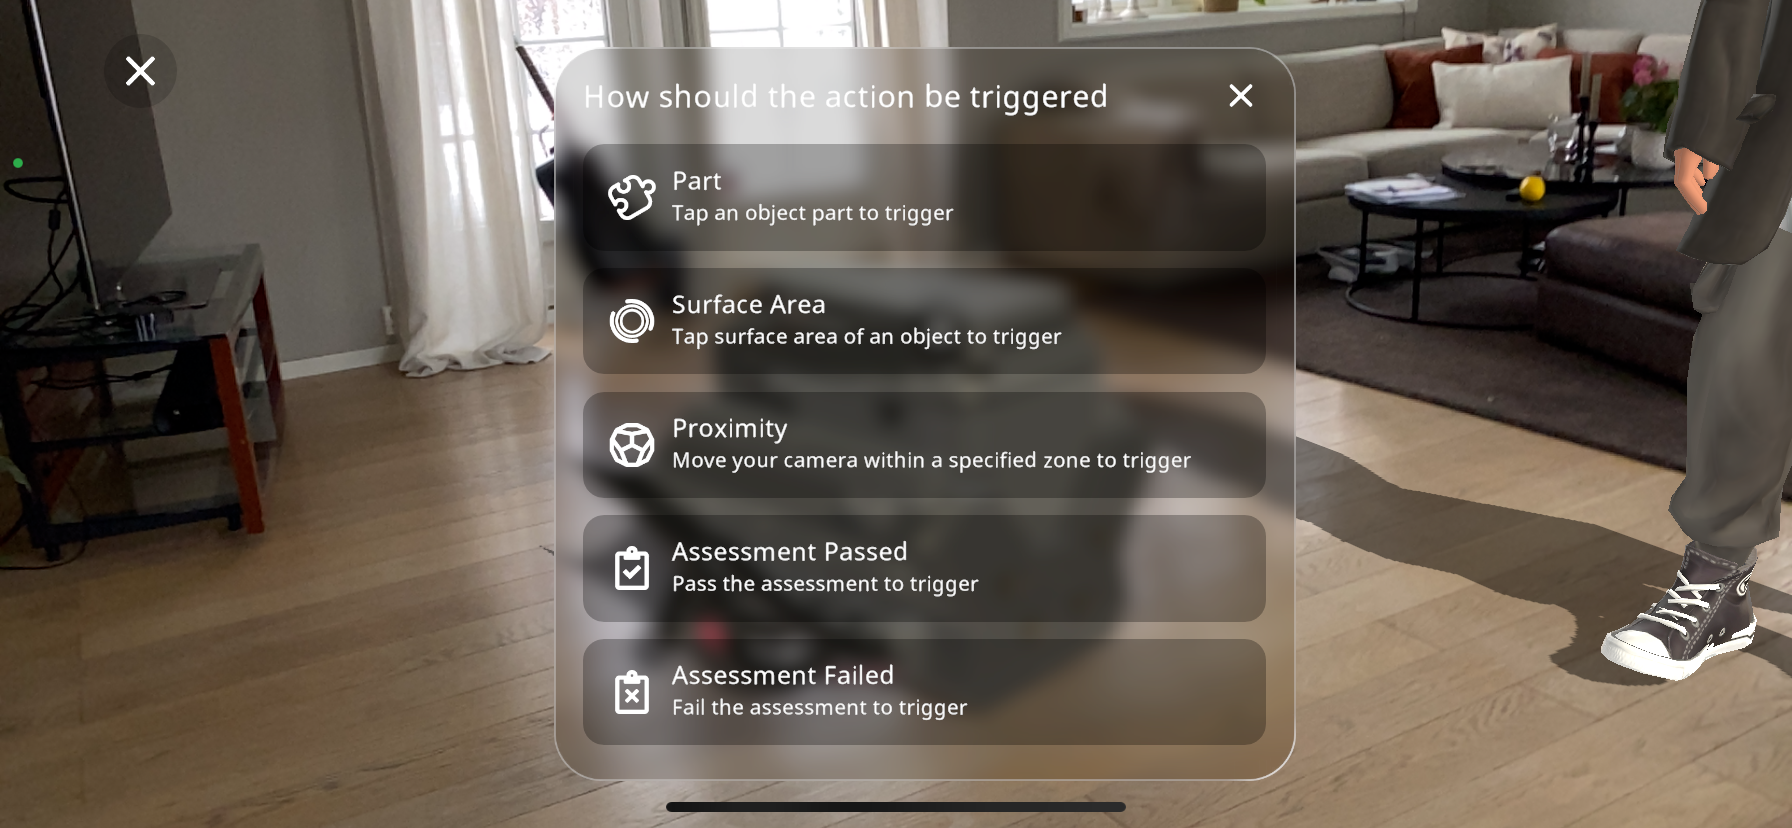
Part: The interaction is triggered when the viewer taps the object that the interaction has been added to.
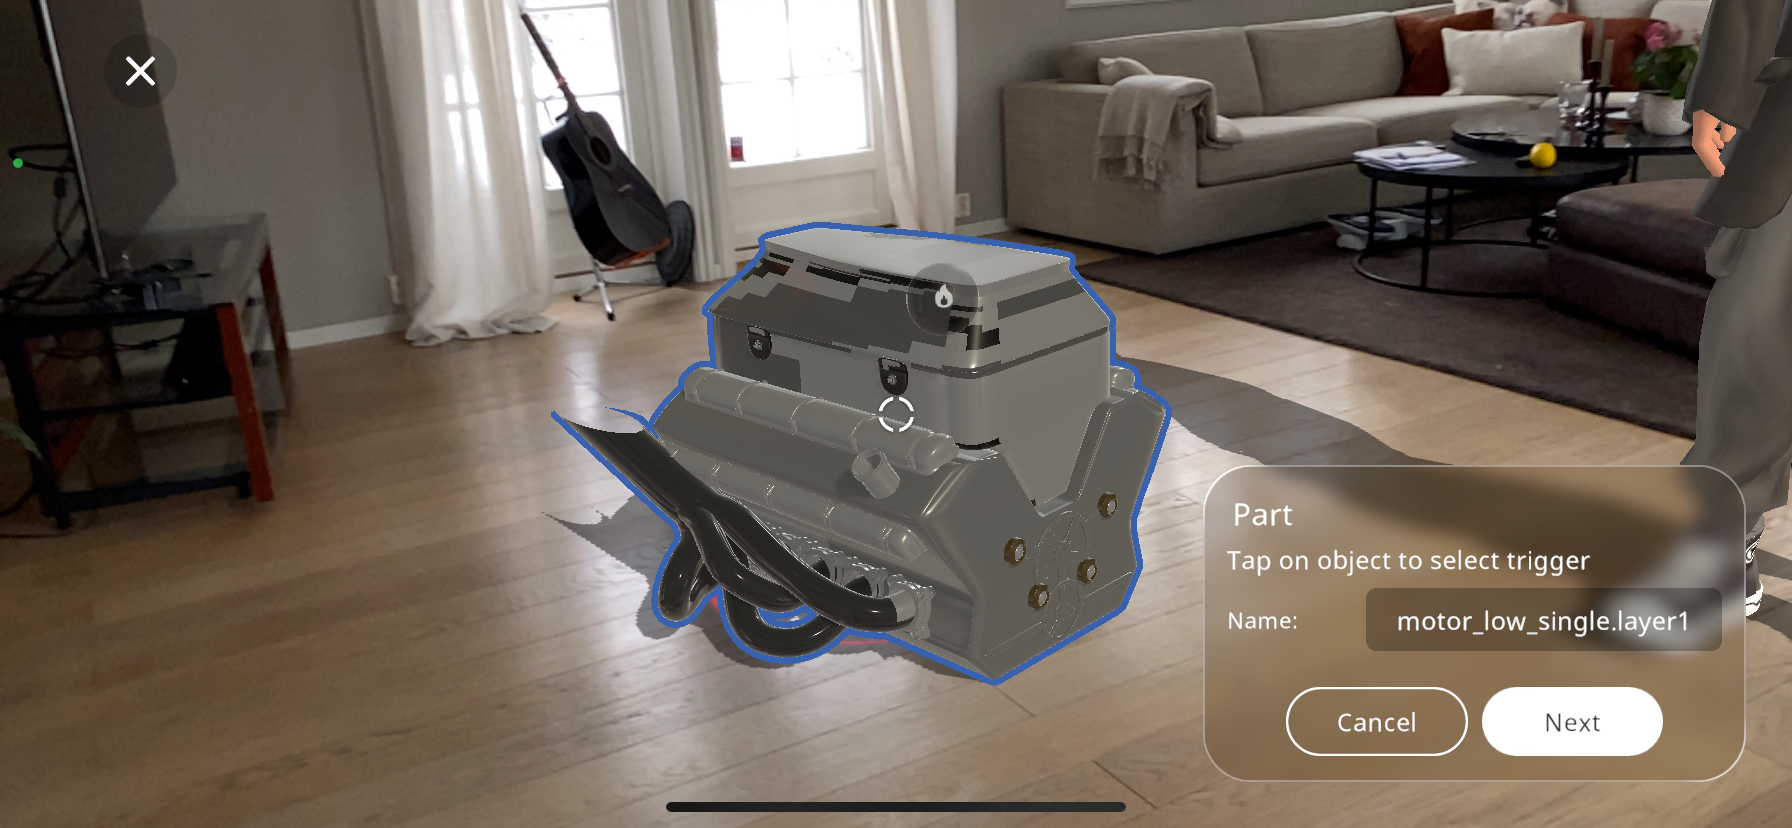
To set up this ”Part” trigger, you must tap the 3D object that you’d like to be the trigger until it is highlighted as can be seen above. Now, you can rename the trigger and press Next.
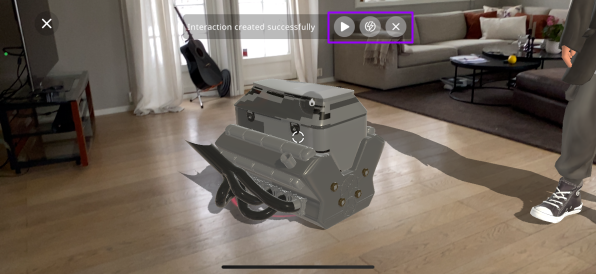
This will show a “Interaction created successfully” message in the upper part of the screen.
To view the recently created interaction, you can press the button in the purple box, demonstrating how the viewer will see it.
The button in the purple box will let you return to the editor Xperience screen, where you’ll be able to add more content.
The button opens the Interact Portal, where you can see the interactions you have created, and you can edit/delete/add new ones.
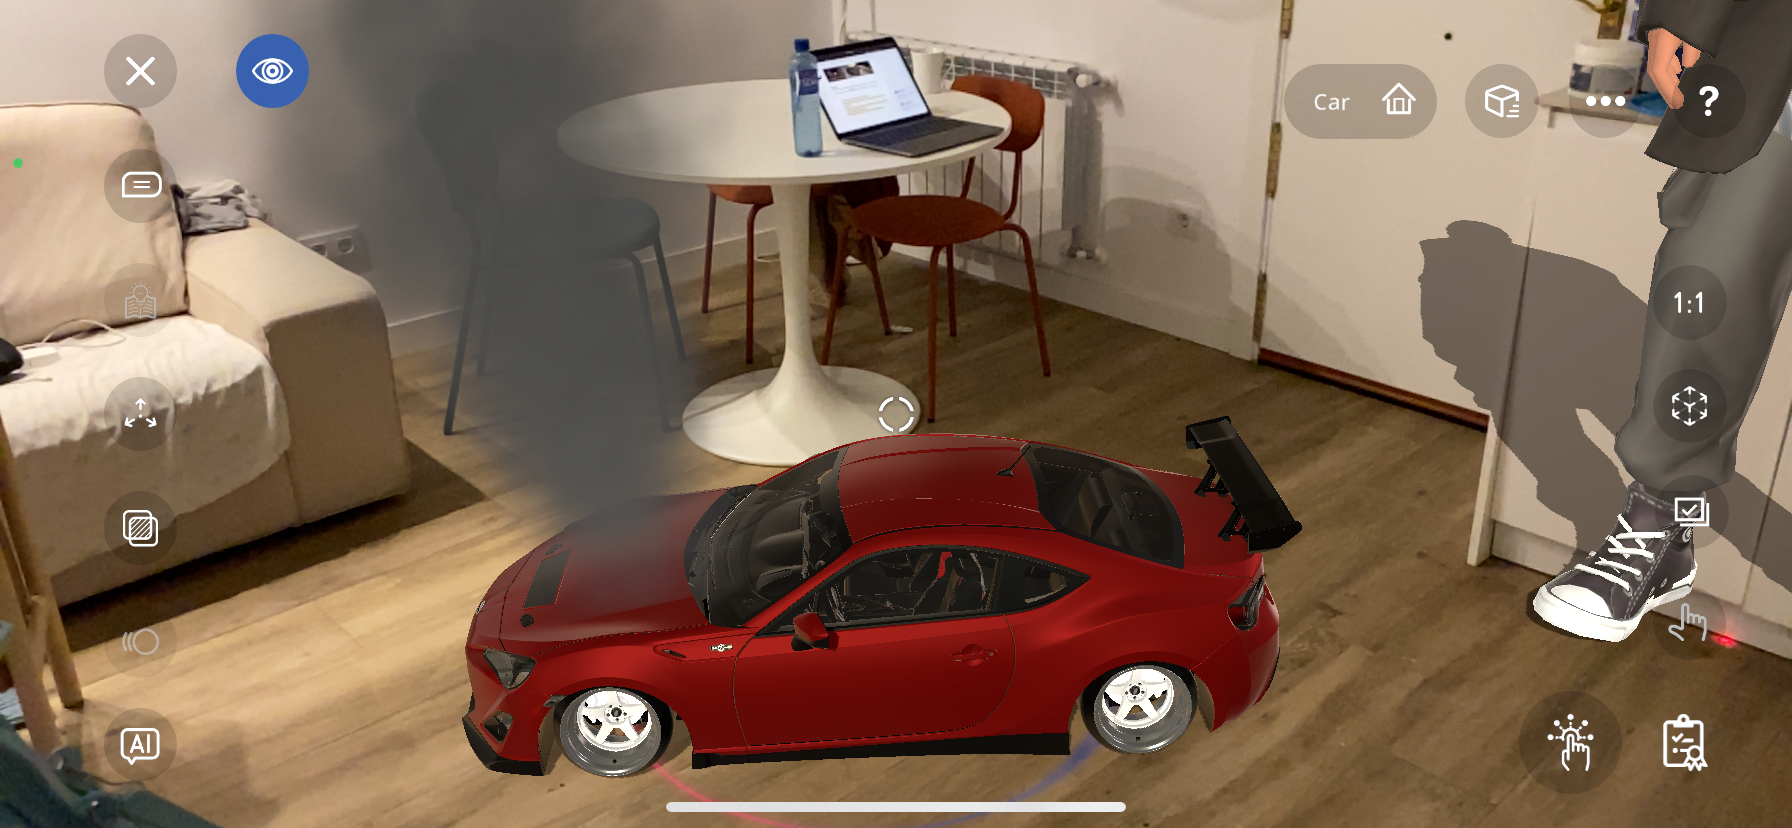
Surface Area: The interaction is triggered when the viewer taps the surface area of an object that the interaction has been added to.
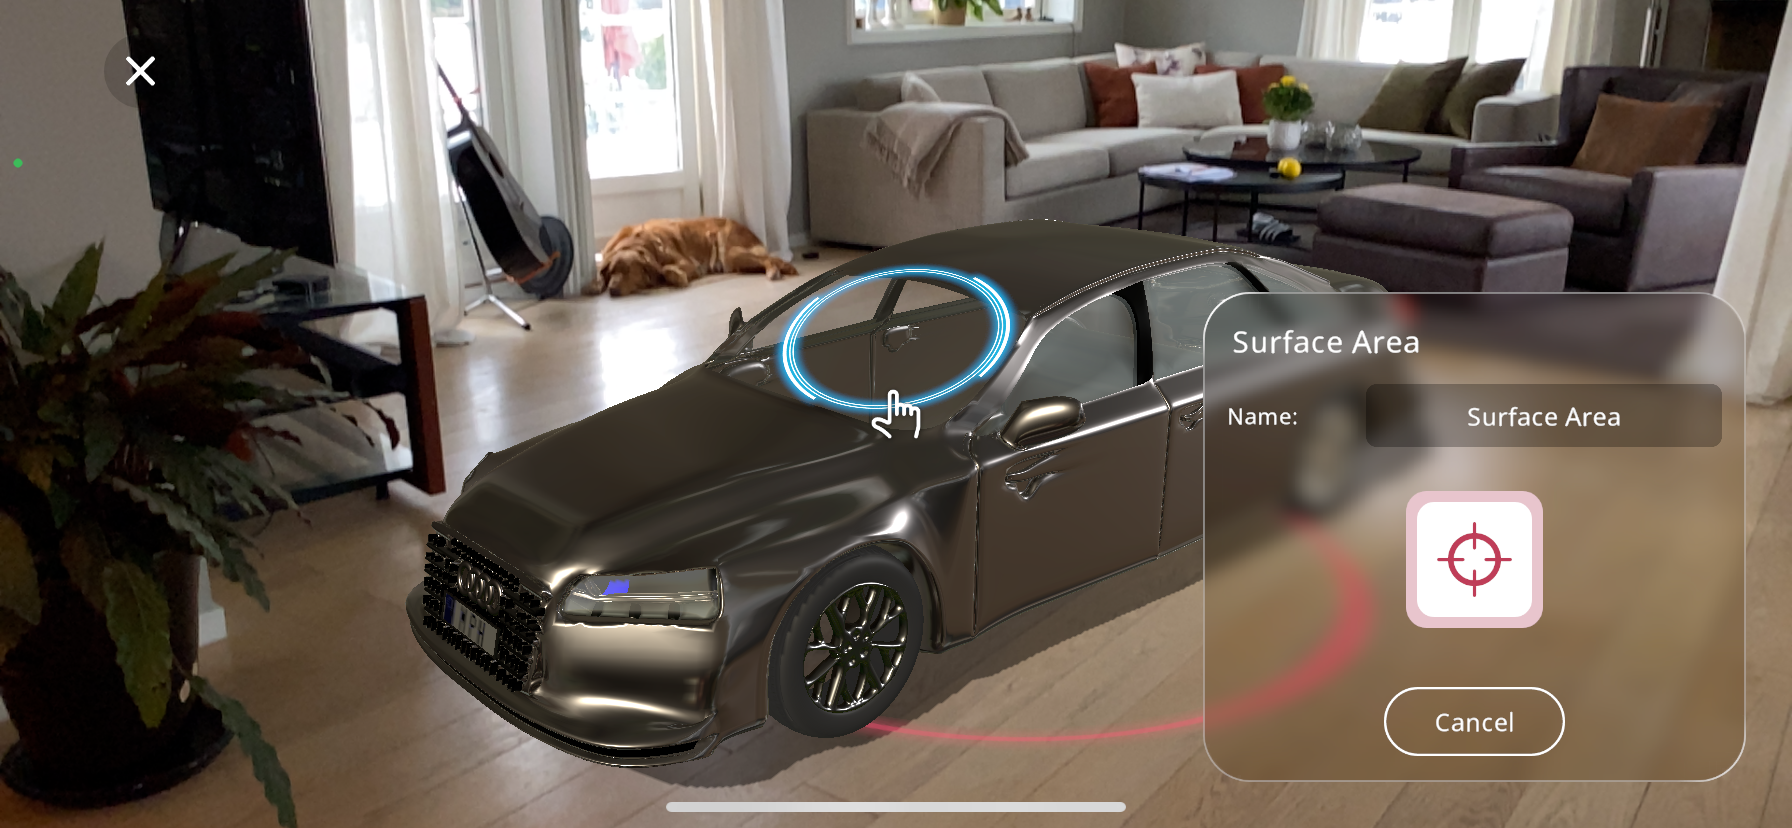
As can be seen above, this option allows the selection of a specific surface area to act as the trigger, so the viewer of the Xperience will have to press that specific surface, in this case the windshield of the car, for the action to trigger.
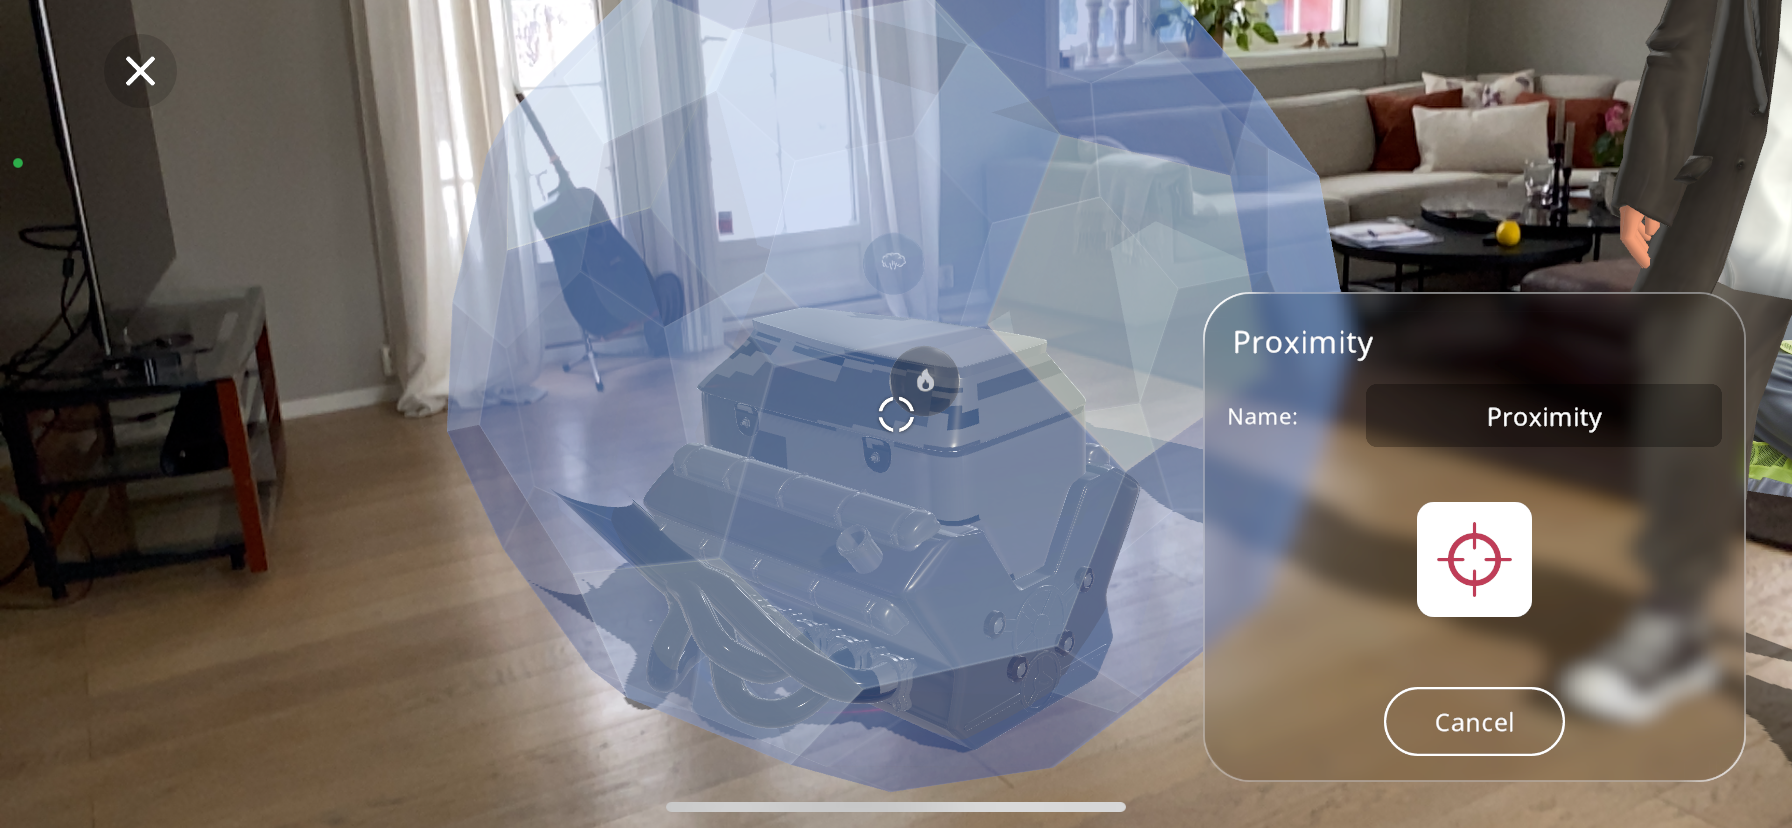
Proximity: The interaction is triggered when the viewer enters the specified blue zone in the Xperience with their device, edit the size of this activation area by using two fingers to pinch/enlarge the area.
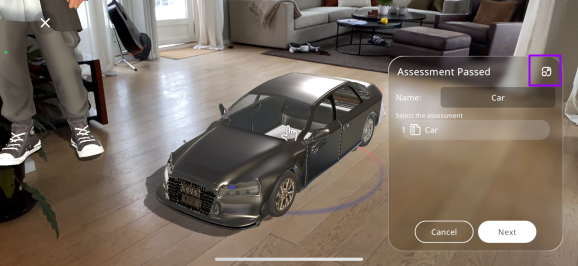
Assessment Passed: The interaction is triggered when the viewer passes an assessment. Simply select the assignment that should trigger the action and press “Next”.
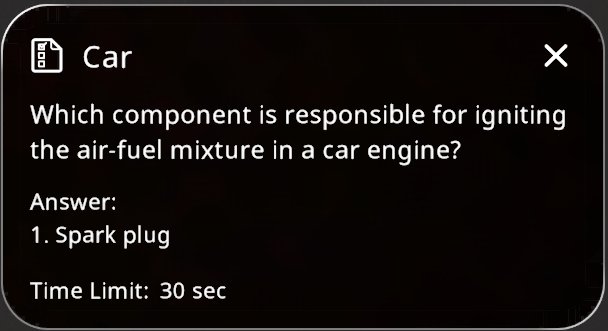
If there are multiple assessments available, are you are unsure of which you would like to select, you can press on an assessment name below the “Select the assessment” title, then press the  button. This will show the details of the assessment activity you have selected, including the questions, answers and the time limit of the assessment.
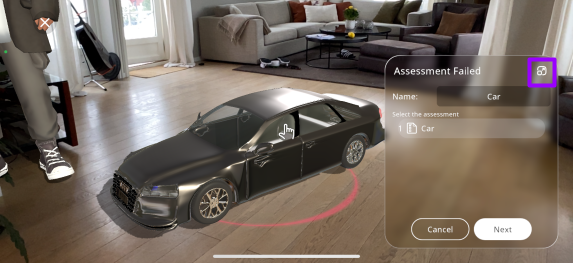
Assessment Failed: Alternatively, the interaction is triggered when the viewer fails an assessment. Simply select the assignment that should trigger the action and press “Next”.
If there are multiple assessments available, are you are unsure of which you would like to select, you can press on an assessment name below the “Select the assessment” title, then press the button. This will show the details of the assessment activity you have selected, including the questions, answers and the time limit of the assessment.
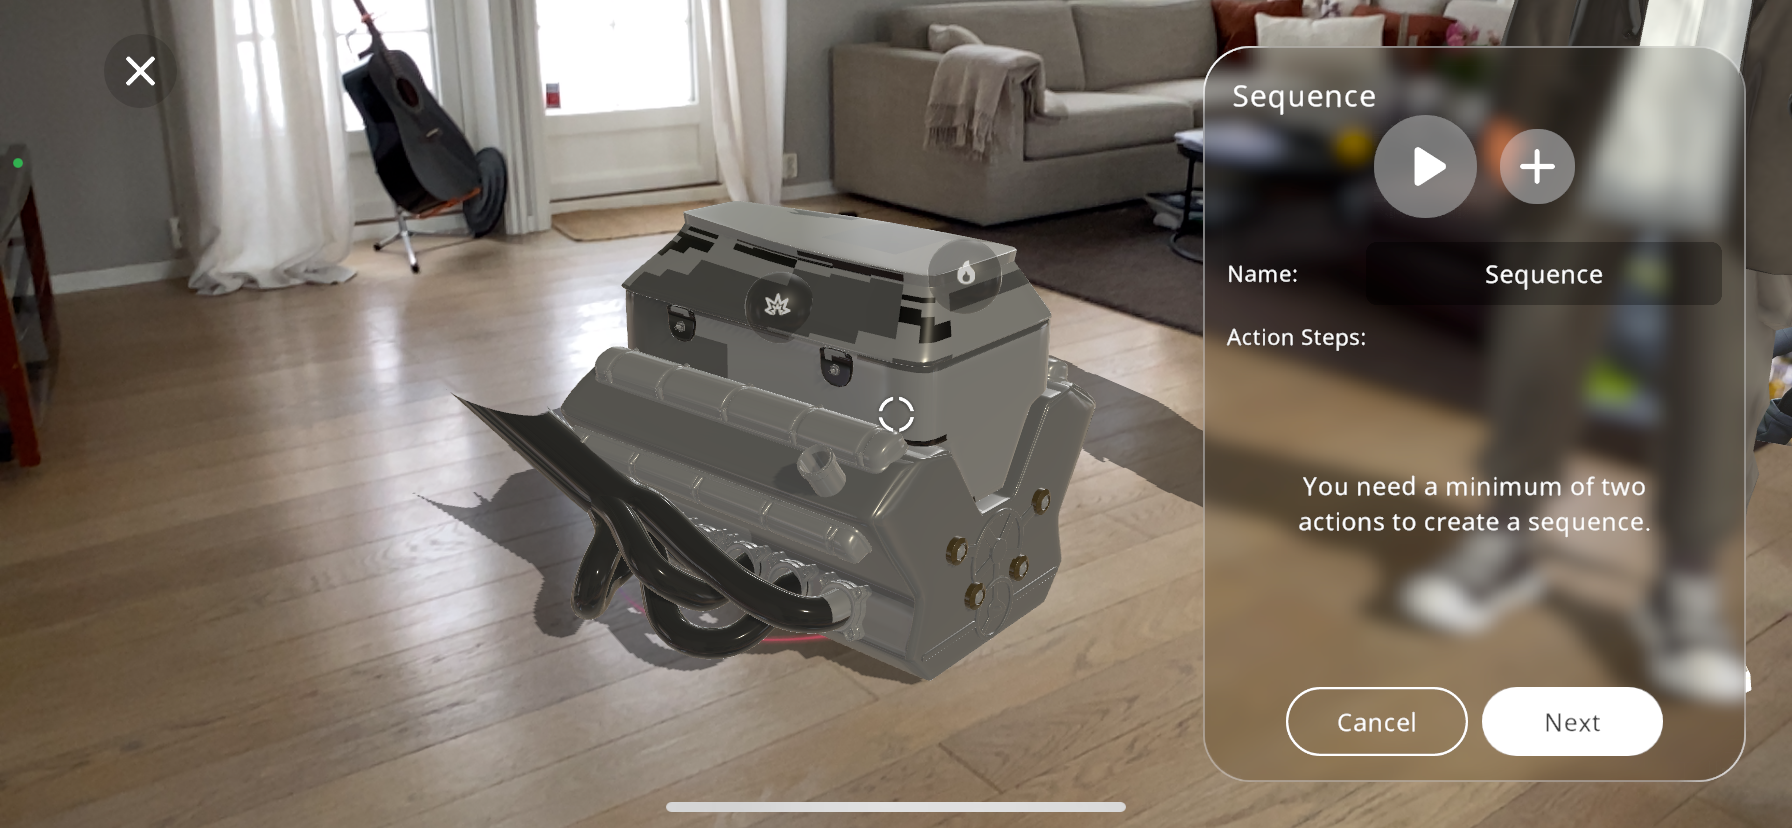
Creating a Sequence#
The last option for actions to add to your Xperience is a sequence. A sequence is simply an order of successive actions that will play out when triggered. To be able to create a sequence you must have created 2 or more actions:
From the actions menu select the “Sequence” action.
Begin by selecting the first action from your existing actions list that you wish to include in the sequence.
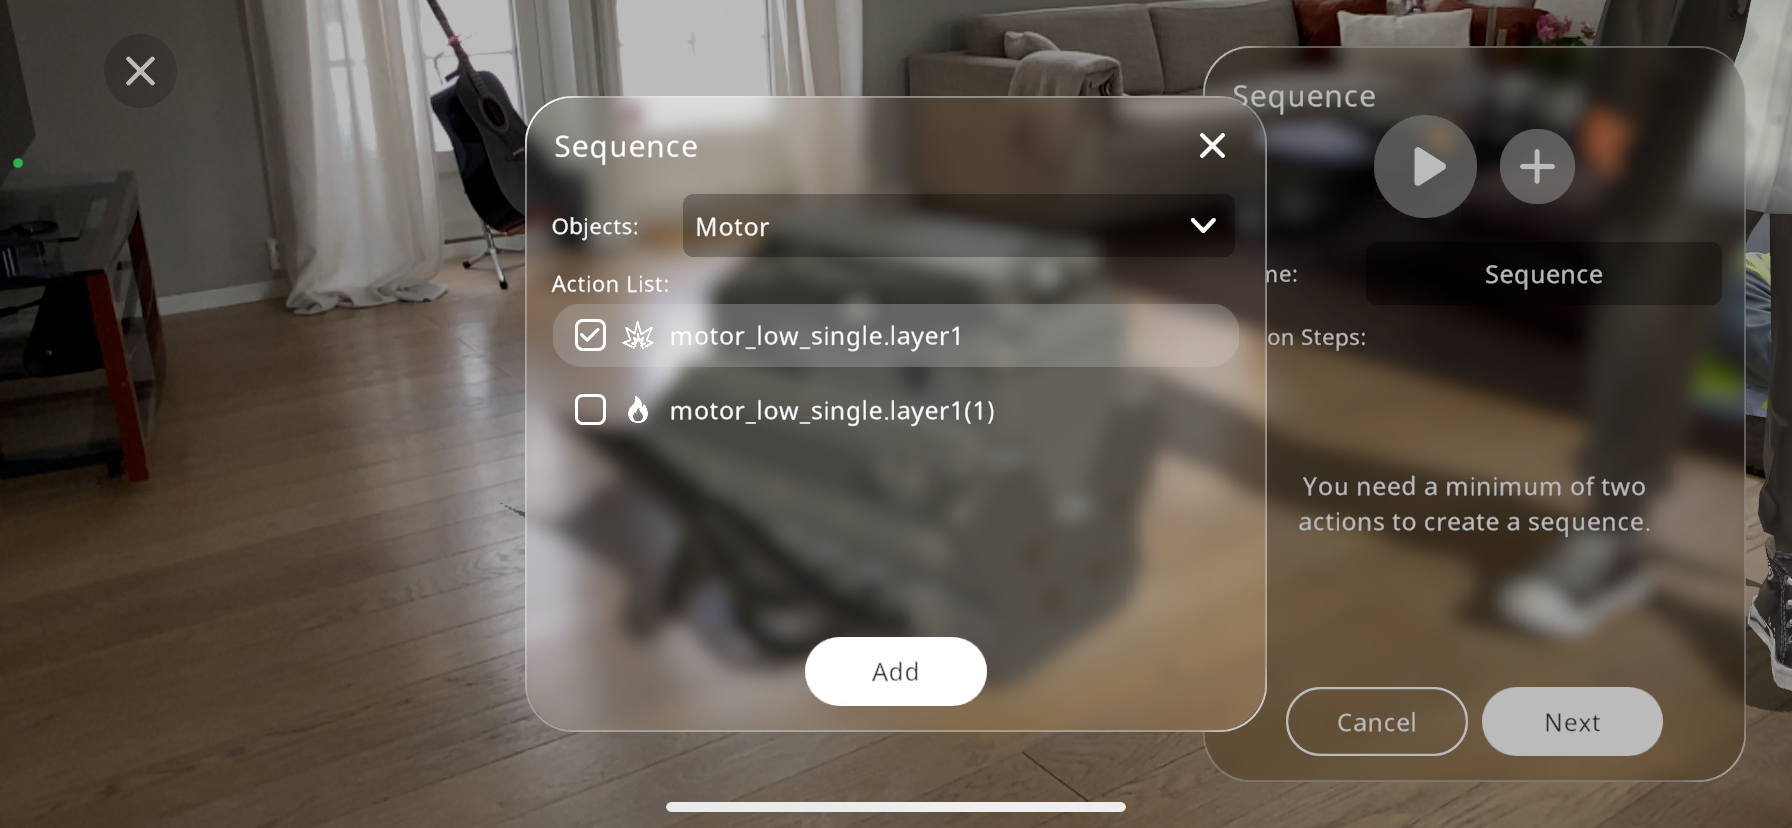
Add the action to your sequence by tapping the “Add” button. This will be the starting point of your sequence.
Continue adding subsequent actions in the order you wish them to occur. You can do this by selecting each action and then pressing the “Add” button.
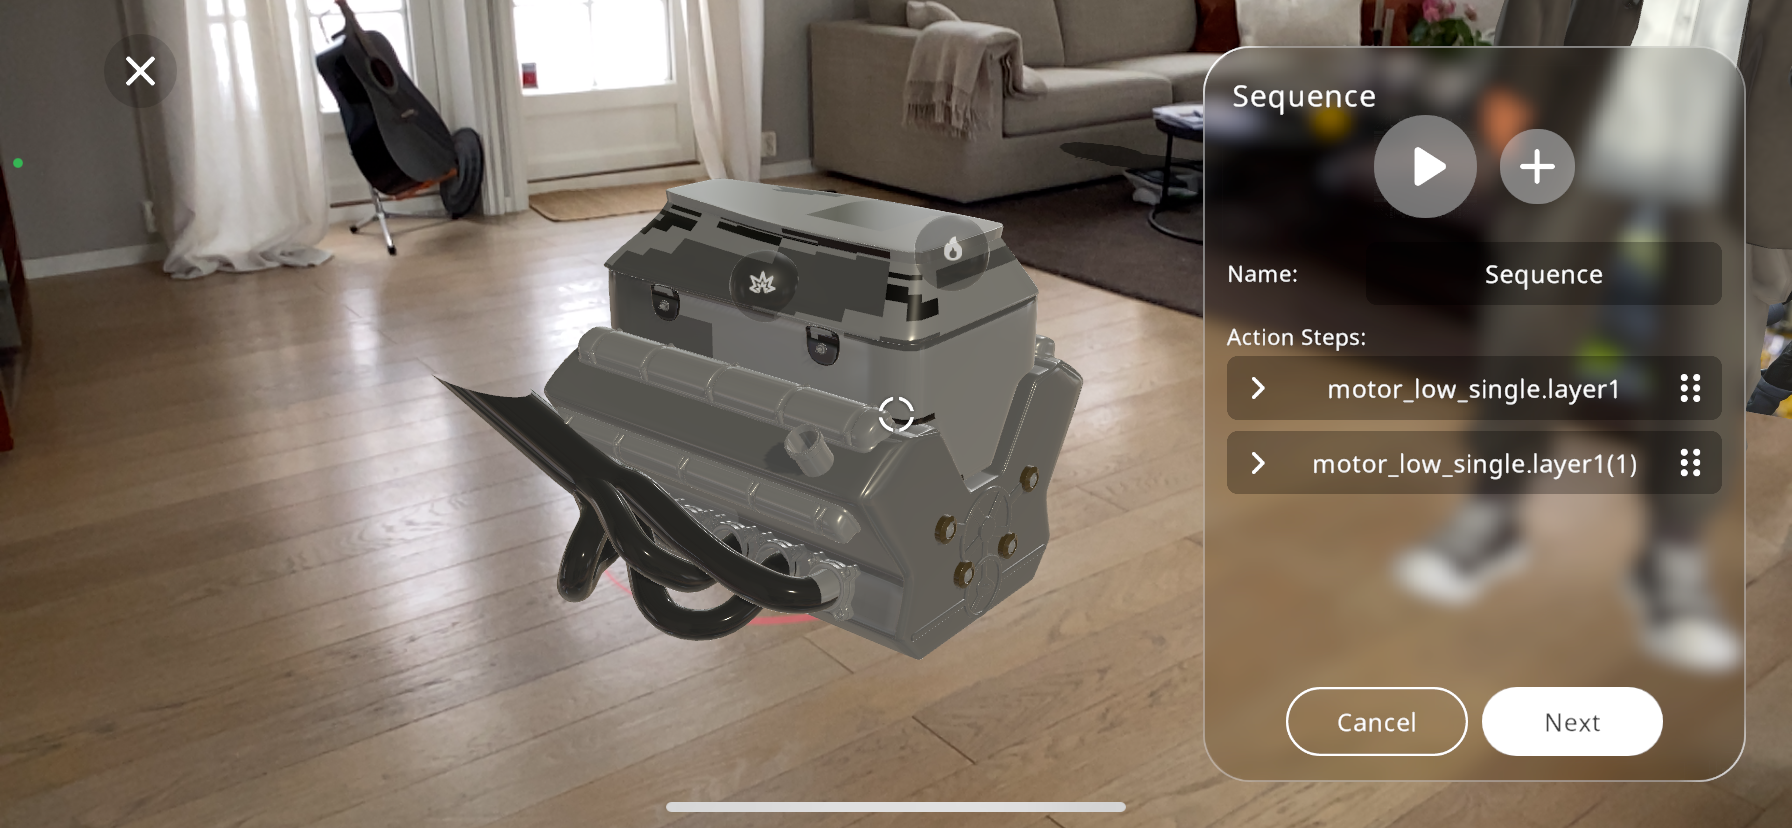
Each action can be reordered by using drag-and-drop functionality or by selecting and moving them up or down the list, ensuring they play out in the desired sequence.
In the “Name” field, give your sequence a distinctive identifier. This helps in managing multiple sequences or when you need to refer to this particular sequence for editing or triggering purposes.
After adding and ordering all the desired actions, you can preview the sequence by pressing the play button. This allows you to observe the sequence in action and make any necessary adjustments.
Once you are satisfied with the sequence and its configuration, press “Next”. This will save your sequence and allow you to define triggers to select the condition under which the sequence should activate.
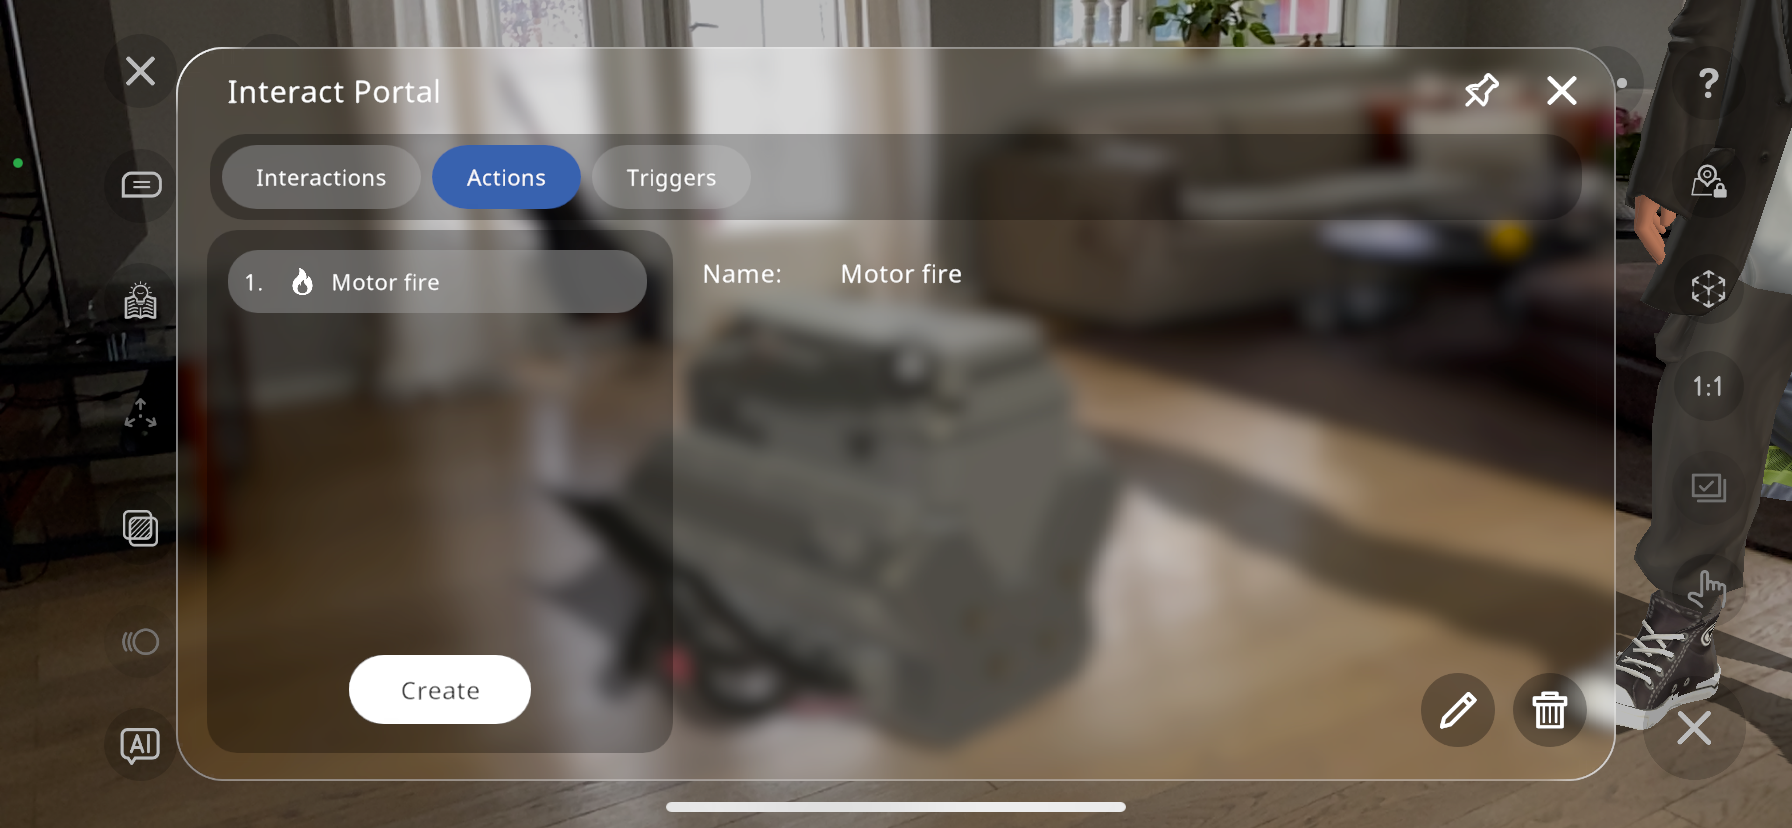
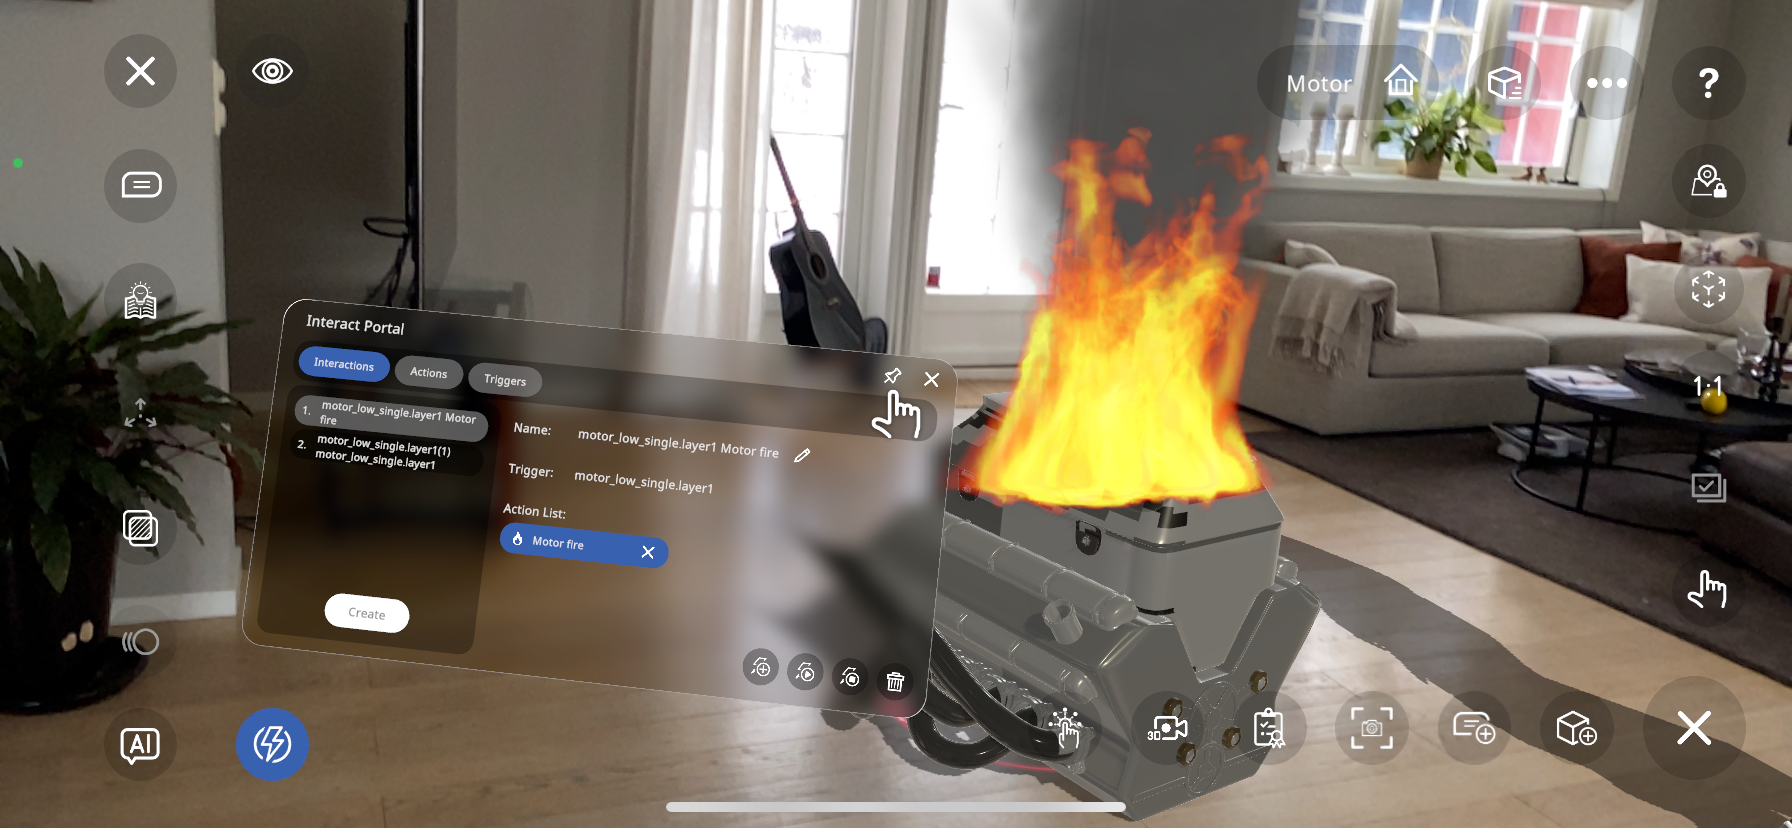
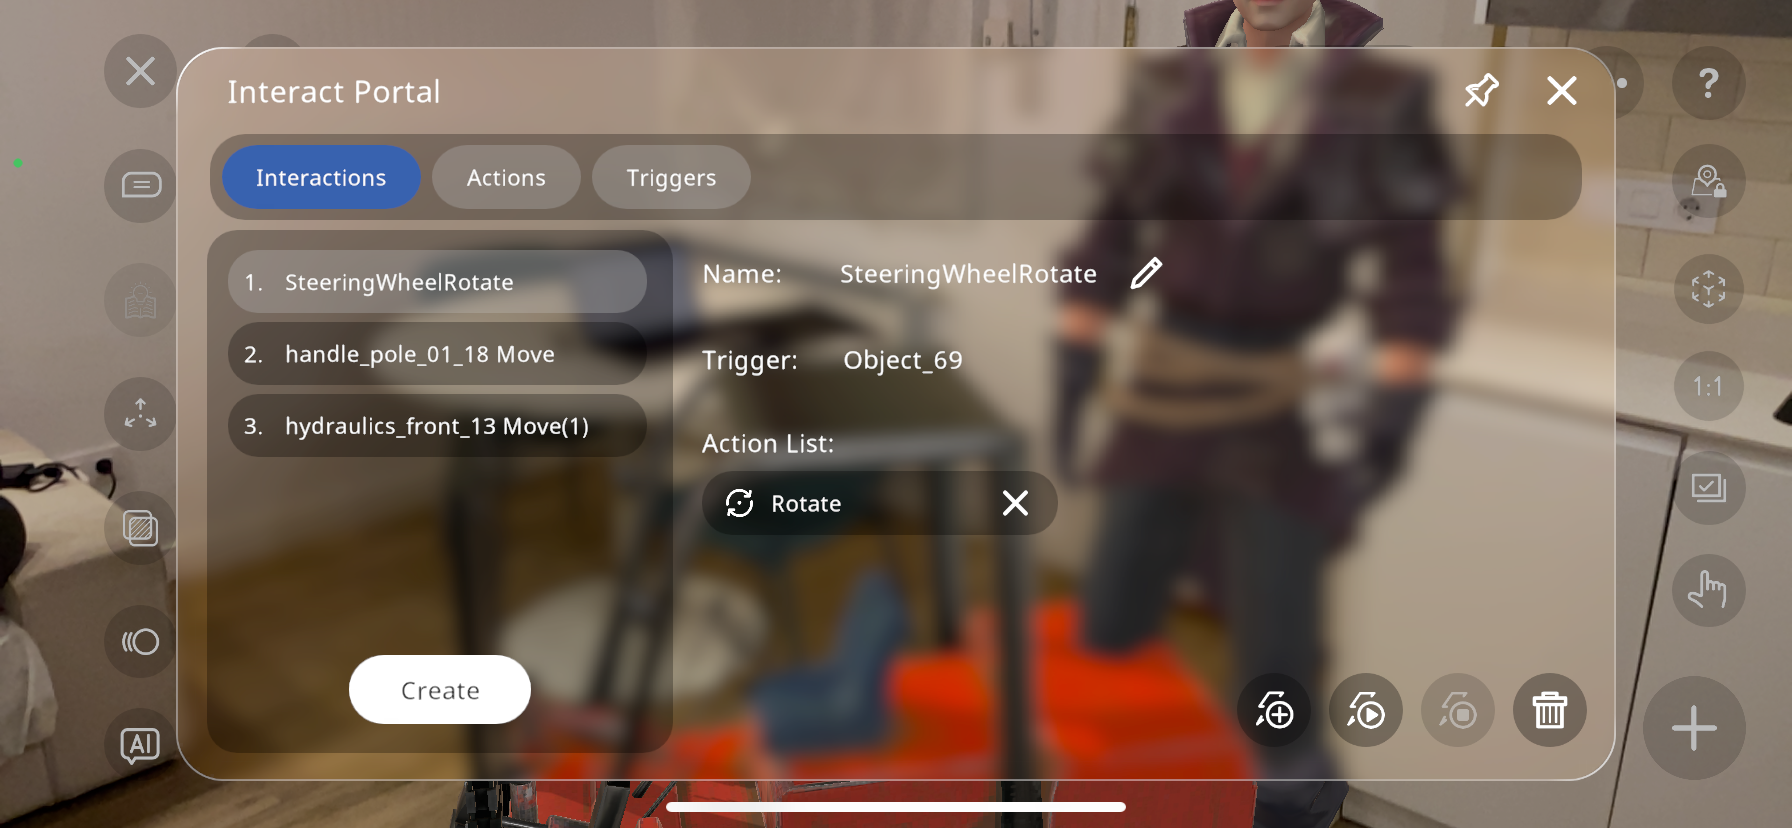
Interact Portal#
In the interact portal you can see all of the interactions, actions and triggers that you have created, in order to edit them, reuse them, delete them or add new ones.
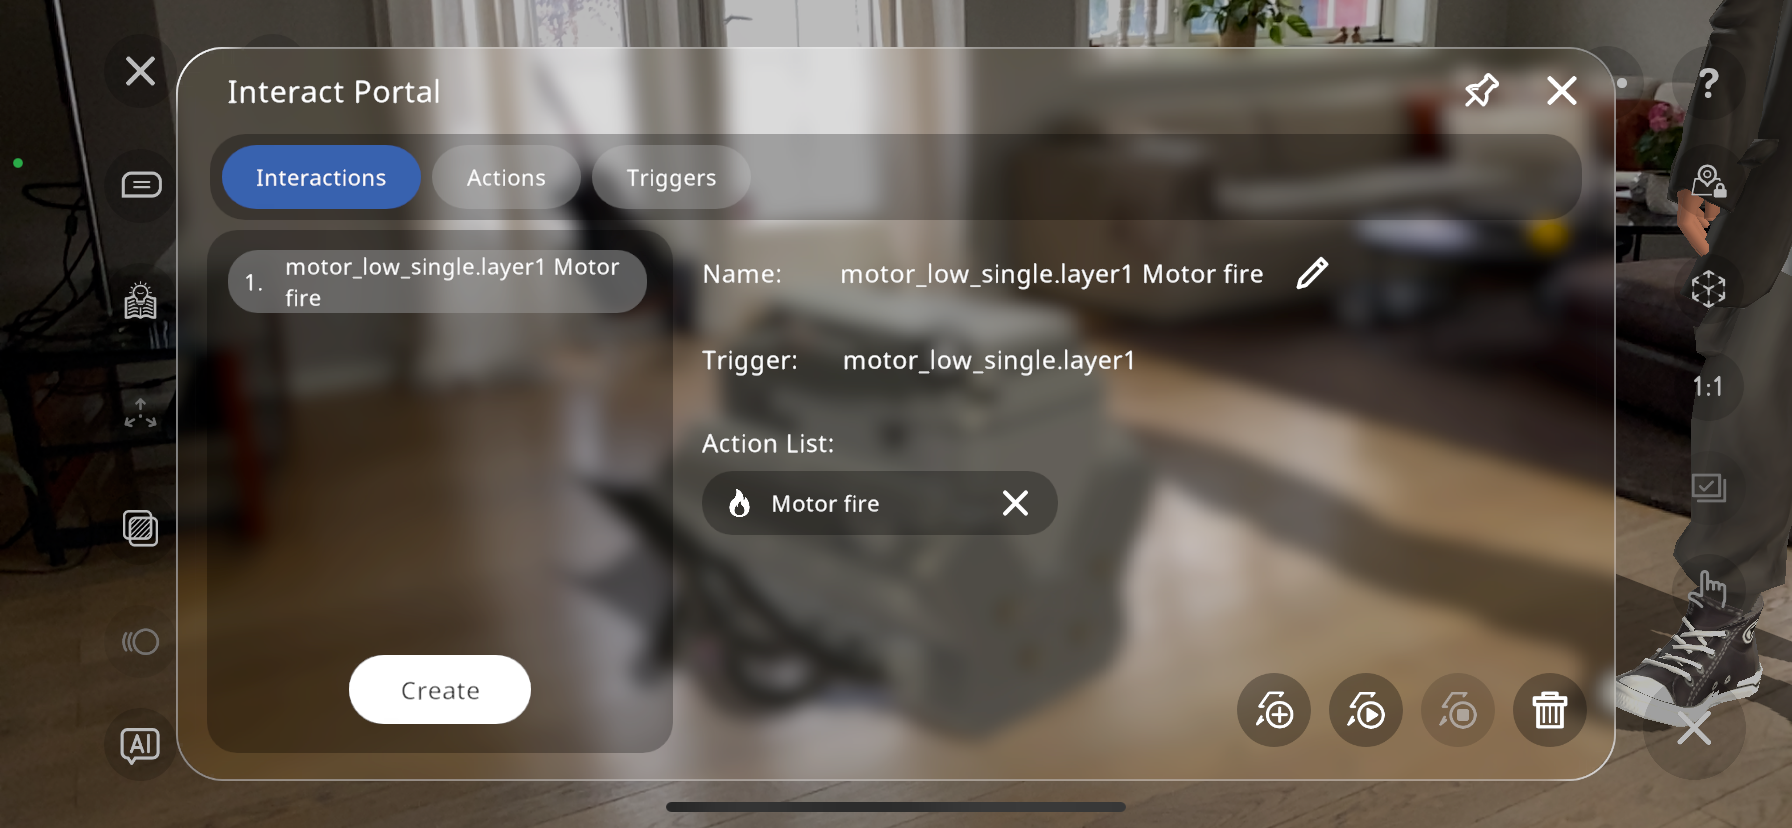
The enumerated section on the left side of the portal shows the created interactions. As can be seen, only one interaction has been created so far.
You can edit or delete these as shown in the bottom right corner of the interact portal.By pressing the  next to the interaction name, this interaction can be renamed.
The  button will play the interaction you have currently selected, in order to view it again or know if there is something you’d like to edit.
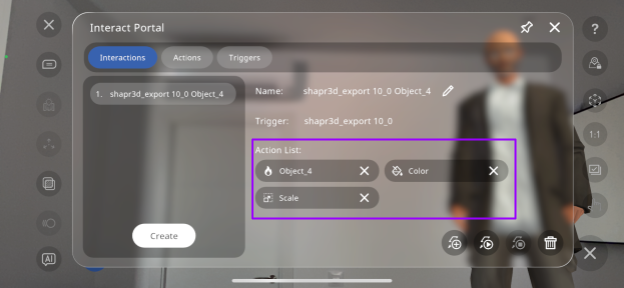
By pressing the  button near the bottom right, you can add a new ACTION to the selected interaction, without the need to create a new trigger, but instead using the same one as is already part of the interaction.
For example, if a fire action has been created with a “part” trigger, and I press the button, then add a color and scale action, the action list (in this case fire, color and scale) will play simultaneously when the “part” is triggered:
button near the bottom right, you can add a new ACTION to the selected interaction, without the need to create a new trigger, but instead using the same one as is already part of the interaction.
For example, if a fire action has been created with a “part” trigger, and I press the button, then add a color and scale action, the action list (in this case fire, color and scale) will play simultaneously when the “part” is triggered:
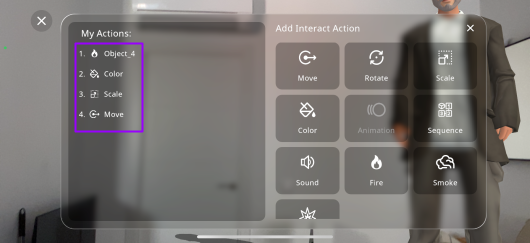
The next tab shows the actions created, these are those mentioned earlier (explosion, move, rotate, fire etc.). By pressing the “Create” button, you can create a new action. This action can then be linked with a trigger in the “Interactions” tab. This is useful if you’d like to add an action to a previously created trigger:
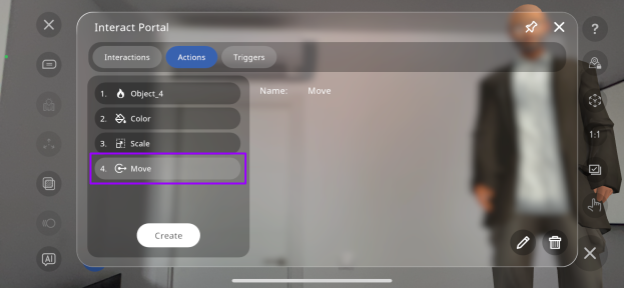
Here, the Move action has been created through the actions tab without a trigger.
By returning to the “Interactions” tab, and pressing Create:

You are able to select the recently created “Move” action:
And link it to the previously existing trigger:
You can then rename the interaction, and this will link the newly created action with the previously created trigger.
The last tab in the Interact Portal is the “Trigger” tab, with the created triggers, which you can edit or delete as well:

Similarly to the create Actions button, you can create a trigger by itself, then through the Interactions tab link this to an already existing action.
As can be seen below, a new trigger “Object_4” has been created through the triggers tab without creating an action:
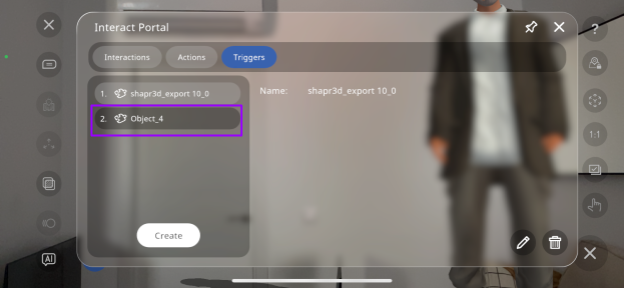
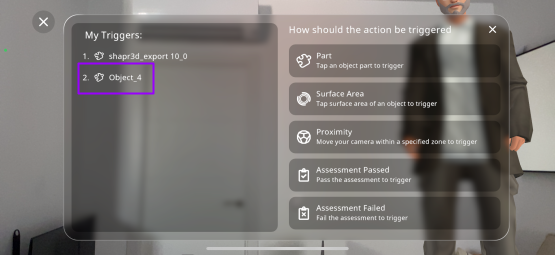
You can now add an existing action to this trigger by returning to the “Interactions” tab, and pressing Create:
This will allow you to select a previously created action to link to the trigger:
Select the trigger you have created:
You can then rename the interaction, and this will link the newly created trigger with the previously created action.
The final button in the interact portal is the  button. This makes the interact portal resizable and movable around your Xperience, to make it more comfortable to edit and test each of the interactions while seeing them occur:
Interaction Play Mode#
Once you have created all your interactions, and want to see what the result will look like for the user, you may press the  button in the top left corner to enter play mode.
When in play mode, if there are no interactions in the current Xperience, the button will appear darker, and you will not be able to click it to visualize any interactions:
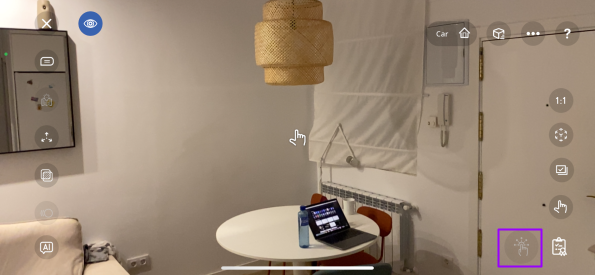
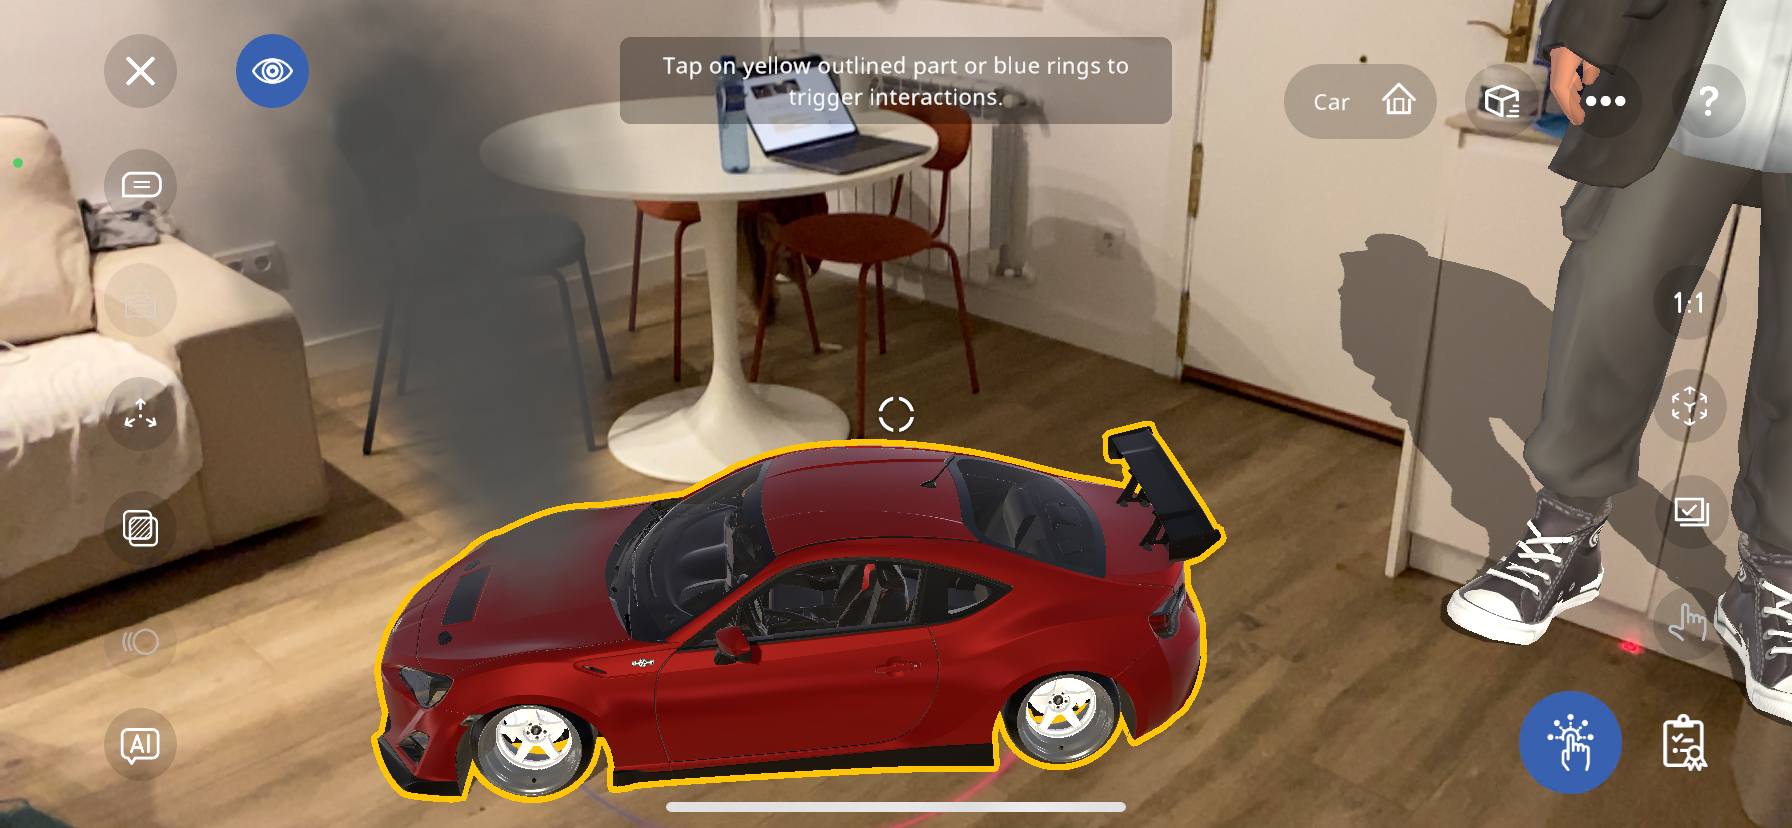
However, if the Xperience does have part/surface triggered interactions, there are two ways of visualizing them:
Pressing the interact button:
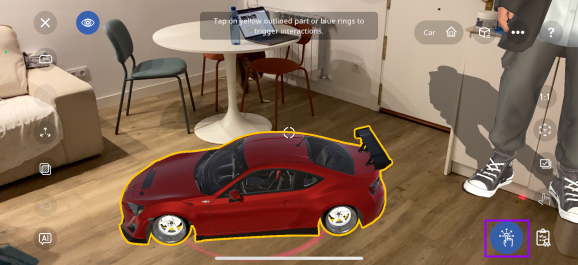
By pressing the highlighted button in the bottom right corner (shown in purple box above), the part of the object with surface or part triggers will highlight yellow as shown above, and pressing this object will activate the action linked with it, as can be seen by the smoke action:
Pressing an empty surface:
You can also press any empty surface (area where no objects are located) to see where these trigger parts/surfaces are:
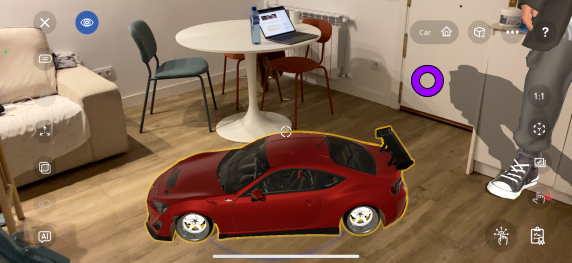
For example, by tapping where the purple circle is shown above, the car highlights yellow, since it has a part trigger attached to it, and again, it is linked to a smoke action when pressed:
Procedures User Guide#
Create customized procedures through a combination of interactions to give the user an interactive lesson!
In order to create a procedure, you must first have the list of interactions that you’d like to combine into a procedure ready beforehand:
Click here to learn how to create Interactions.
Once you have a list of the interactions prepared, you may begin to create the procedure. Press the  button near the middle in the bottom to open the procedure menu:

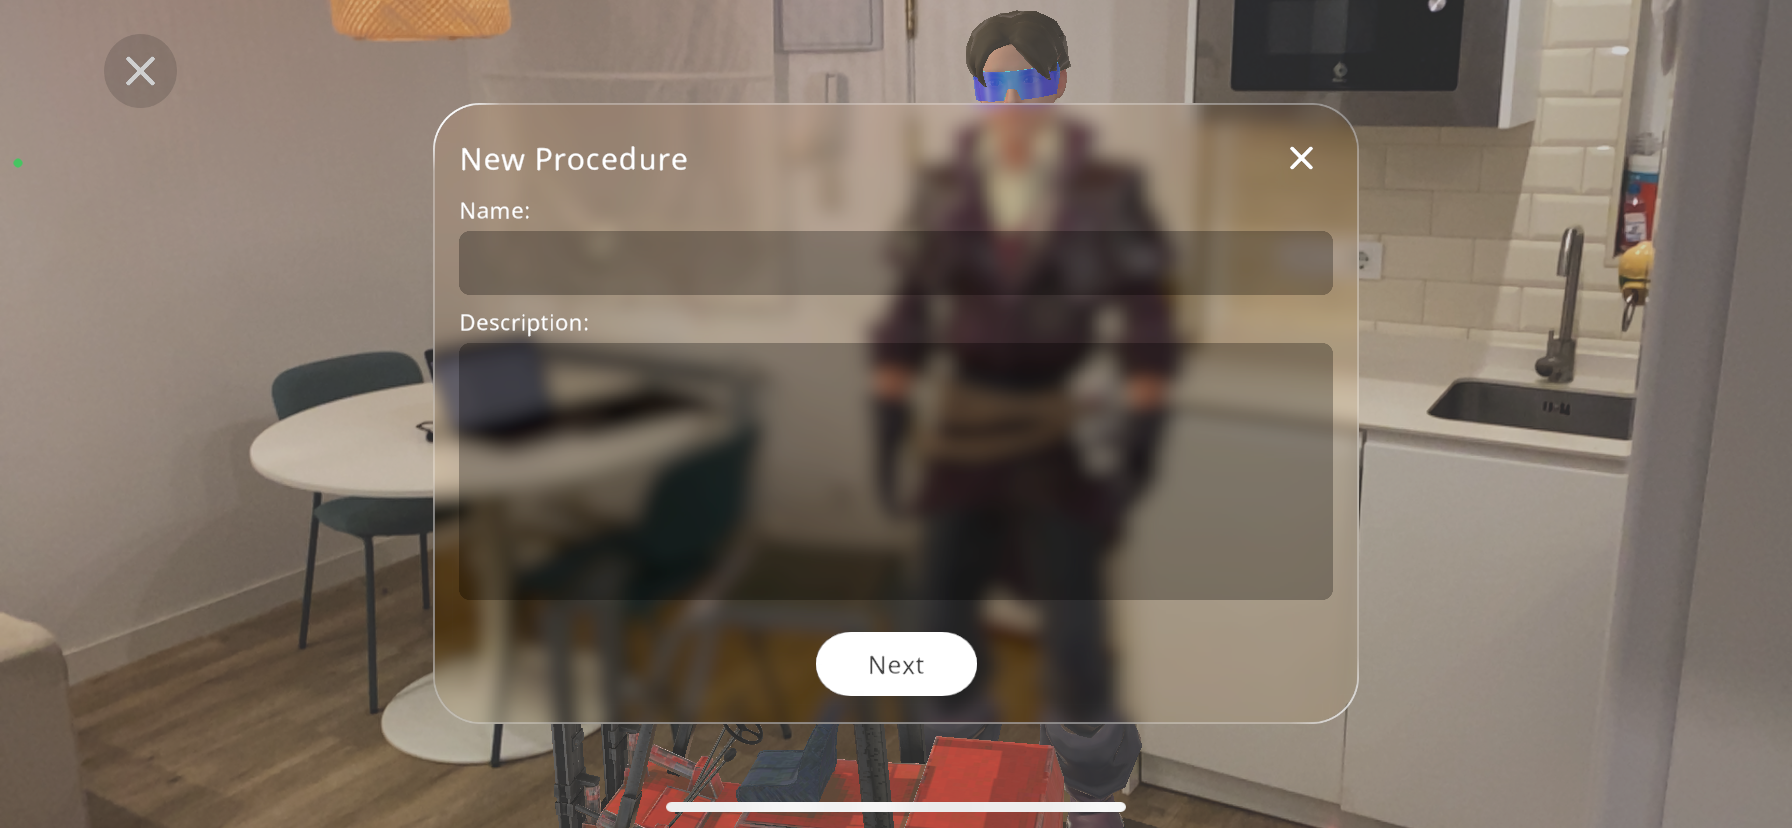
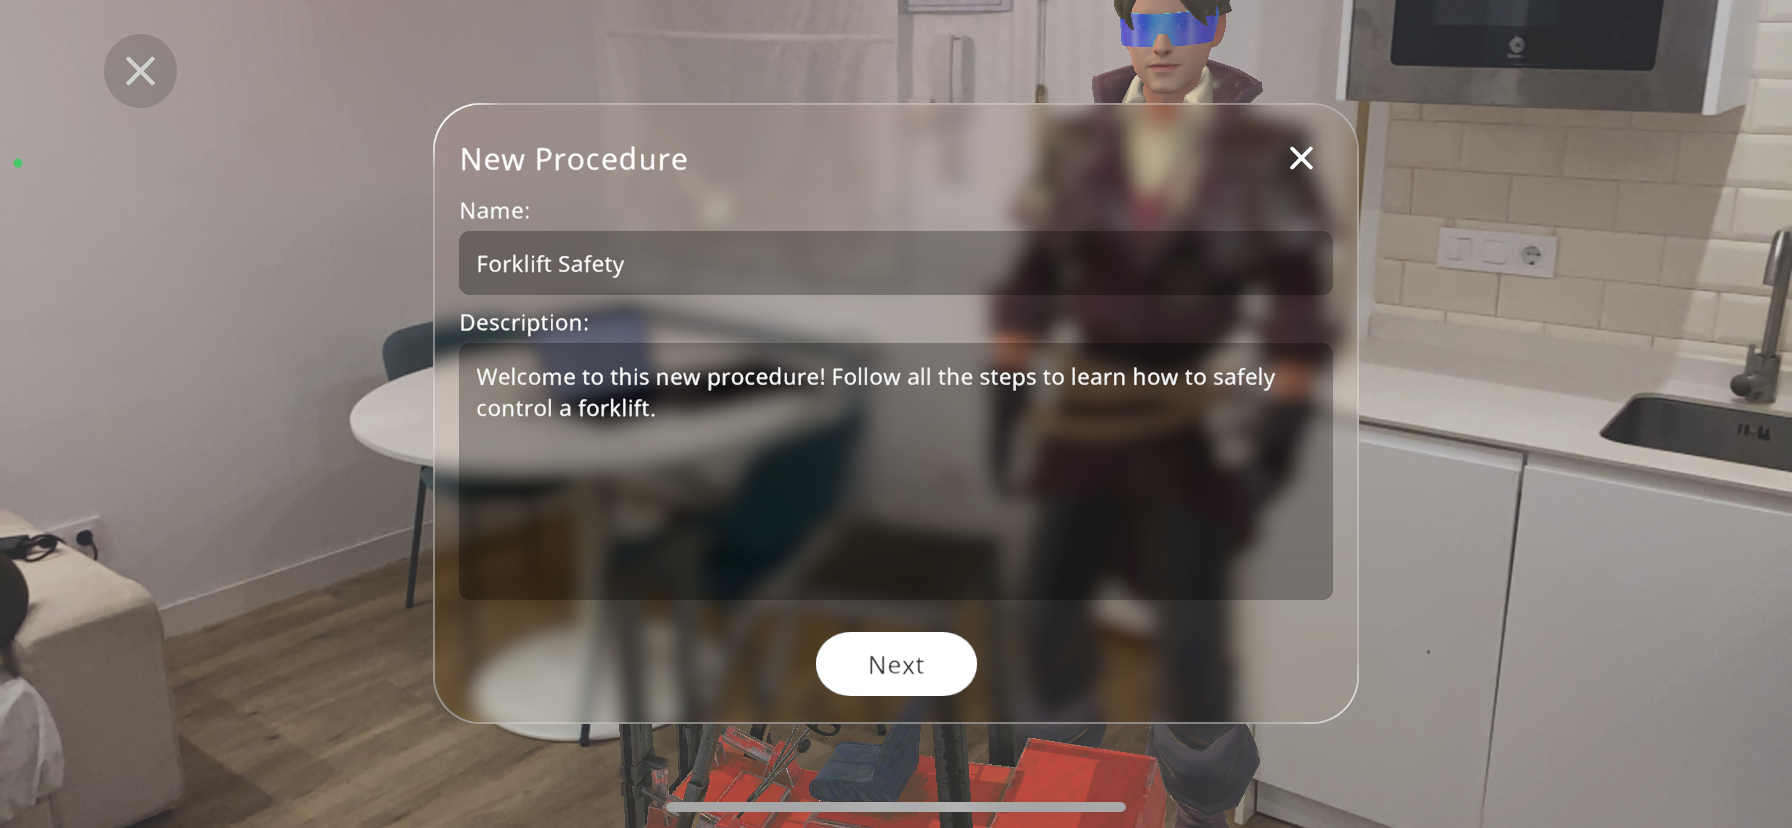
Now you are given the option to create a name and description for this procedure. Add a descriptive name and text, as this is what the user will see when starting the procedure. Press next to continue.
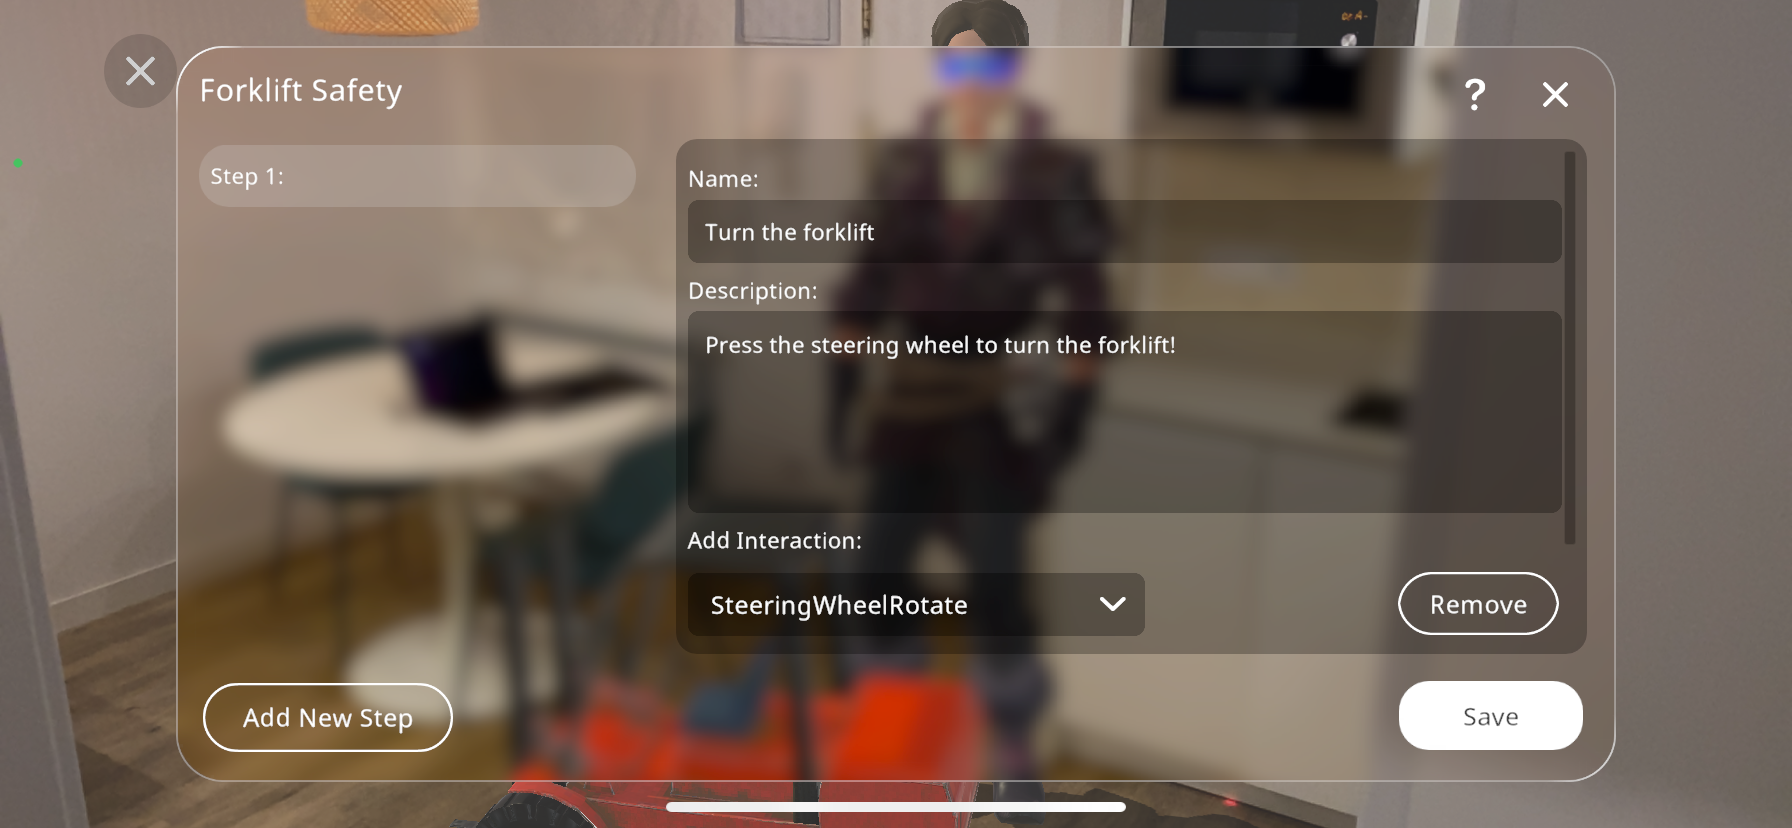
Now, your procedure menu opens up. Here you will create all the steps that form part of your procedure. Press the  button for a help popup with a short description of each part of this menu.
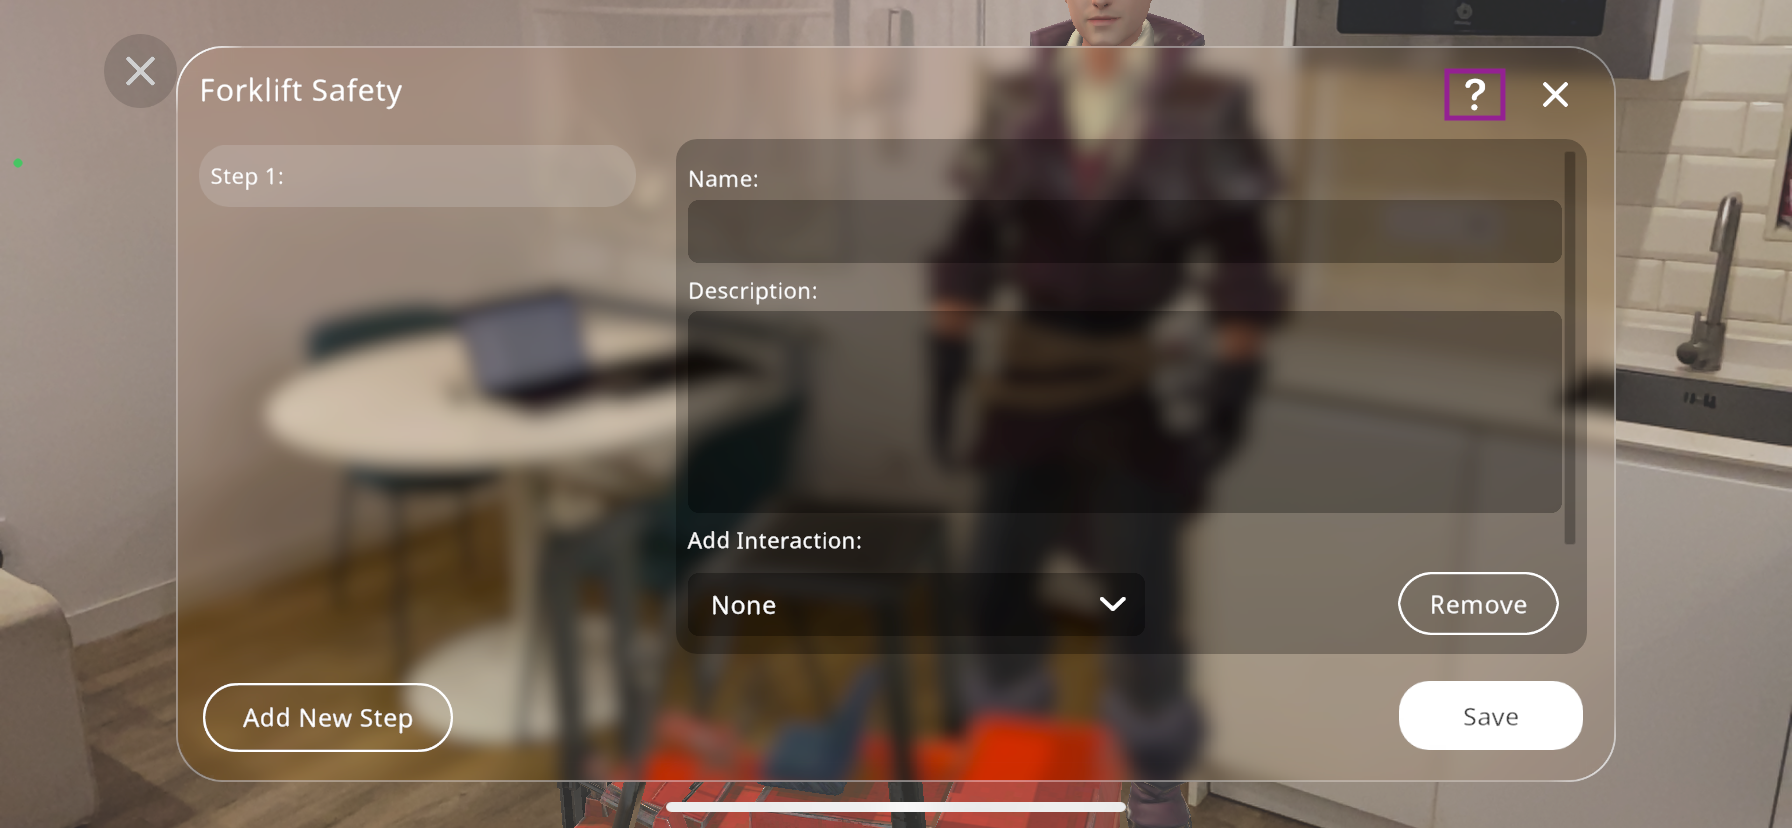
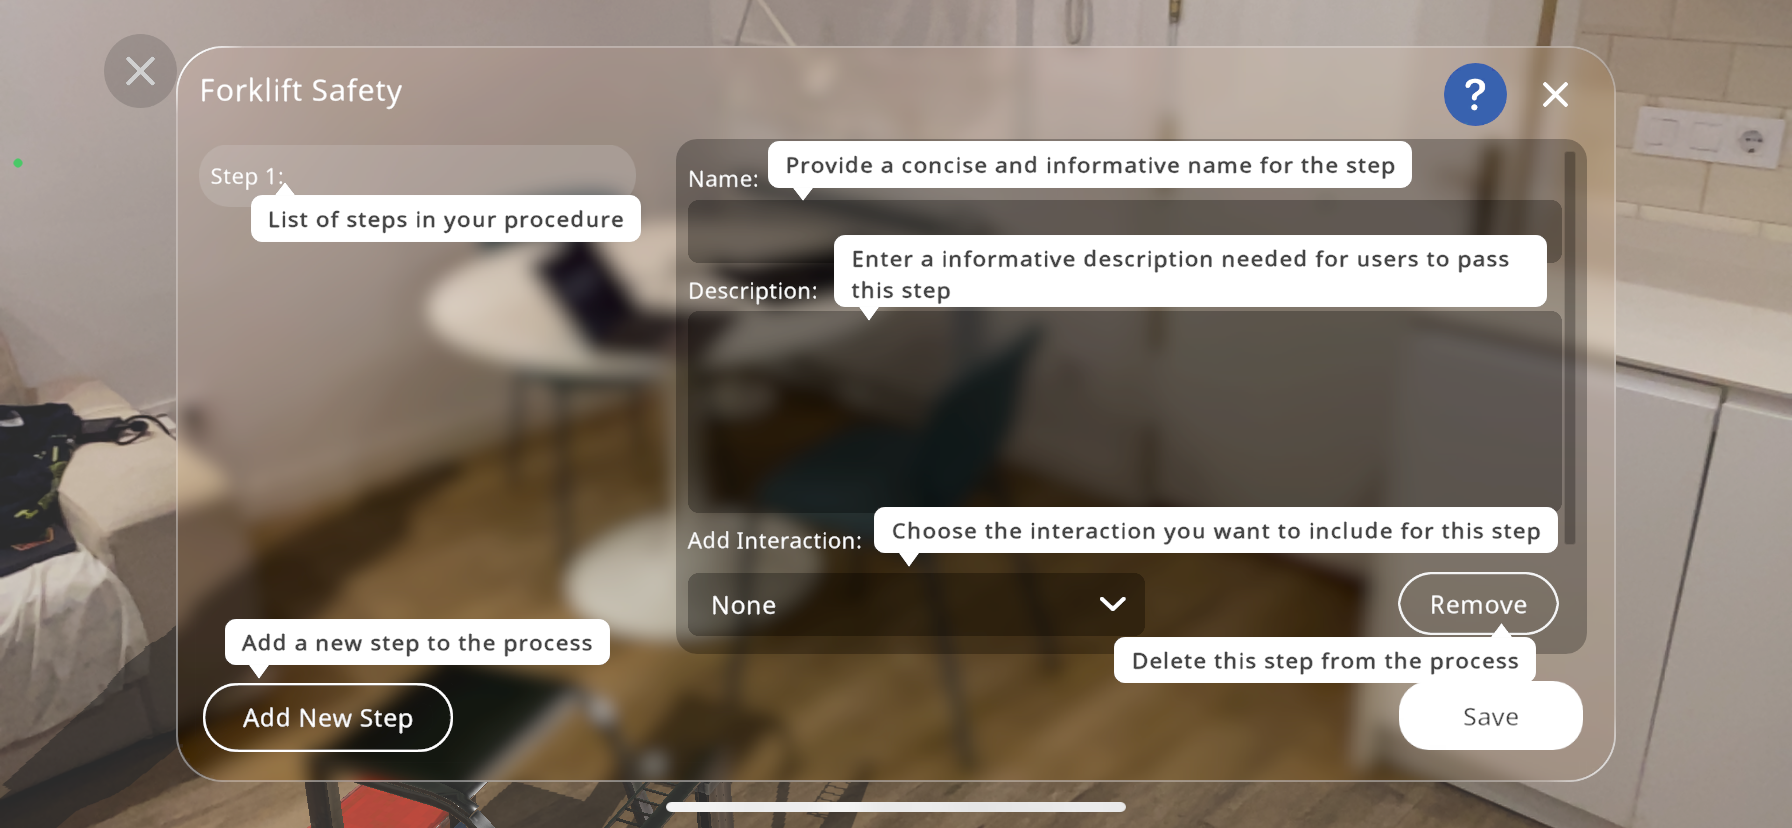
You will begin by creating a name and description for step 1. Make sure that the description explains clearly what the user must do to successfully complete this step, as they will have to complete this step to be able to continue.
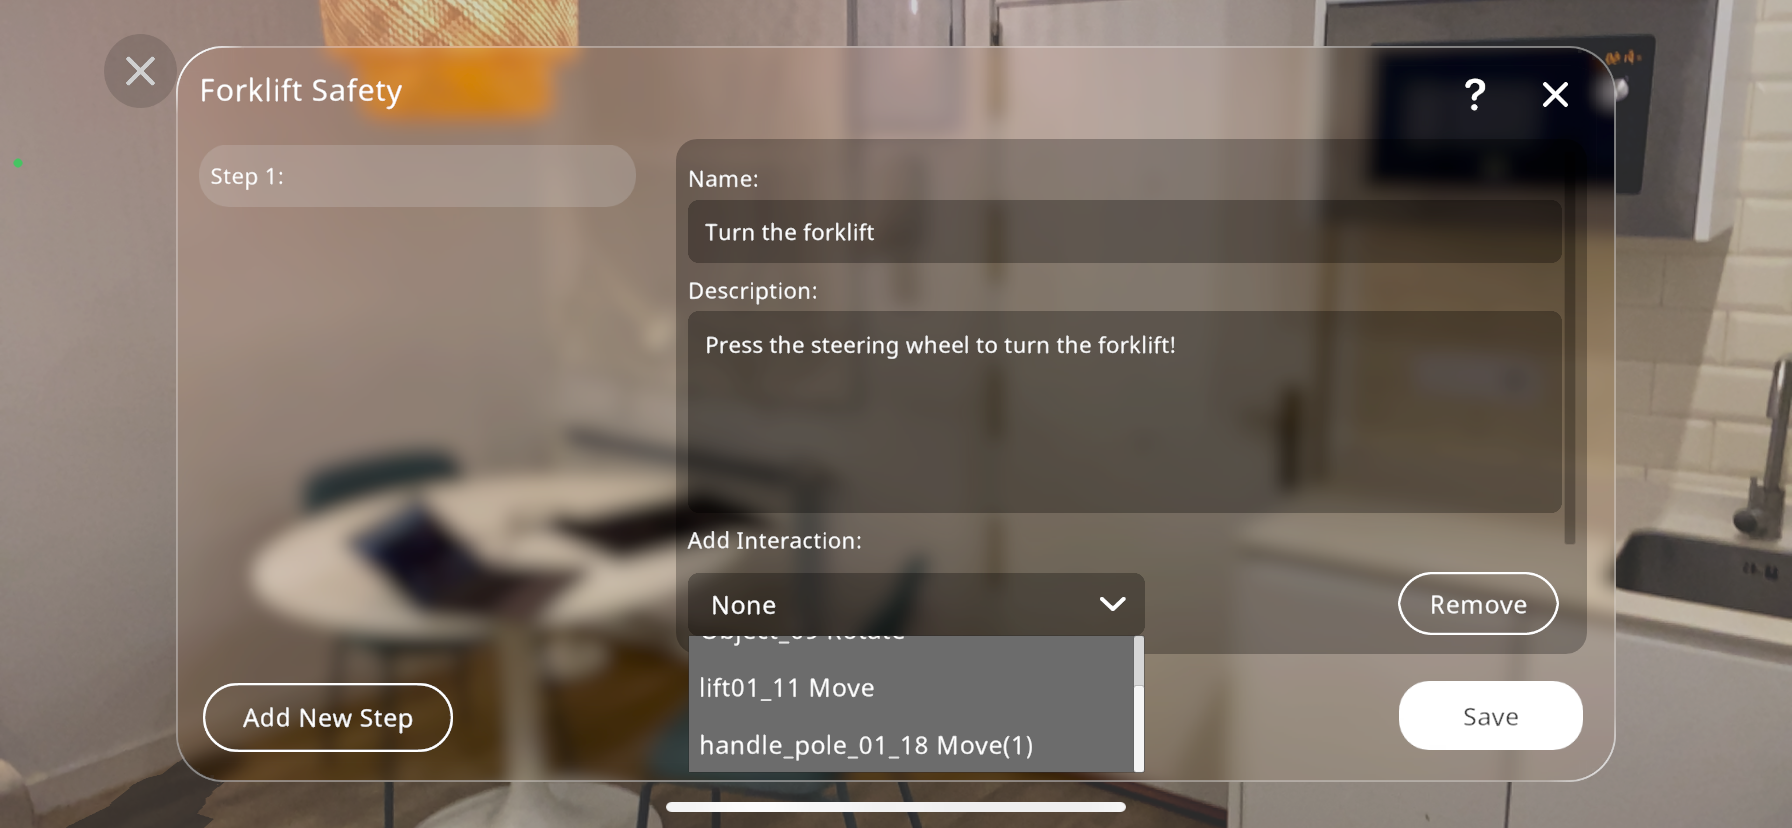
Next, press the “Add Interaction” dropdown menu, and select the interaction that you want to link to this step of the procedure.
You may press “Remove” if you are not satisfied with this step and would like to delete it. If you would only like to create one step for the procedure, press “Save” to exit the procedure menu. If you’d like to add more steps, press “Add New Step”.
If you want to add more steps, simply repeat the same process, adding a name, description and interaction linked to the step.
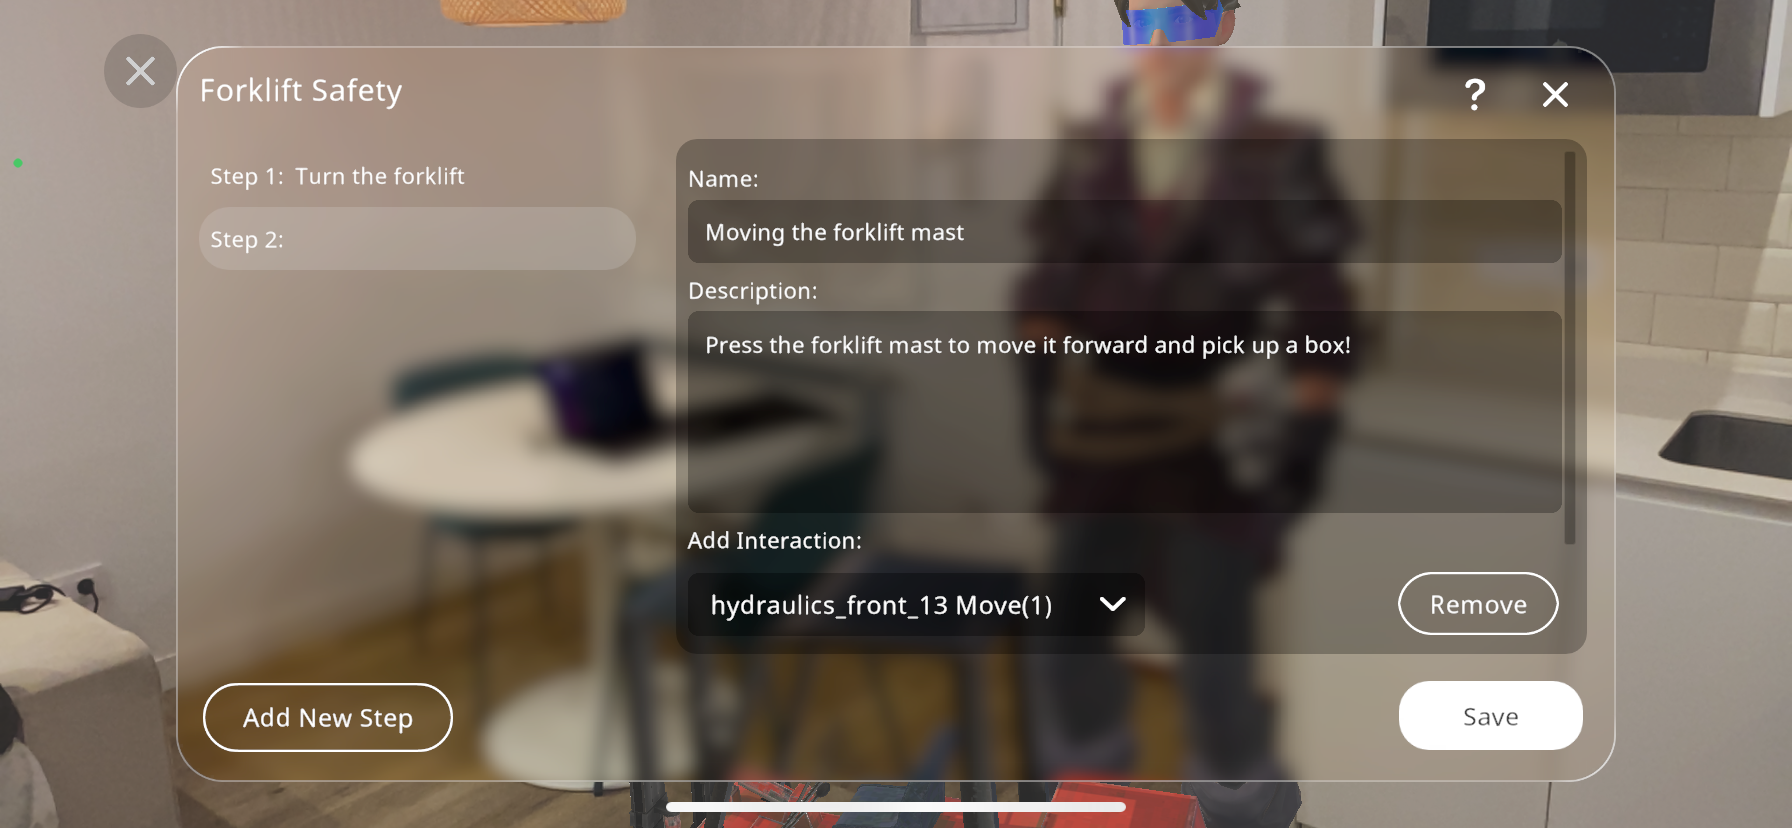
Press “Save” once you have added all the desired steps, and the procedure will be saved under the Assessments for the user to complete.
Procedure Play Mode:#
To view the procedures as the user would view them, press the button in the top left corner to enter “Play Mode”.
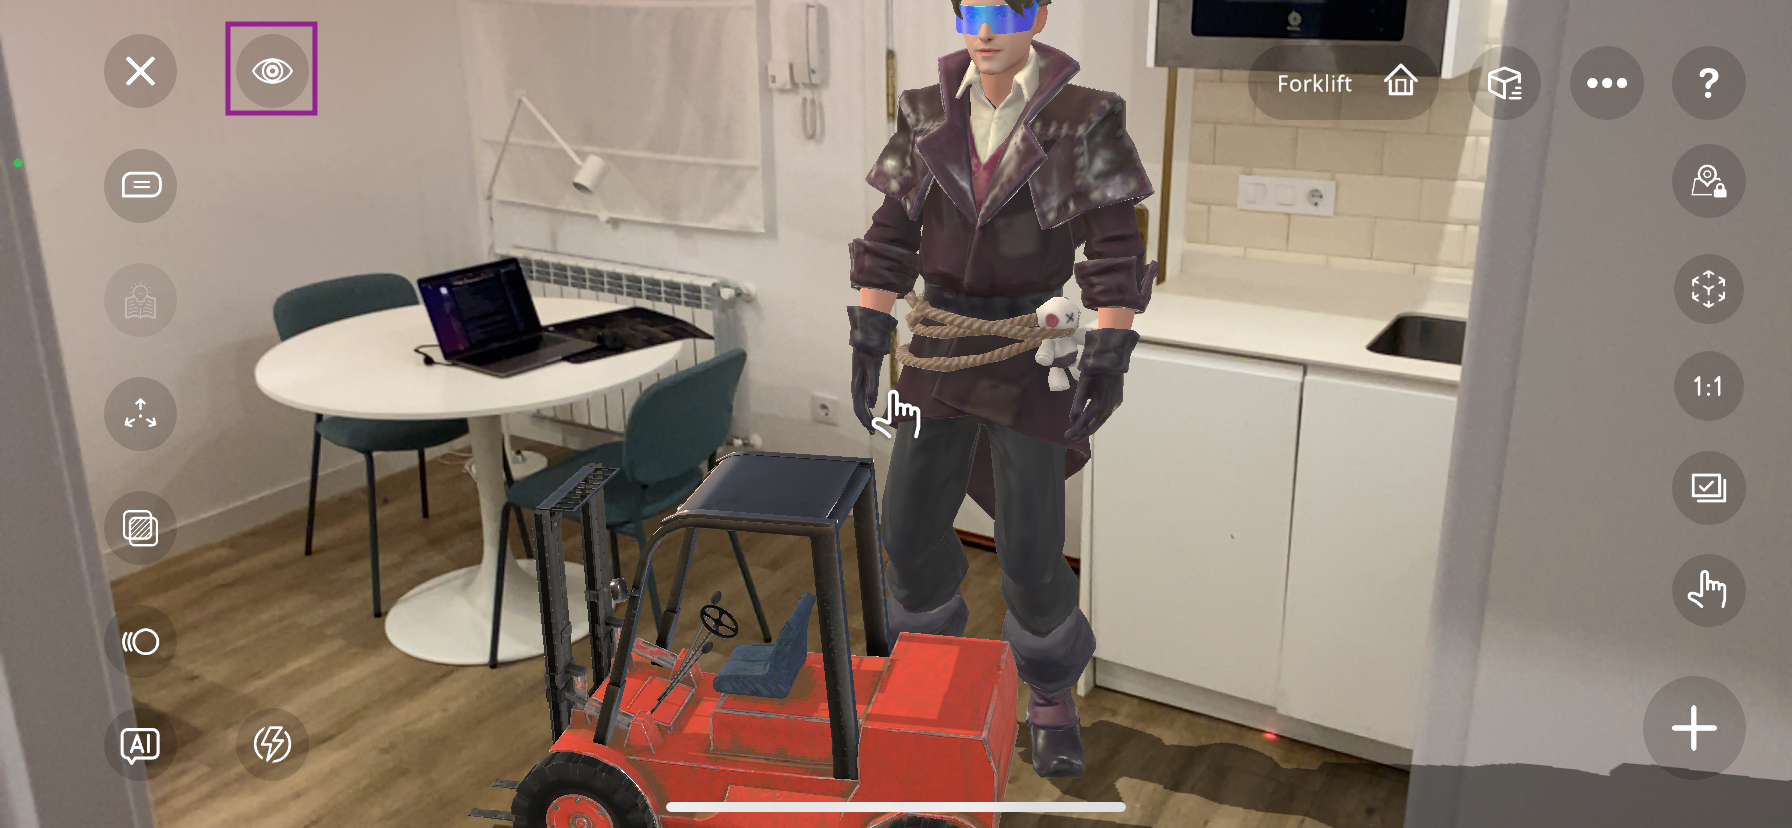

When in play mode, you can press the assessment button 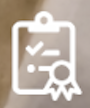 in the bottom right to open all available assessments. Here you should be able to see the newly created procedure, identifiable by the
  symbol and the name you initially made for the procedure when creating it.
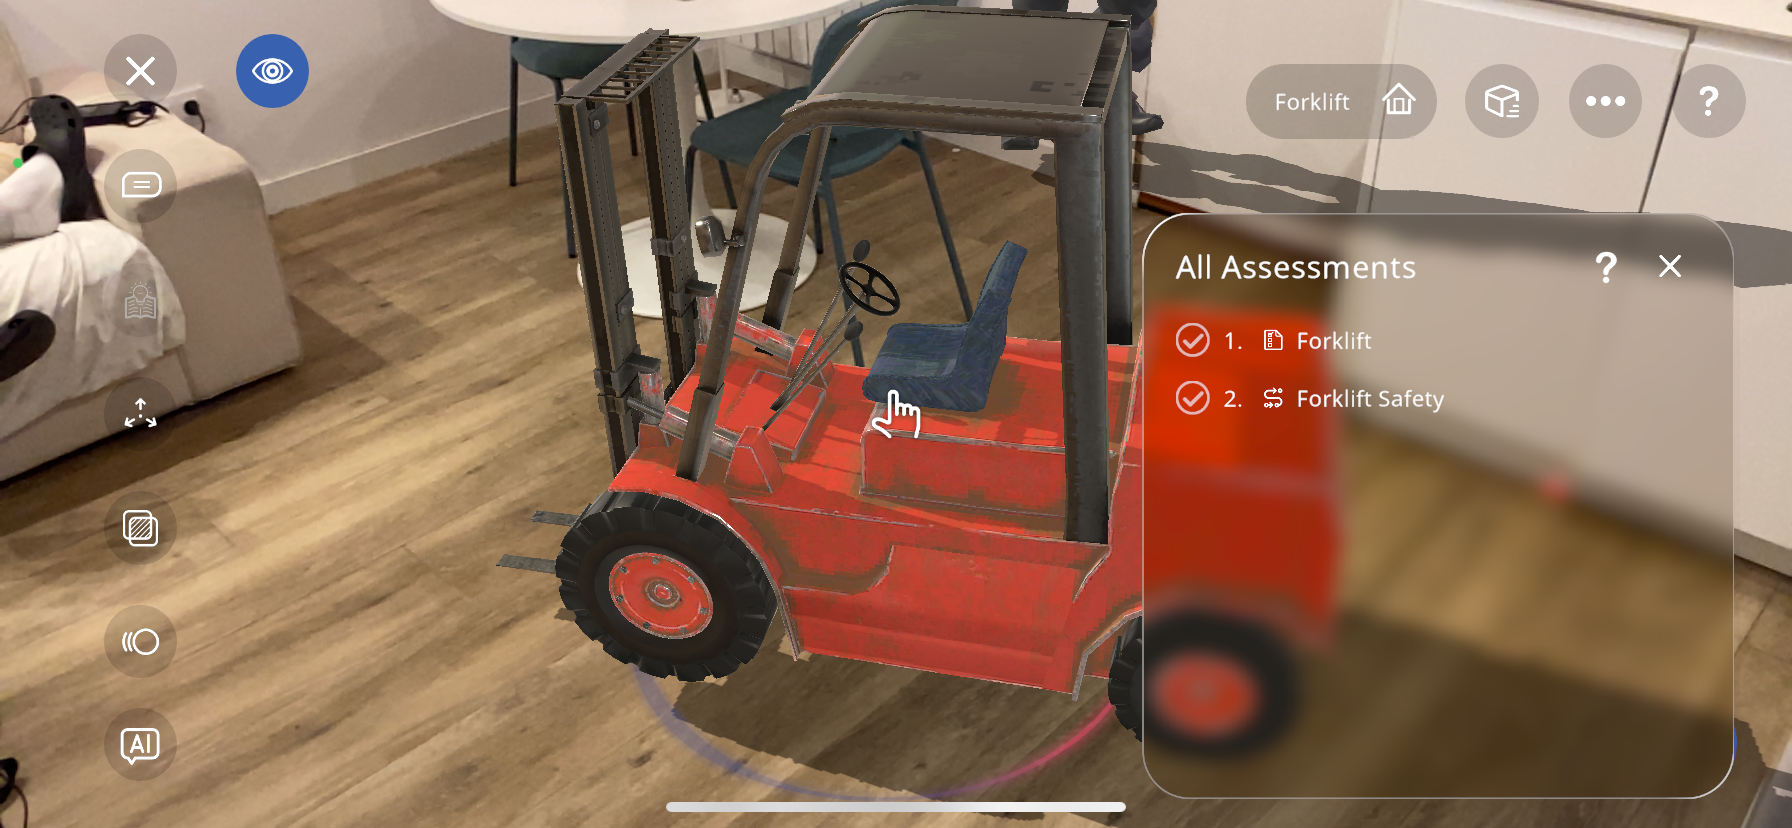
Press on the procedure to test it out.
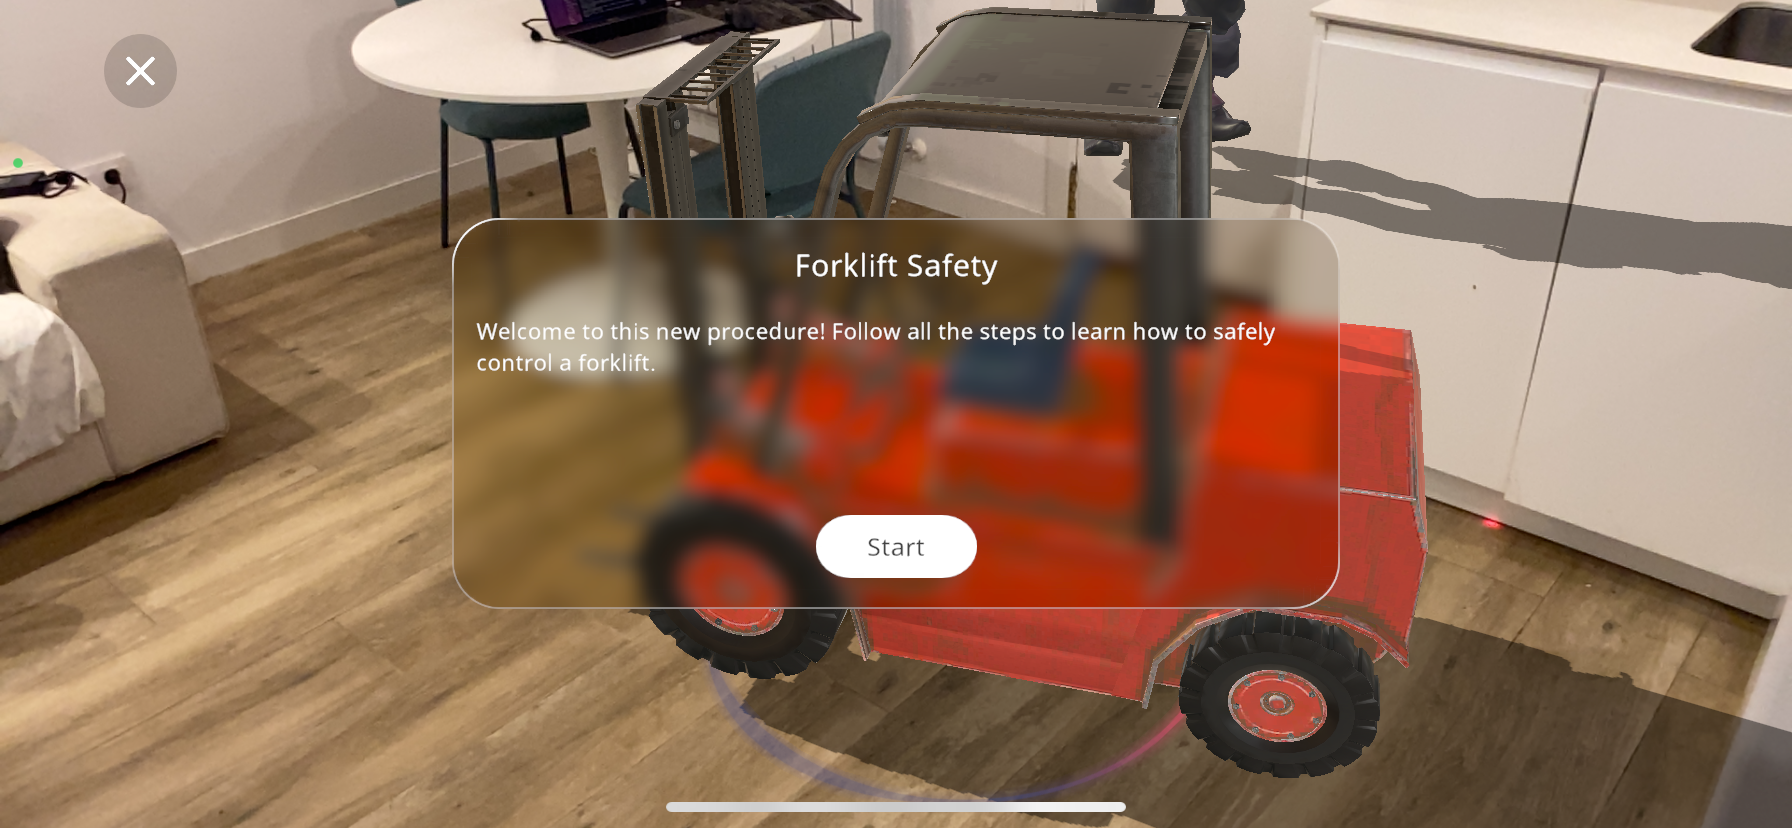
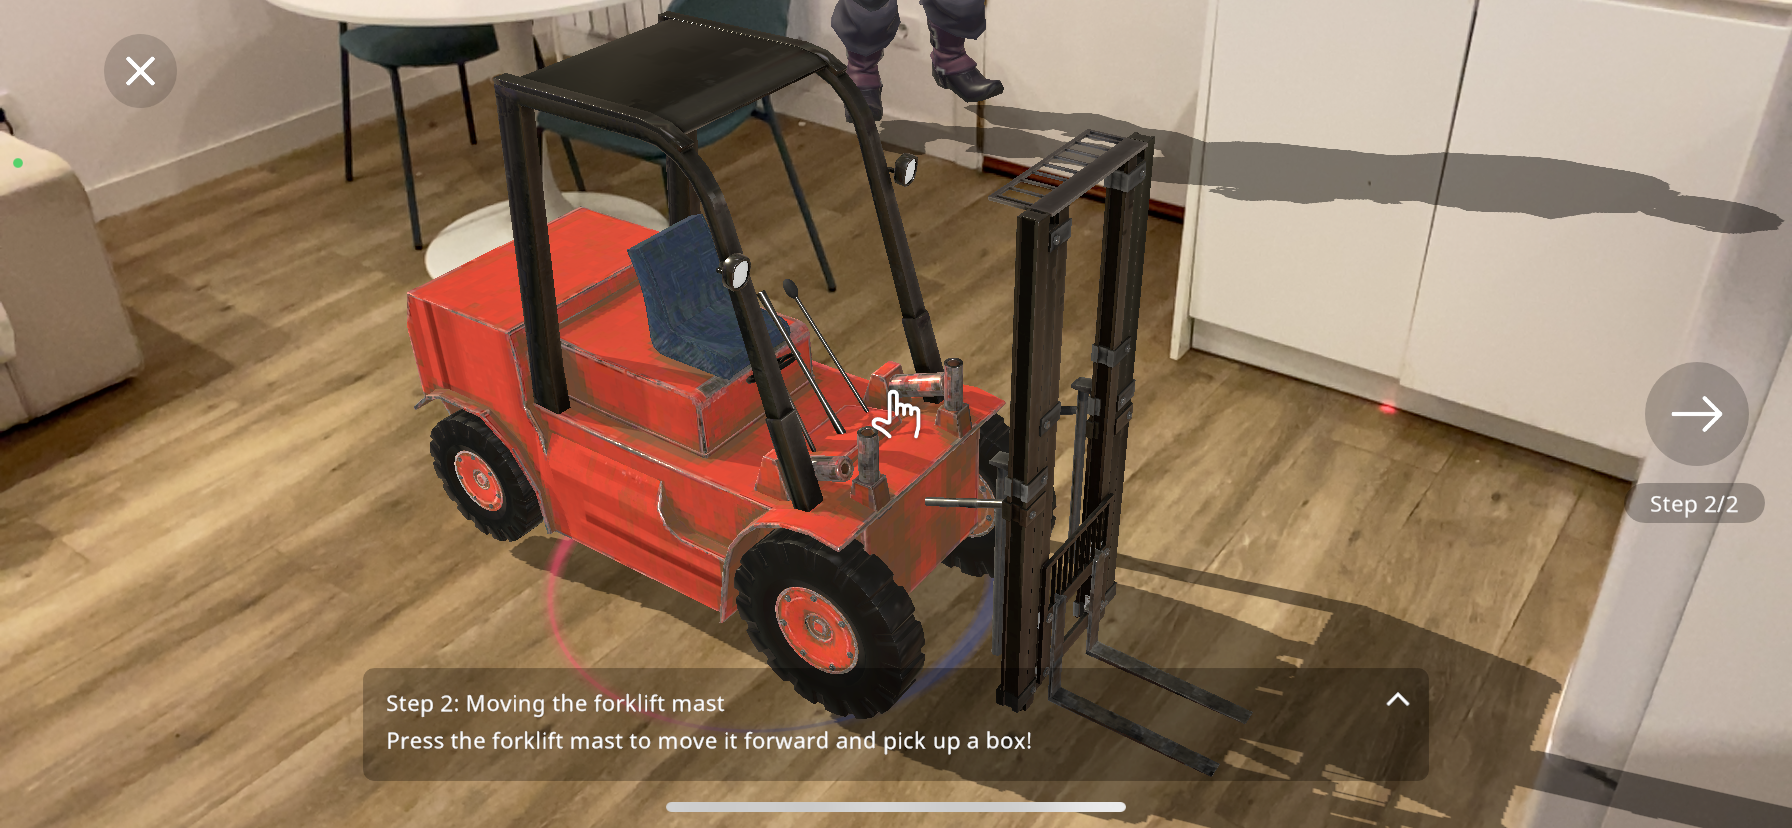
You will now see the name and description created earlier. Press start to begin the procedure. Now, the name of the step and the description will show up. Follow the instructions in the description to complete the step. Press the  button to expand/minimize the description.
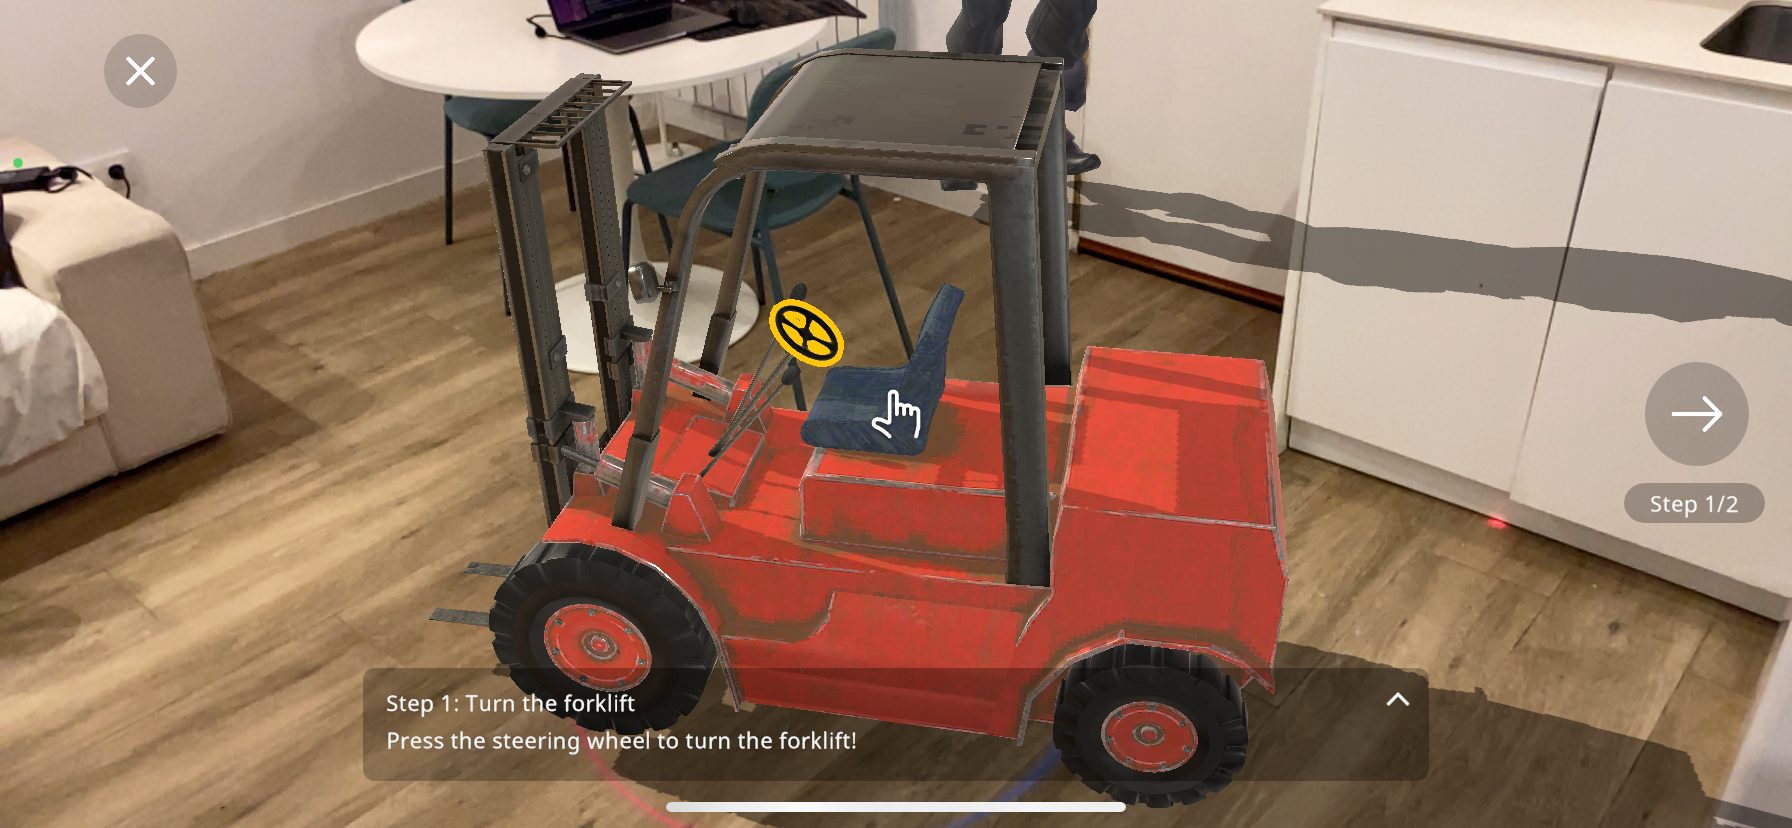
Once you activate the step trigger, the interaction will play and you will complete the step:

You can now press the arrow in the right of the screen to continue to the next step.
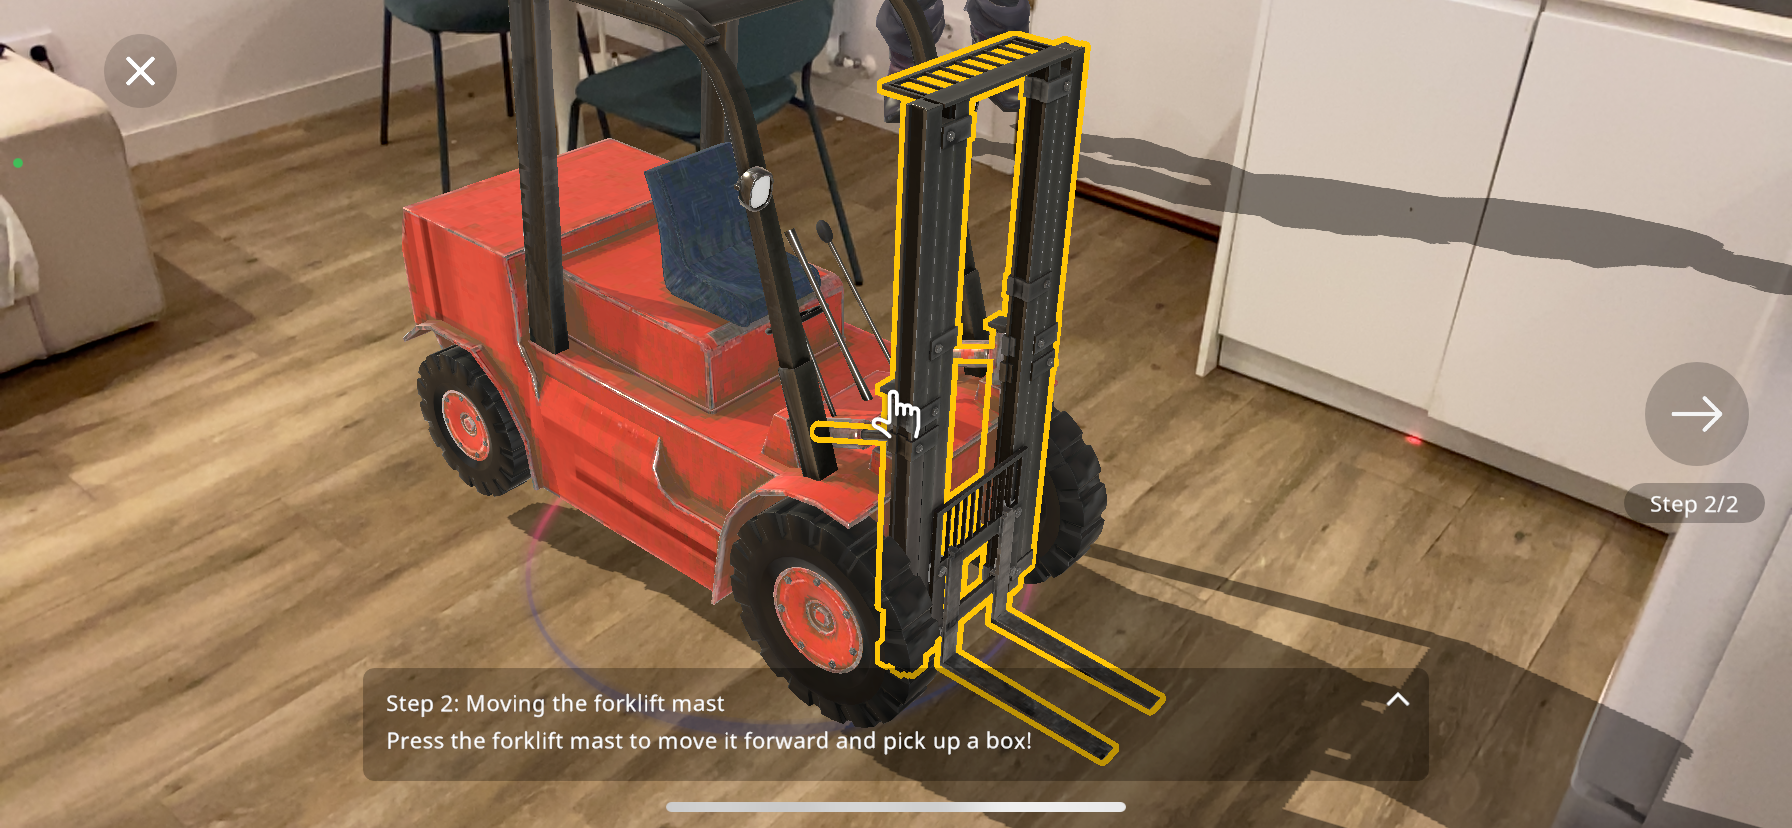
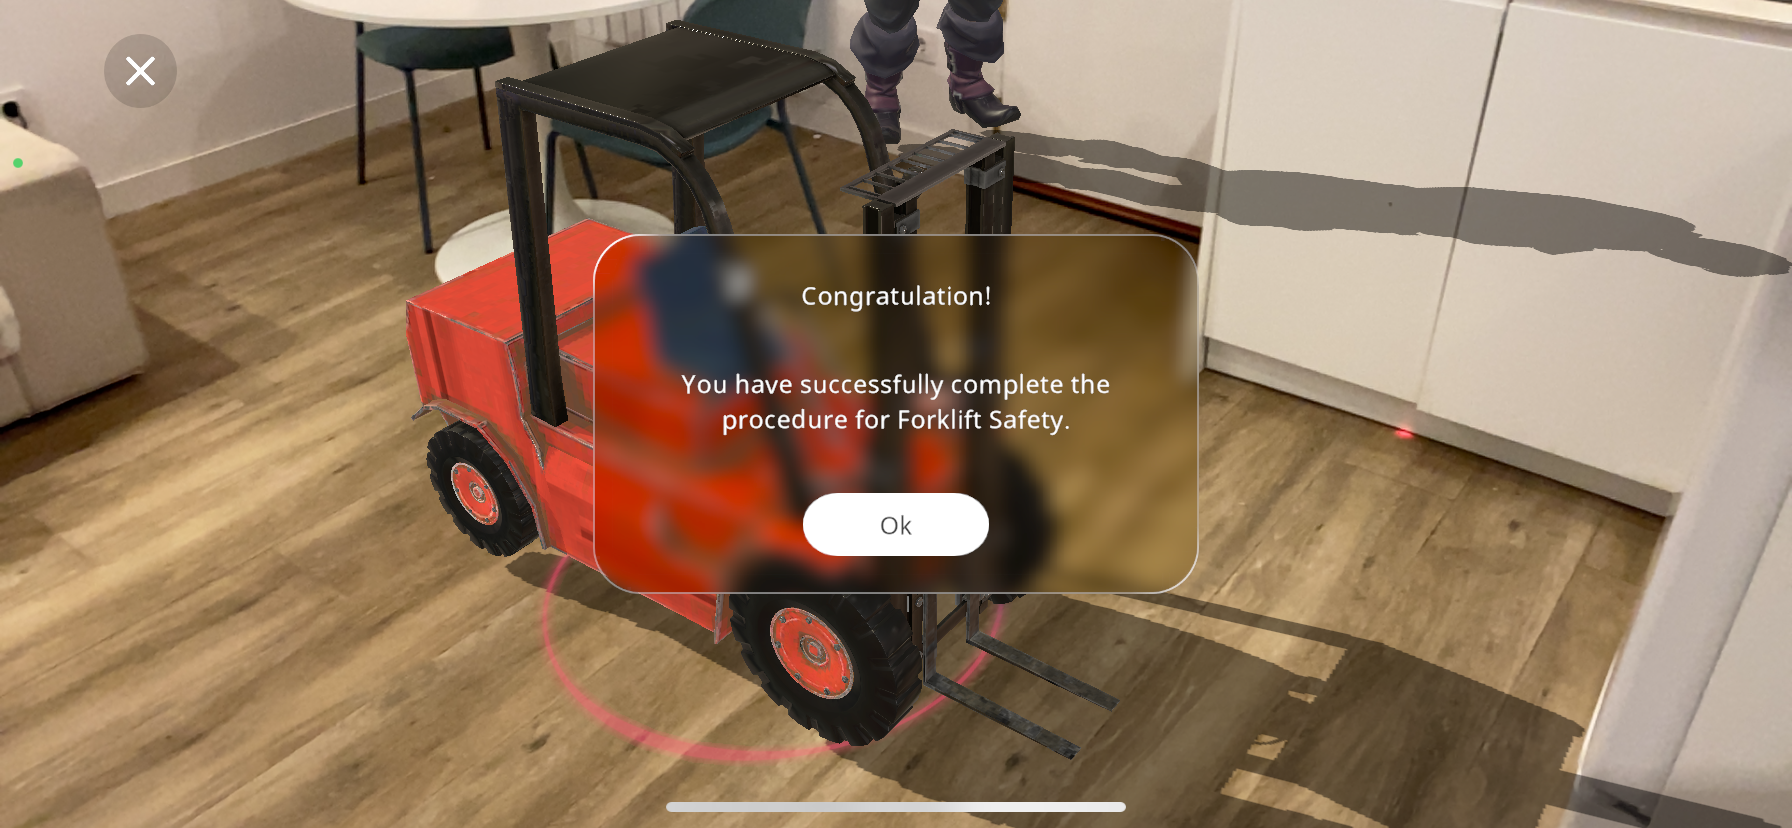
When you have done all the steps in the procedure, it will show the following screen, and the procedure assessment has been completed!
Persistent anchors#
Persistent anchors is a function used to create geolocated Xperiences. It is used to connect 3D objects to physical locations in the real world, by memorizing position and orientation of the objects. When exploring the geolocated Xperience in play mode, you can load the objects in the specified orientation at the memorized location.
Note
Creating persistent anchors requires GPS location on an AR compatible device.
Create persistent objects#
Select make persistent

Place the object at a location where it is easily reachable
Note
Adjusting the placement for an object does not relocate previously anchored objects.
Optionally, adjust the orientation of the object
Scan surrounding areas until the indicator turns green to capture the anchor
Hint
Move around the object slowly and make sure the scan indicator turns green.
Hint
If you are unable to complete the scan, place the object in another physical location and try again.

The persistent anchor for the object is created and uploaded to the cloud service
Take a photo of the persistent anchor location to help users find the correct location
Note
You can remove persistent anchors in the Experience menu.